With Christmas not that far in the future, I started thinking about our holiday decorations. Ironically, now that our children are grown and Ted and I are retired, it seems I no longer have time for craft projects. That’s a shame, because I enjoy doing a variety of crafts. It surprises me how many holiday decorations I’ve made over the years.
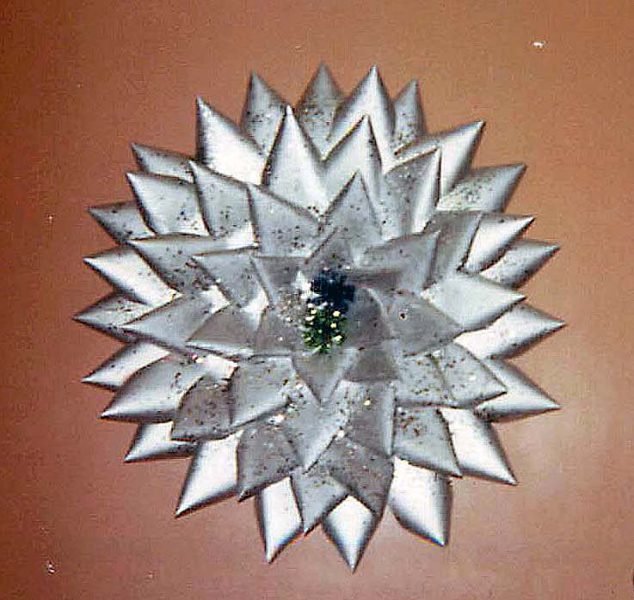
Before we had children, I worked for the U.S. Bureau of the Census. Tabulations for the first computerized decennial census were in progress, and computer punch cards were everywhere. My office mates and I (and lots of other people with access to used punch cards) made Christmas wreaths from them.
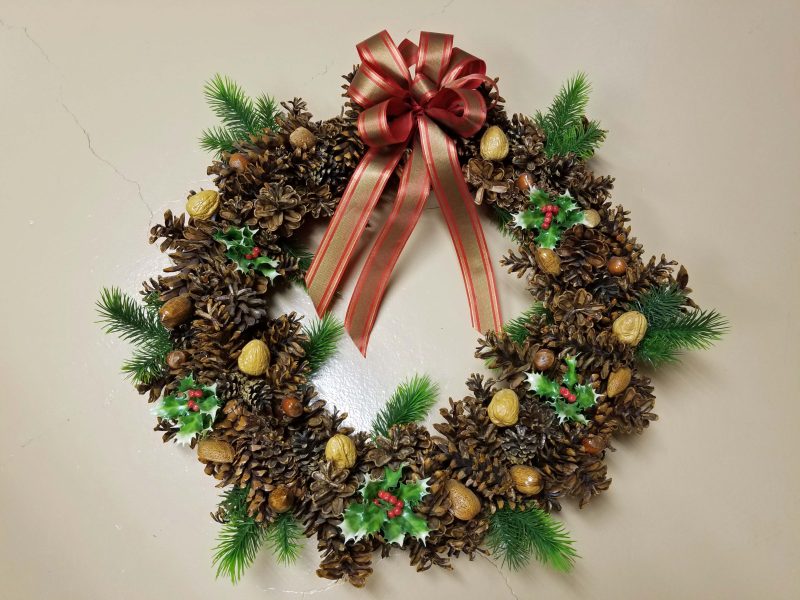
Years later, my friends and I became interested in pinecone Christmas wreaths. FYI, cemeteries are great places to find free pinecones. They plant a lot of evergreen trees in cemeteries! I made two wreaths for our home and eight more as Christmas gifts.
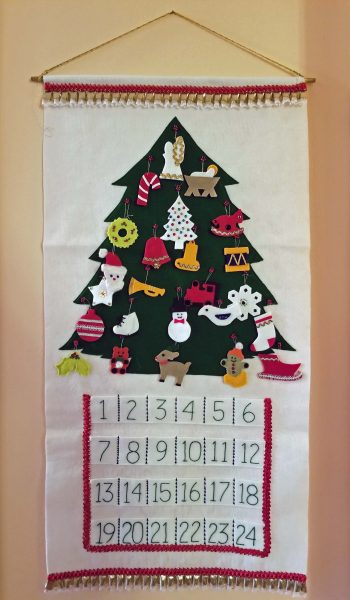
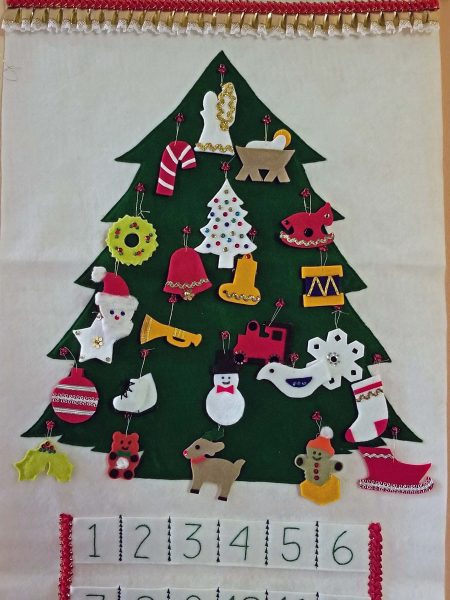
When our kids were little, I knew they would enjoy an Advent calendar, so I made a calendar and the required 24 ornaments. When she had children of her own, Kari and I made Advent calendars together so she could hang one in her house as well.
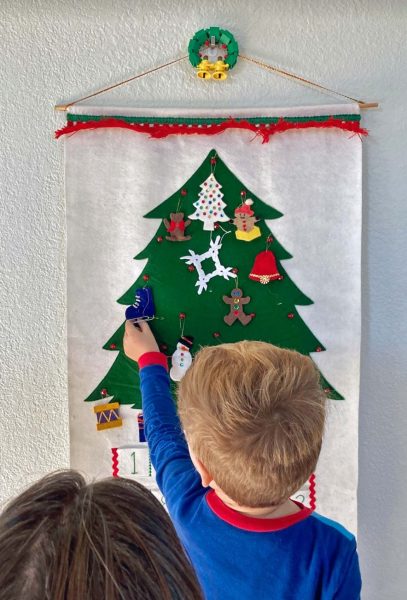
I gave one of the calendars to Thom. Some of the ornaments showed wear, so Katie made replacement ornaments for their children to hang. The tradition continues!
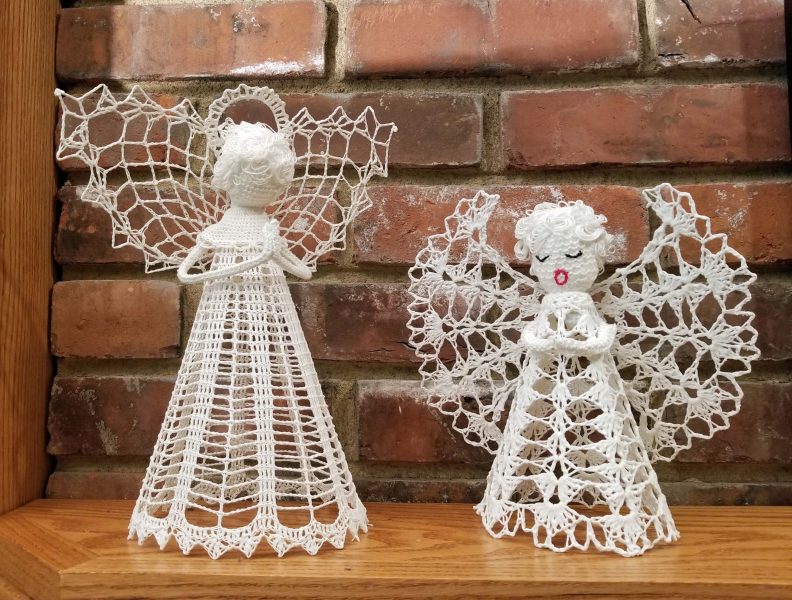
My mother taught me to knit and crochet. I enjoy knitting, but crochet? Not so much. Still, when I see a pattern I really want to make, I’ll crochet. One year, I crocheted Christmas angels.
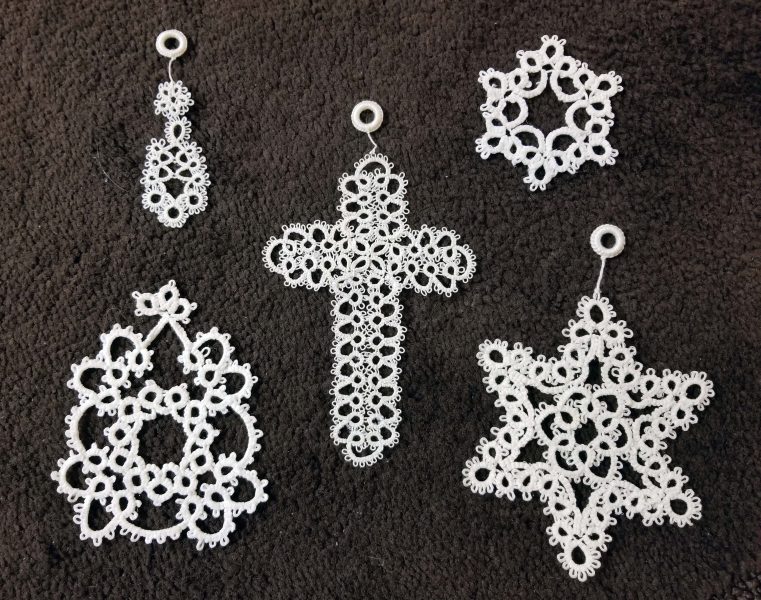
I admired the tatted Christmas ornaments that Ted’s mother made, so she taught me to tat. I’ve made countless tatted ornaments for myself and to give to others as gifts.
One year, I saw a ceramic Nativity set I liked, and I decided that I should make one. I’d never worked with ceramics before, and most people seem to start by making a mug or an ashtray. I didn’t want either one, so I reasoned that making a 15-piece Nativity set wasn’t any different than making a mug or an ashtray–I just had to do the same things to more pieces. I made a Nativity set for Ted and myself and two more to give to our parents as Christmas gifts that year.
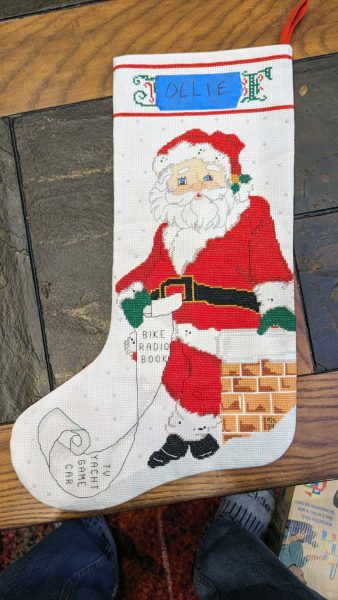
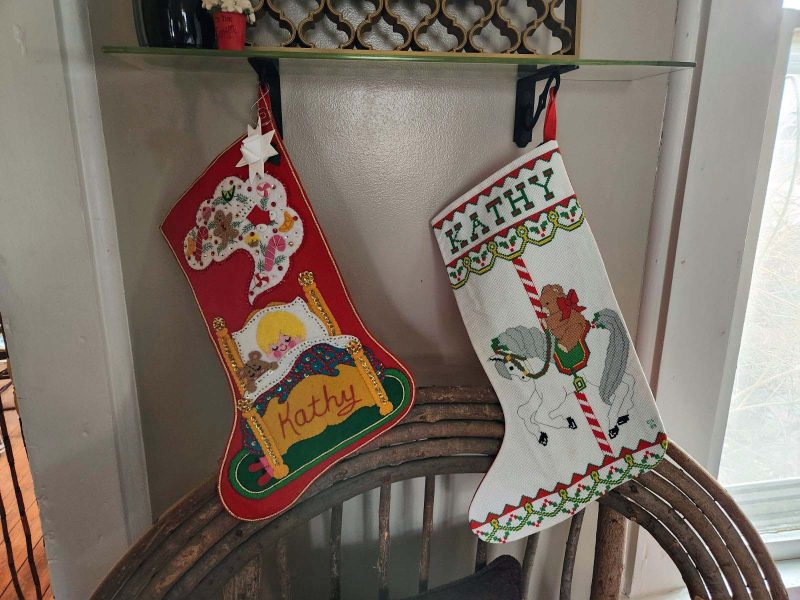
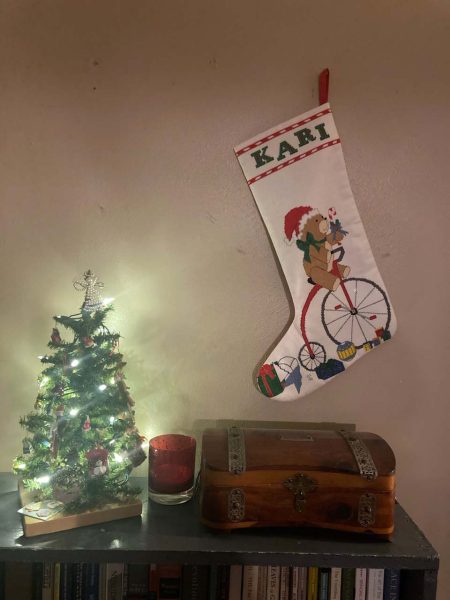
Another year, I made felt appliqúed stockings for our (at the time) three children. After Kari was born, I thought she should have a matching stocking, but there was no way to match the older felt stockings, so I made counted cross-stitch stockings for all four kids. Surprising and gratifying to me, they still hang them. I can’t speak for Thom’s stockings because I don’t have a recent picture of his Christmas decorations.
Jeff lent his counted cross-stitch stocking to his grandson, Ollie. Does that make it a “heritage” stocking from Ollie’s great-grandma (me)?
Kathy hangs both stockings–the felt appliqúed one and the counted cross-stitched one.
Kari hangs hers near a table-sized Christmas tree.
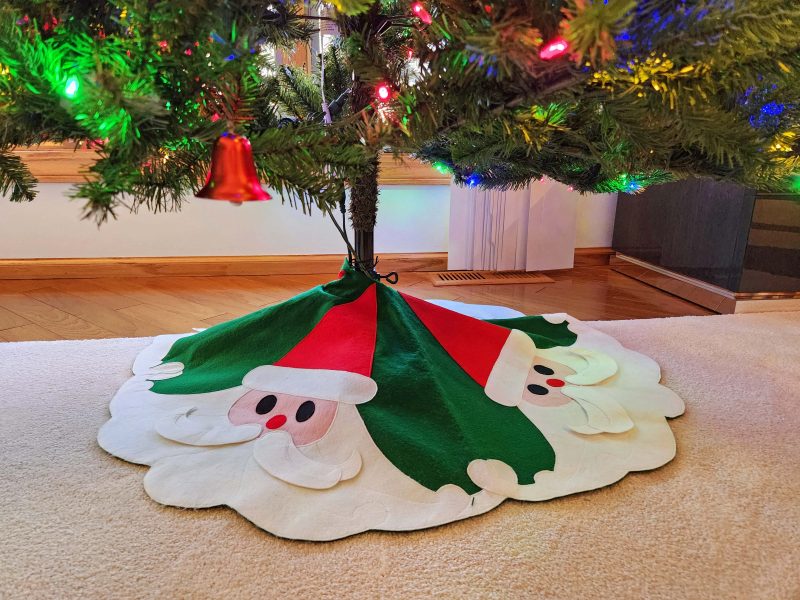
I made this tree skirt a long time ago–probably when I made the felt-appliqúed stockings for the kids.
Just thinking about these projects makes me want to make something new, but now that the children are grown and I’m retired, I don’t seem to have the time. How can that be??!! I think I should set a 2025 goal to make some new craft projects.
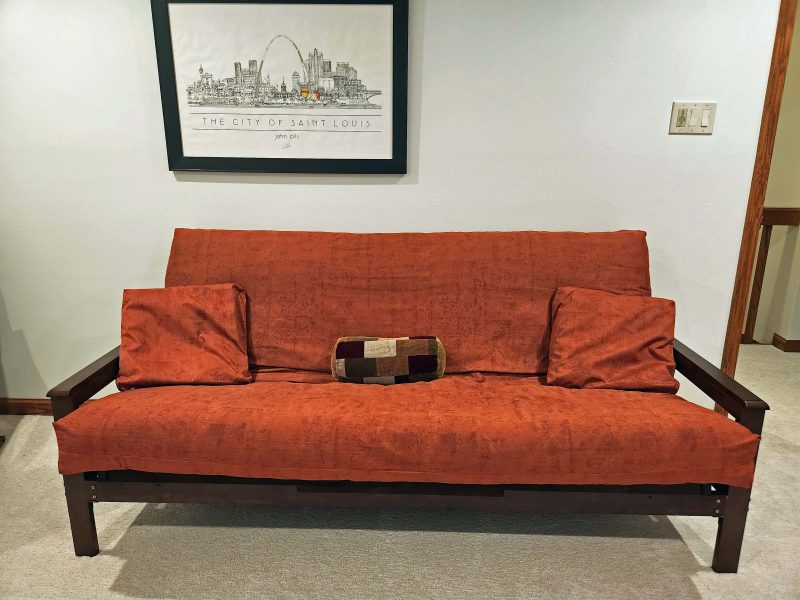
During our interior update, Ted and I replaced our old futon and wanted a new mattress cover for it too. We found one in an acceptable color for only $20 at a going-out-of-business futon store. Oops! When we unpacked it to put in on the mattress, I discovered that the zipper was hopelessly broken. There were no other identical covers at the store, and I didn’t see any other colors or patterns I wanted online, so I decided to replace the zipper.
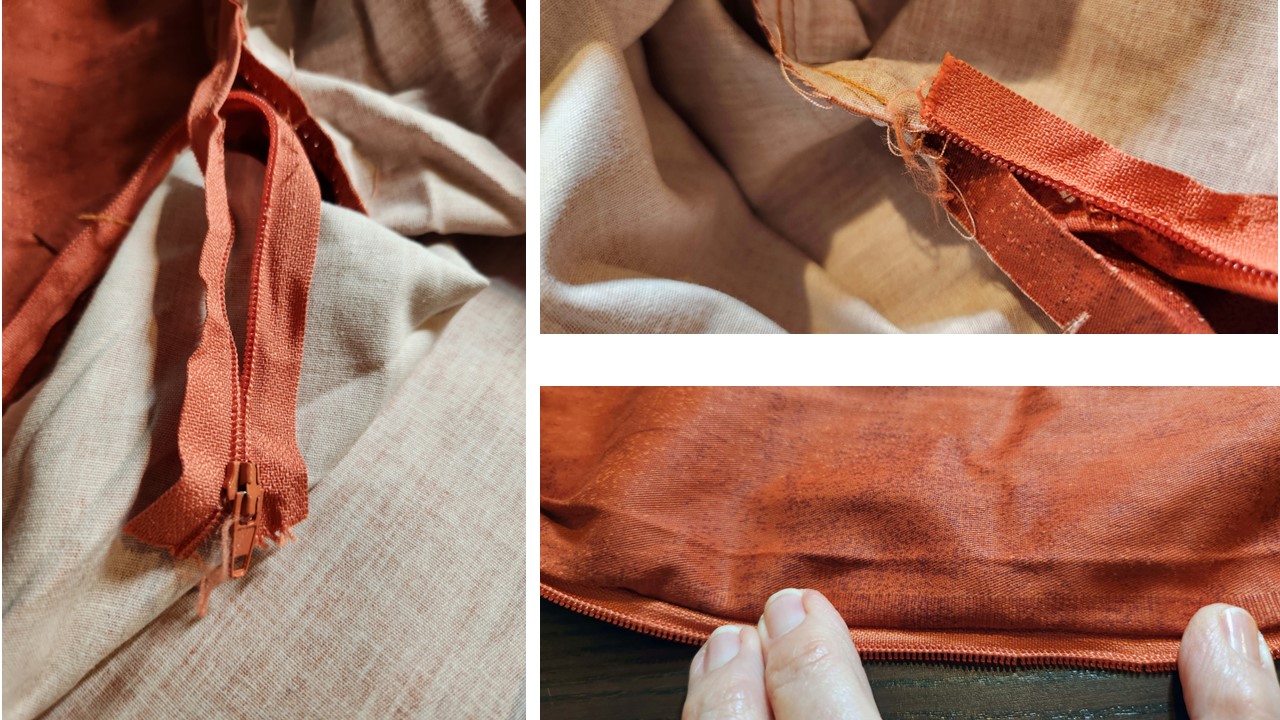
Nylon zippers can be “repaired” by simply sliding the zipper pull downward on the zipper. Problem #1: In this case, the zipper teeth were so far out of alignment that the zipper pull wouldn’t move. Problem #2: All along the length of the zipper, the nylon coils were so badly bent that the zipper could not possibly move smoothly in either direction. Problem #3: The bottom end of the zipper was completely separated, making it impossible to ever match the teeth again.
This is what might have happened to cause such extreme zipper damage. (1) In the factory folding/packaging process, the zipper was sharply folded in a variety of places. (2) Someone bought the mattress cover and unzipped it to put in on their futon mattress. Because of all the sharp bends in the zipper teeth, the movement of the zipper head caused the teeth to separate. (3) The buyer returned the mattress cover to the store without mentioning the damage. (4) The store re-sold the mattress cover–to us. Luckily, and thanks to my mother, I’m an expert seamstress.
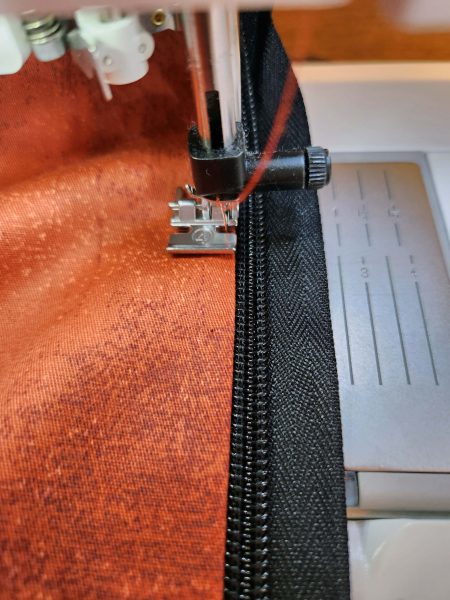
I bought some black zipper-by-the-yard (color choices were white, brown, and black), ripped out the damaged zipper, and replaced it with my new zipper yardage. I don’t think I’ve used the zipper foot on my sewing machine since I bought it. All zipper feet are based on the same design principle, but this one is awesome. It’s the best zipper foot I’ve ever used! It sits very comfortably on the fabric and effortlessly guides itself along the zipper teeth. I wish I had another zipper-style project to sew because it would be fun to use the zipper foot again.
It didn’t take long to finish putting in the zipper. Then it was time to put the mattress cover on the mattress. Voilà! We now have a new futon with a new mattress cover.
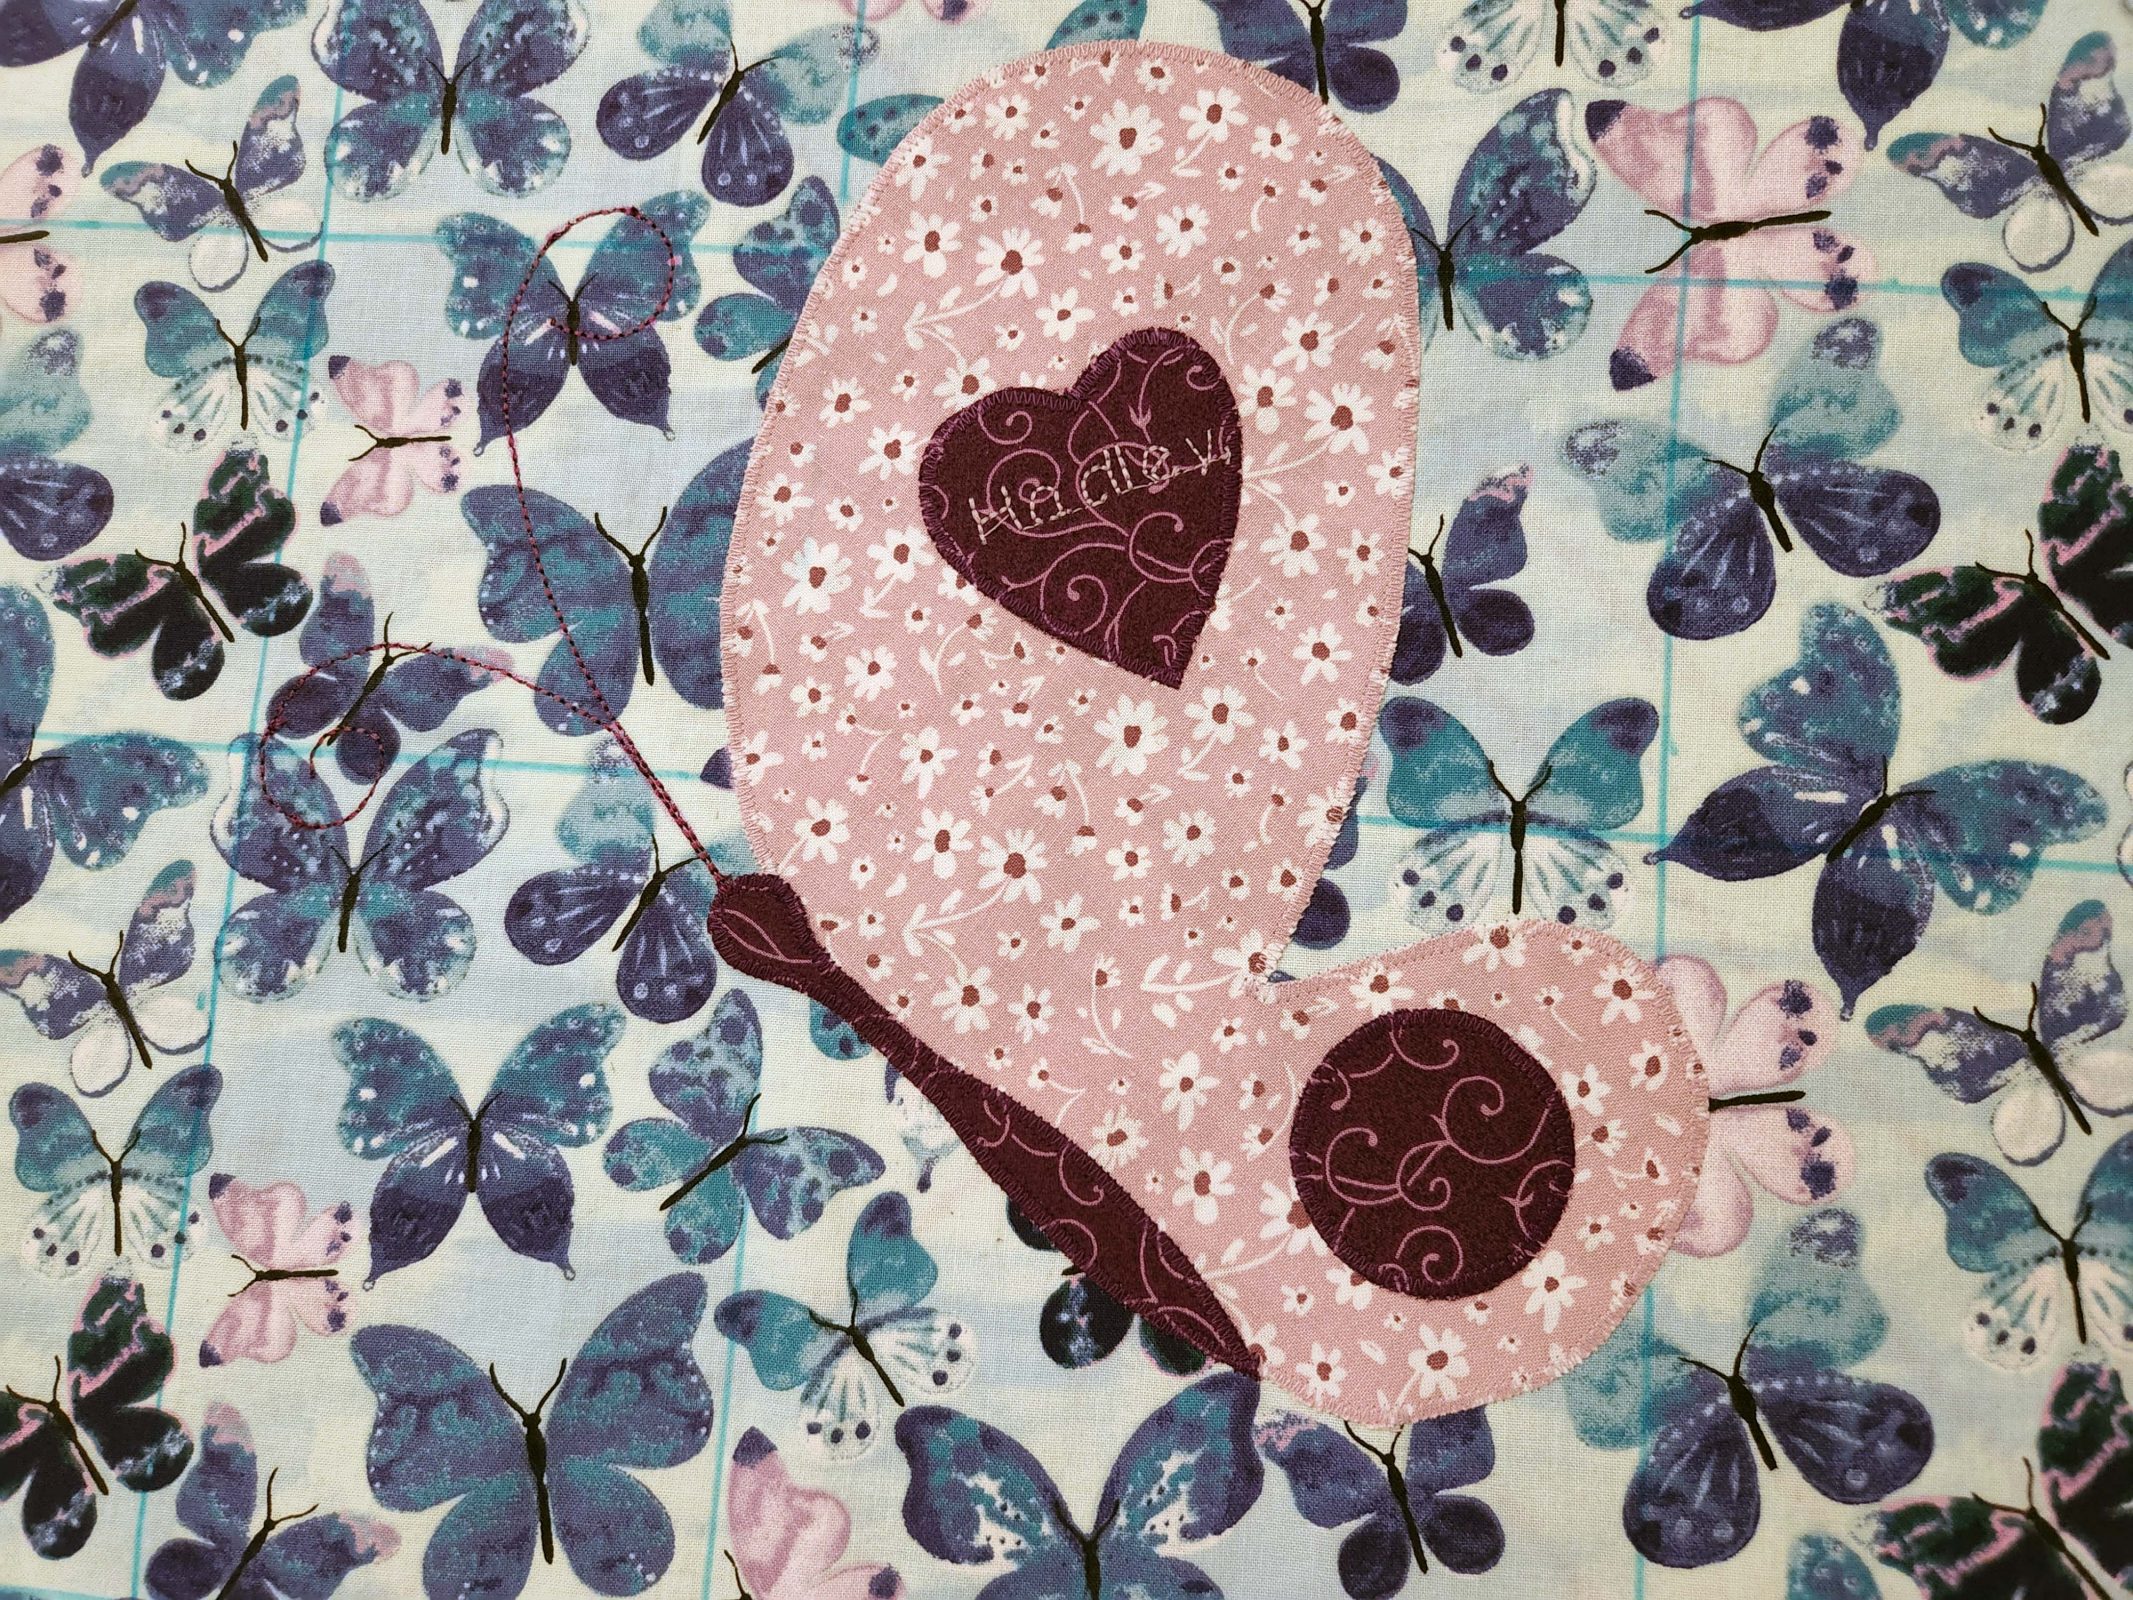
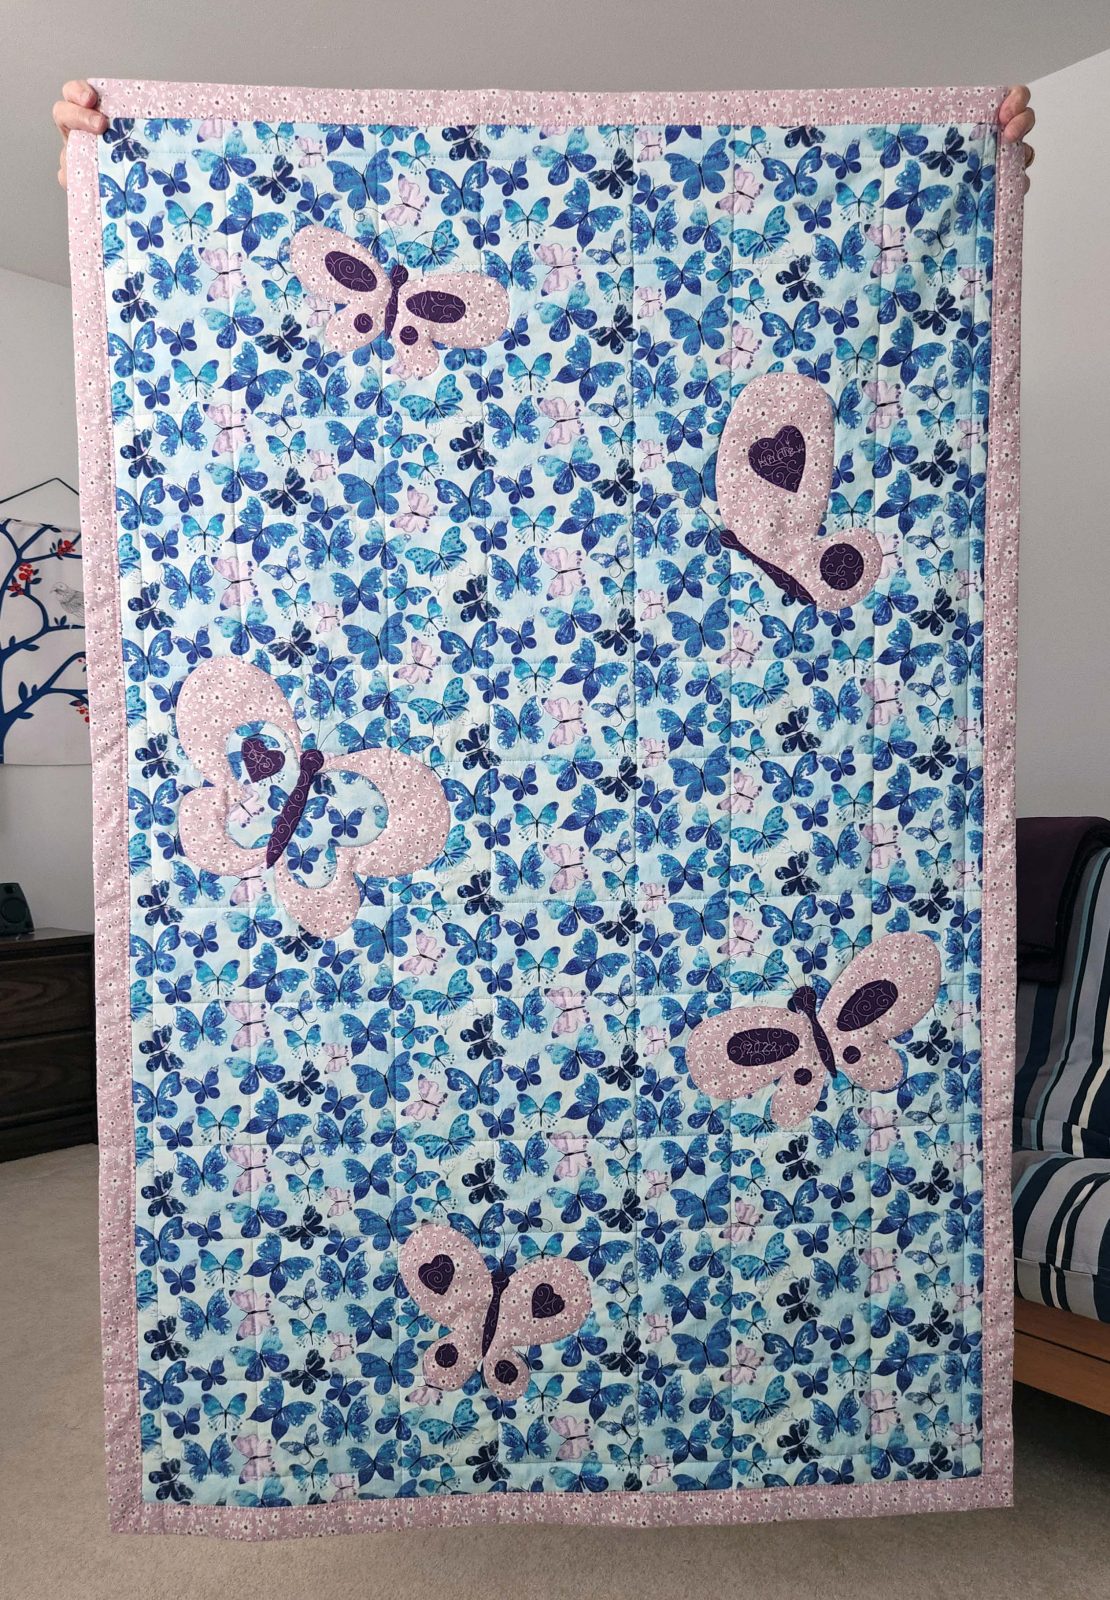
I liked the puppy quilt I made for Ollie’s first birthday, so I decided to continue the fun by making a quilt for Hadley’s first birthday too. I searched “baby quilts” and “crib blankets” online, hoping to find an inspiration for “girlie” colors and themes. Eh! There were no “aha!” moments online. Hoping fabric choices would point me toward a design, I went fabric shopping and–unbelievably!–found nothing I liked in fabrics. I saw a lot of fabric, but inspiration continued to elude me, so I went home to mull things over. After a few weeks, I thought the fabric store might have some new fabrics. They did, and I settled on a butterfly print and a complementary fabric for the backing. I felt like my fabric choices were satisfactory, but not thrilling. I liked the puppy fabric and the puppy paw print appliqué idea for Ollie immediately. It wasn’t that way with my Hadley project, but the longer I worked on it, and the more finished it became, the more I liked it.
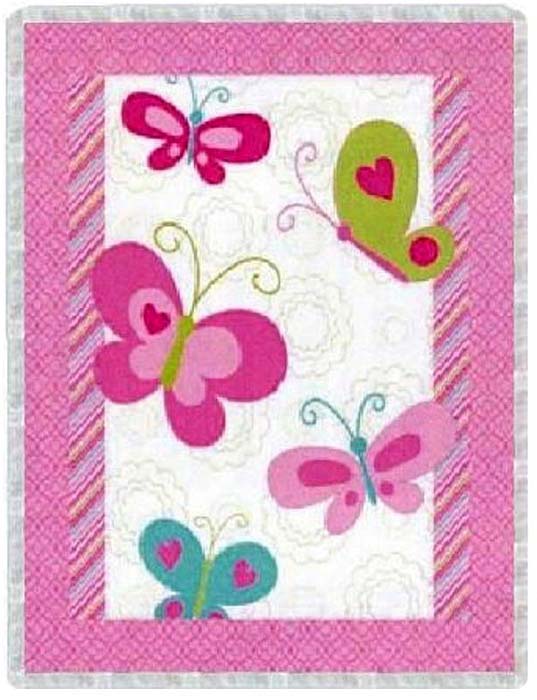
My next online search was for butterflies to go with my fabric choice. This was my online inspiration. It’s garish, but I liked the idea of butterflies fluttering over the entire surface of the quilt.
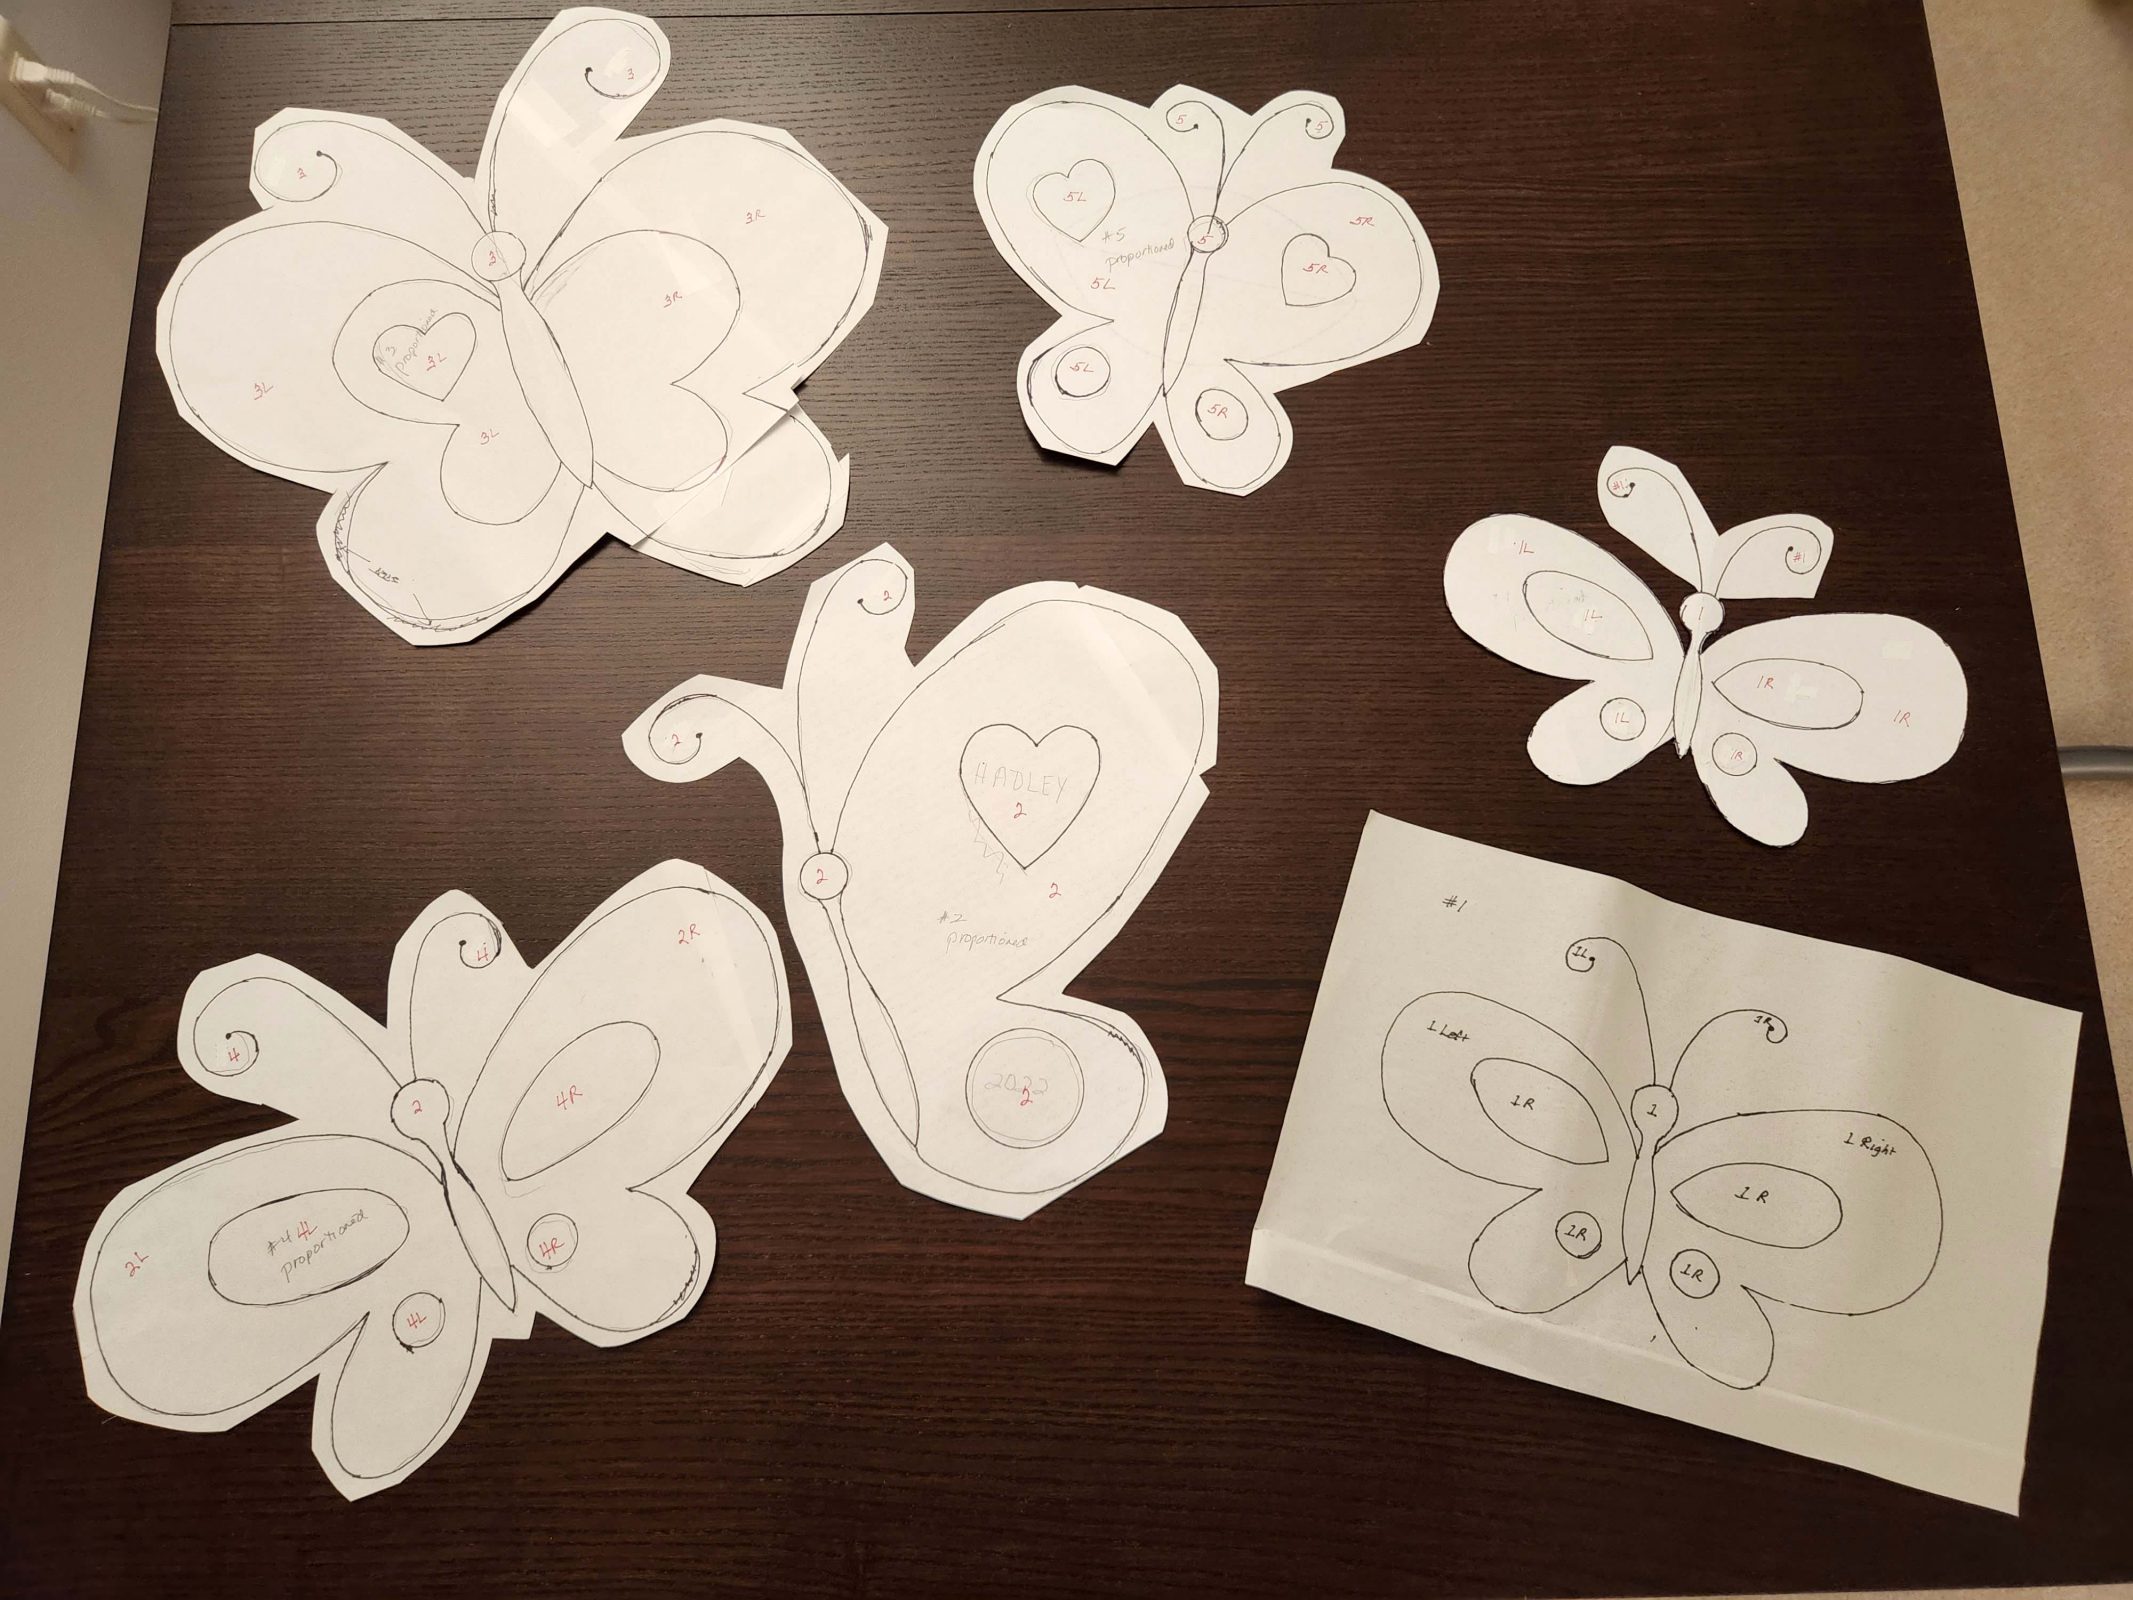
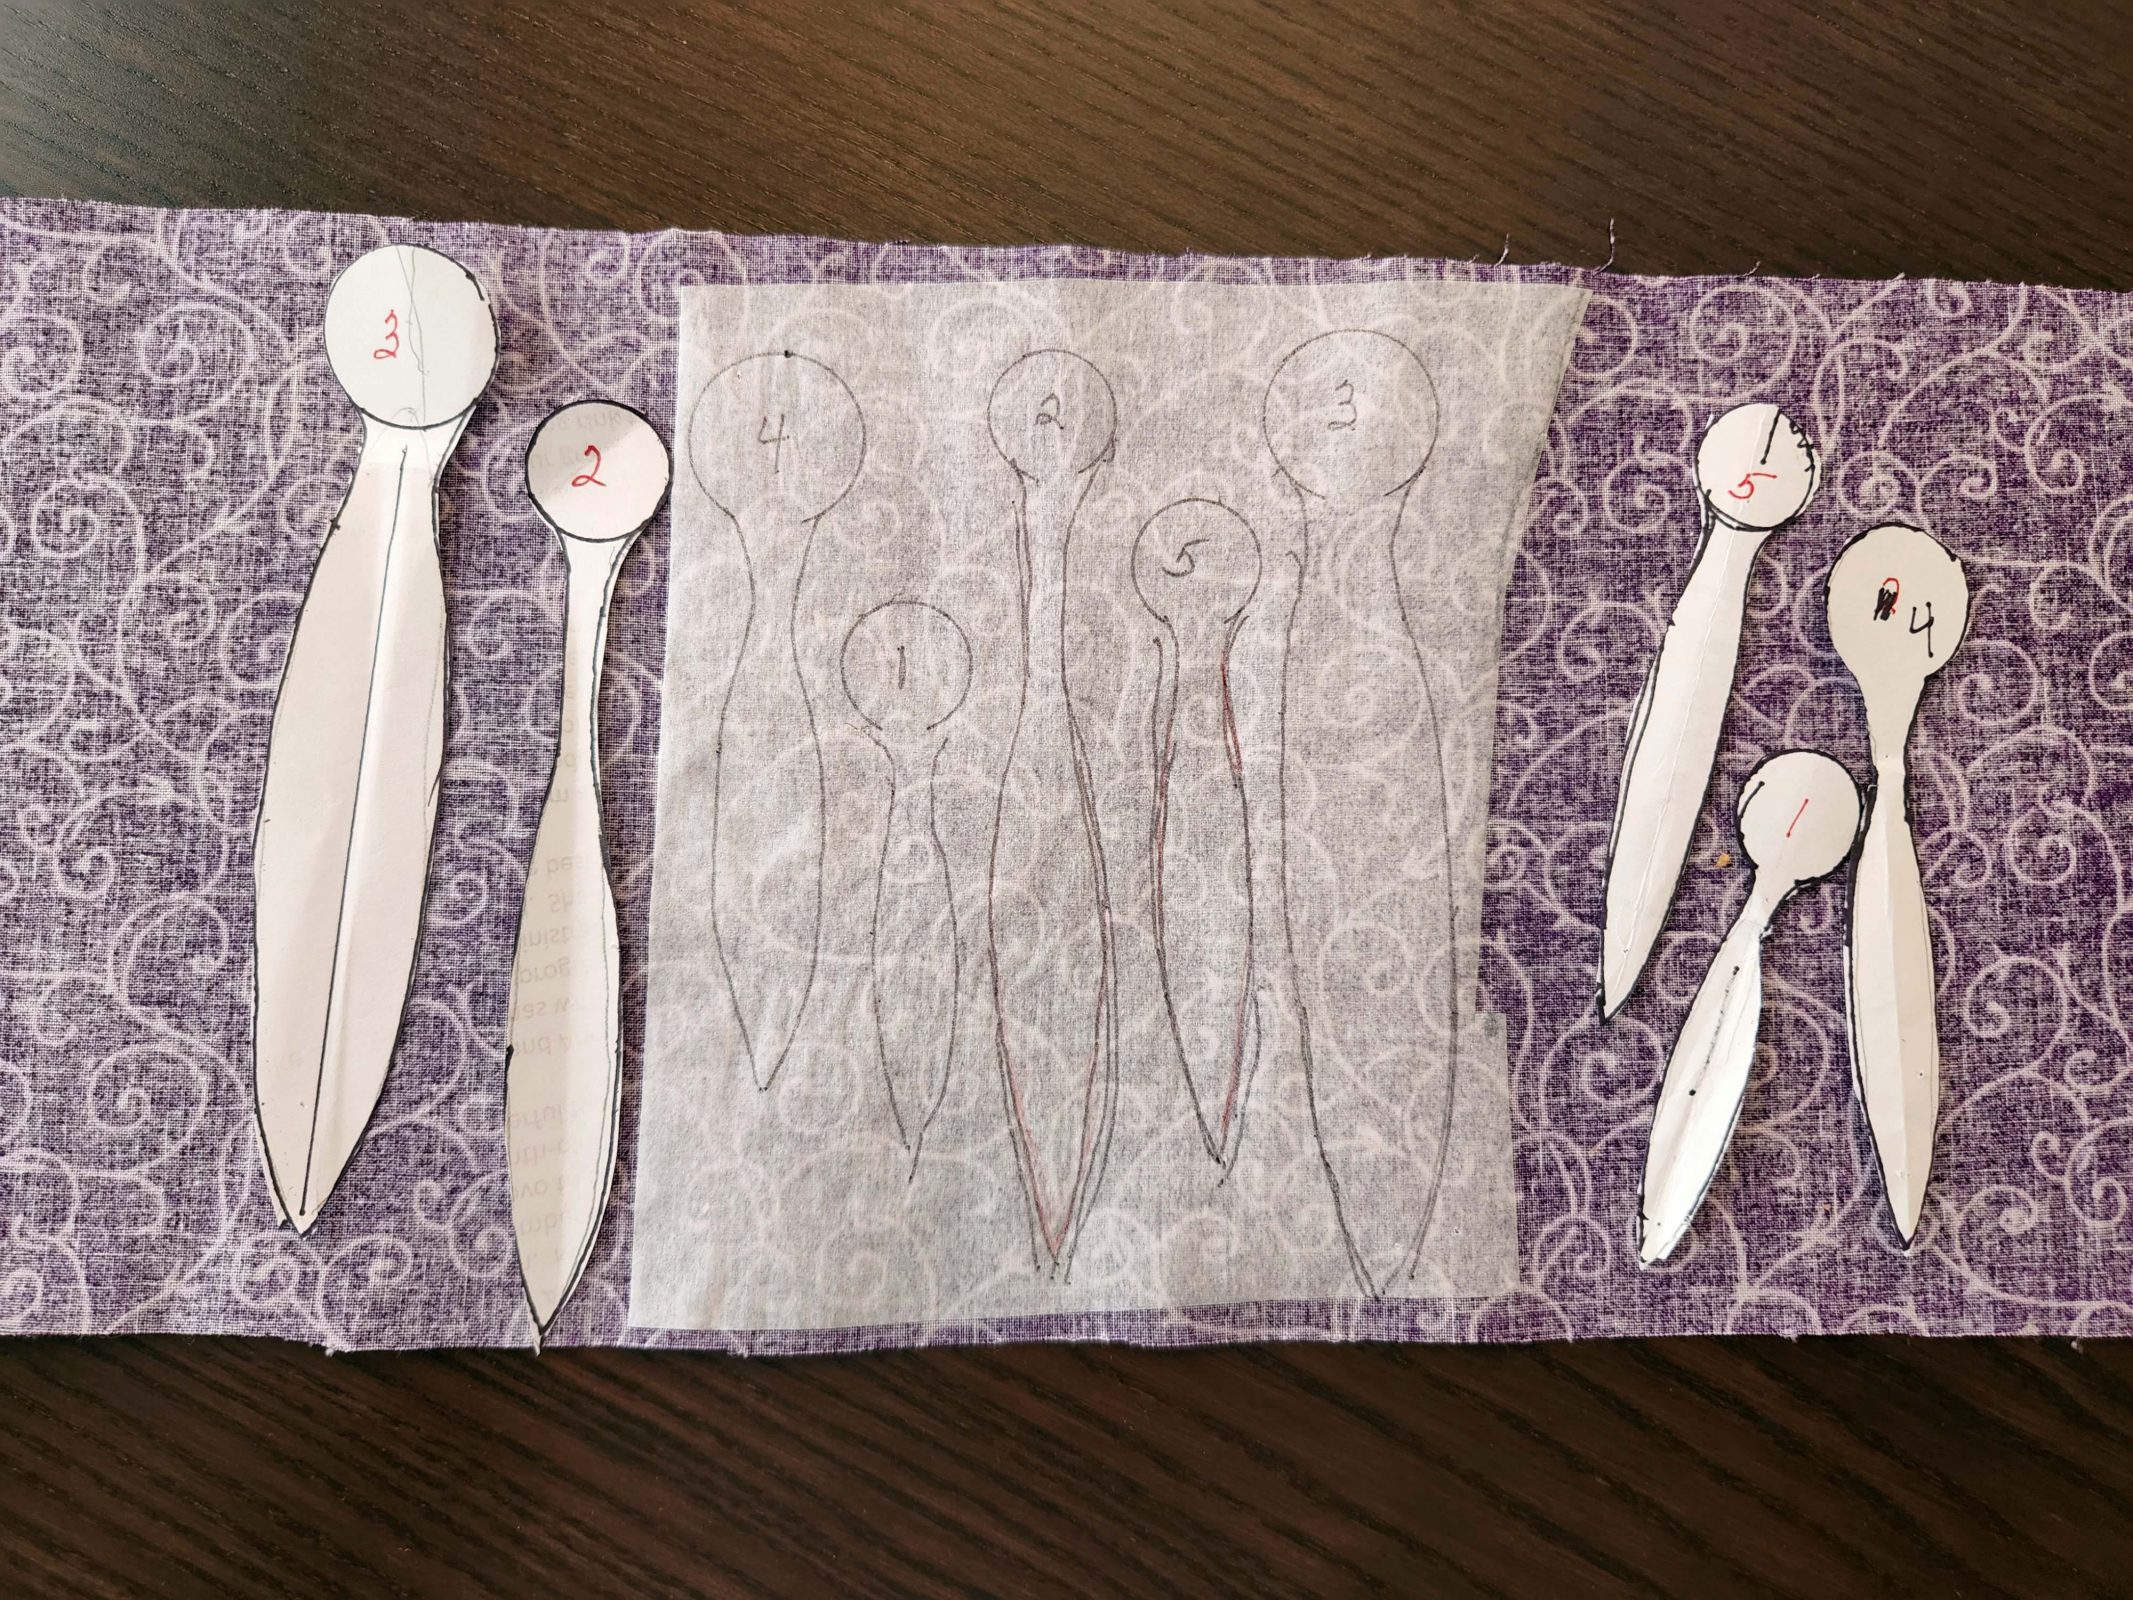
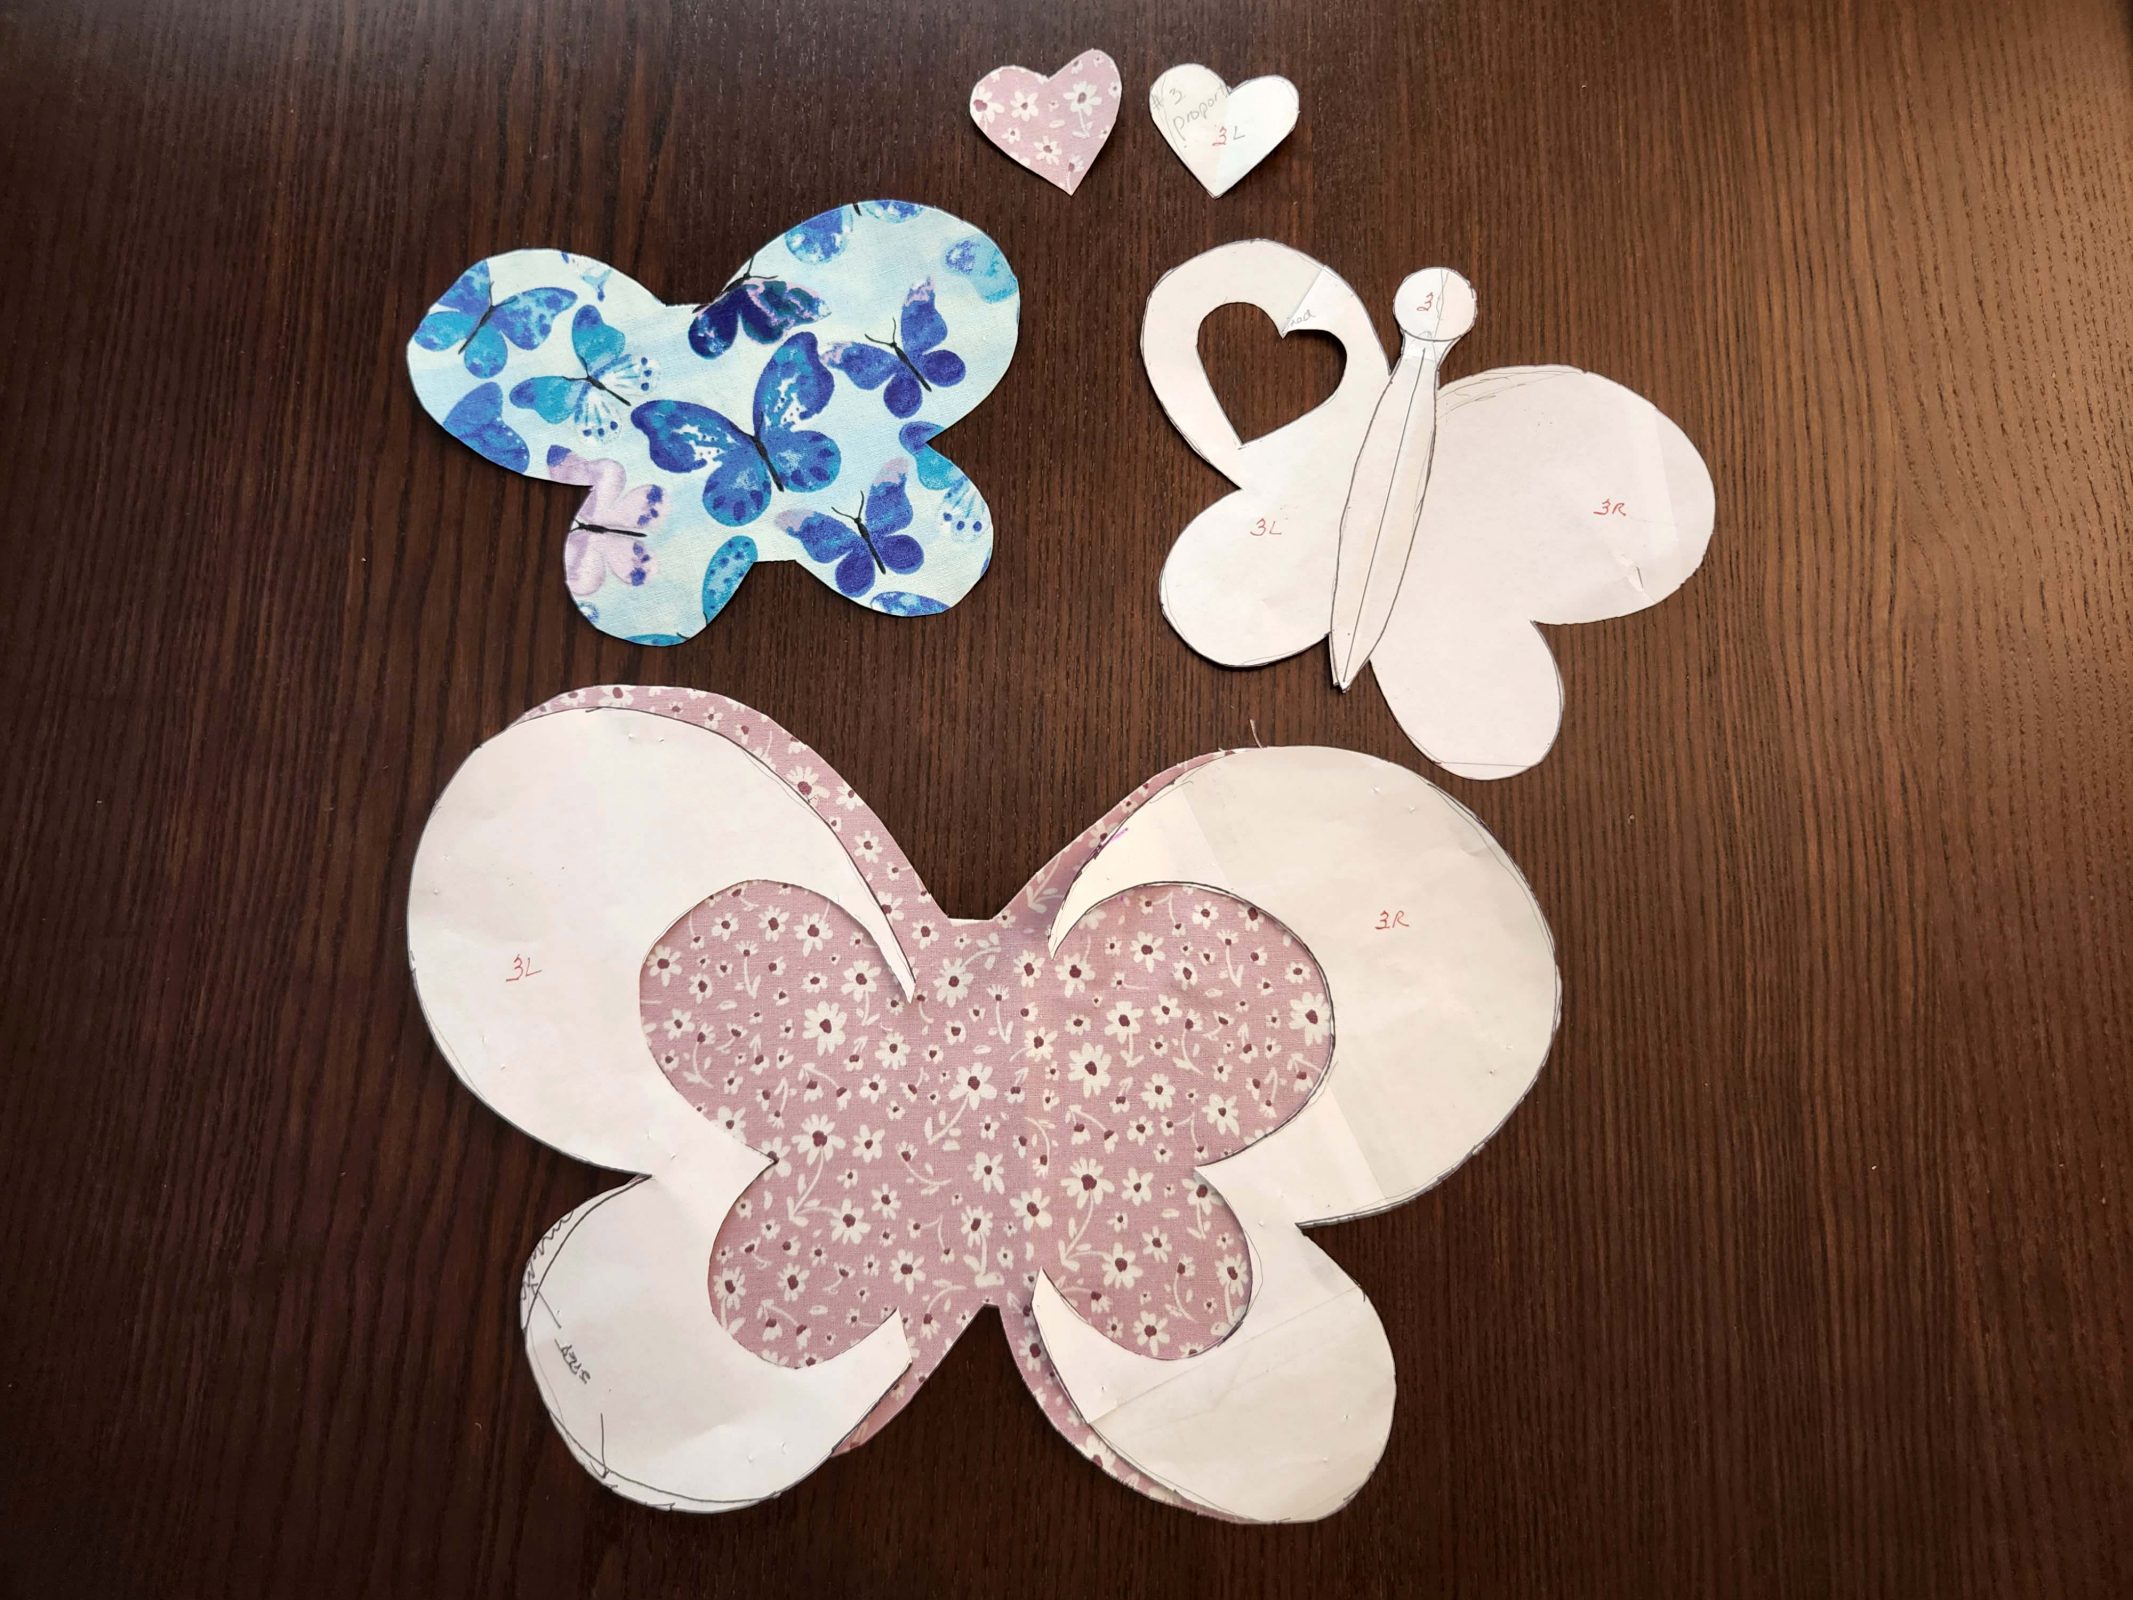
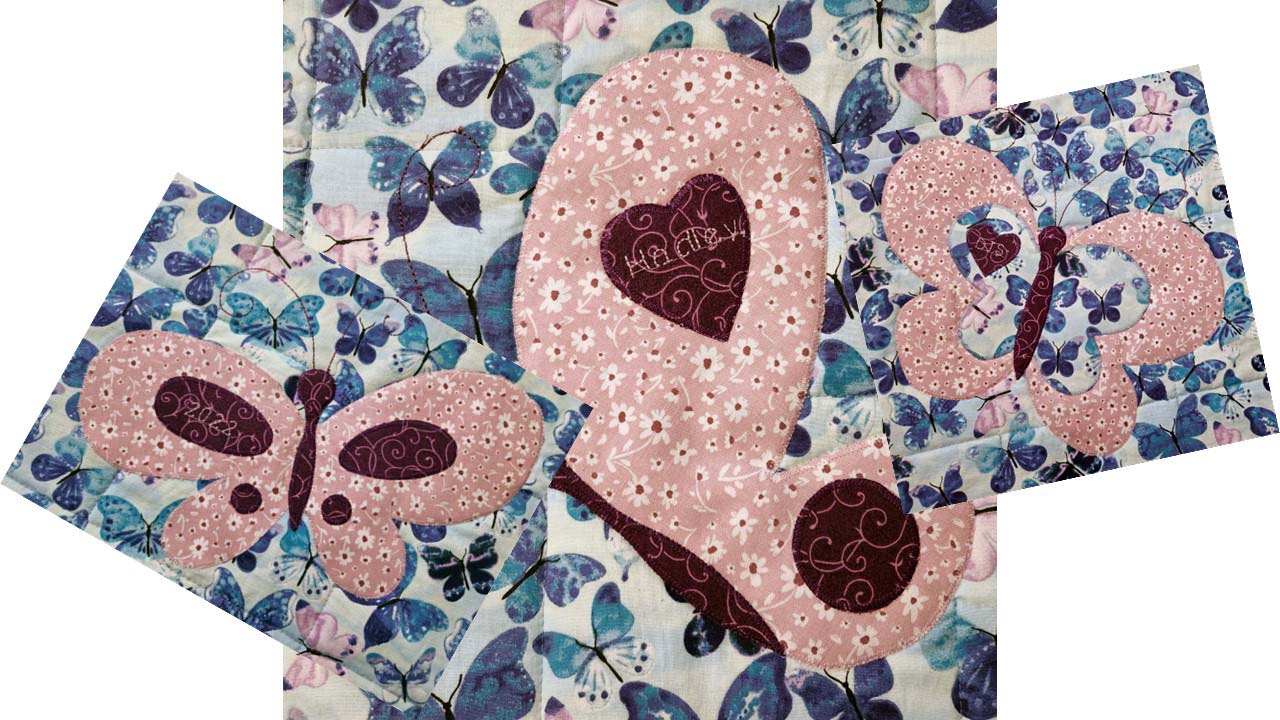
After buying fabric, my next step was to draw butterfly patterns. Four of the butterfly appliqués required two layers of fabric; the one in the upper left needed three layers.
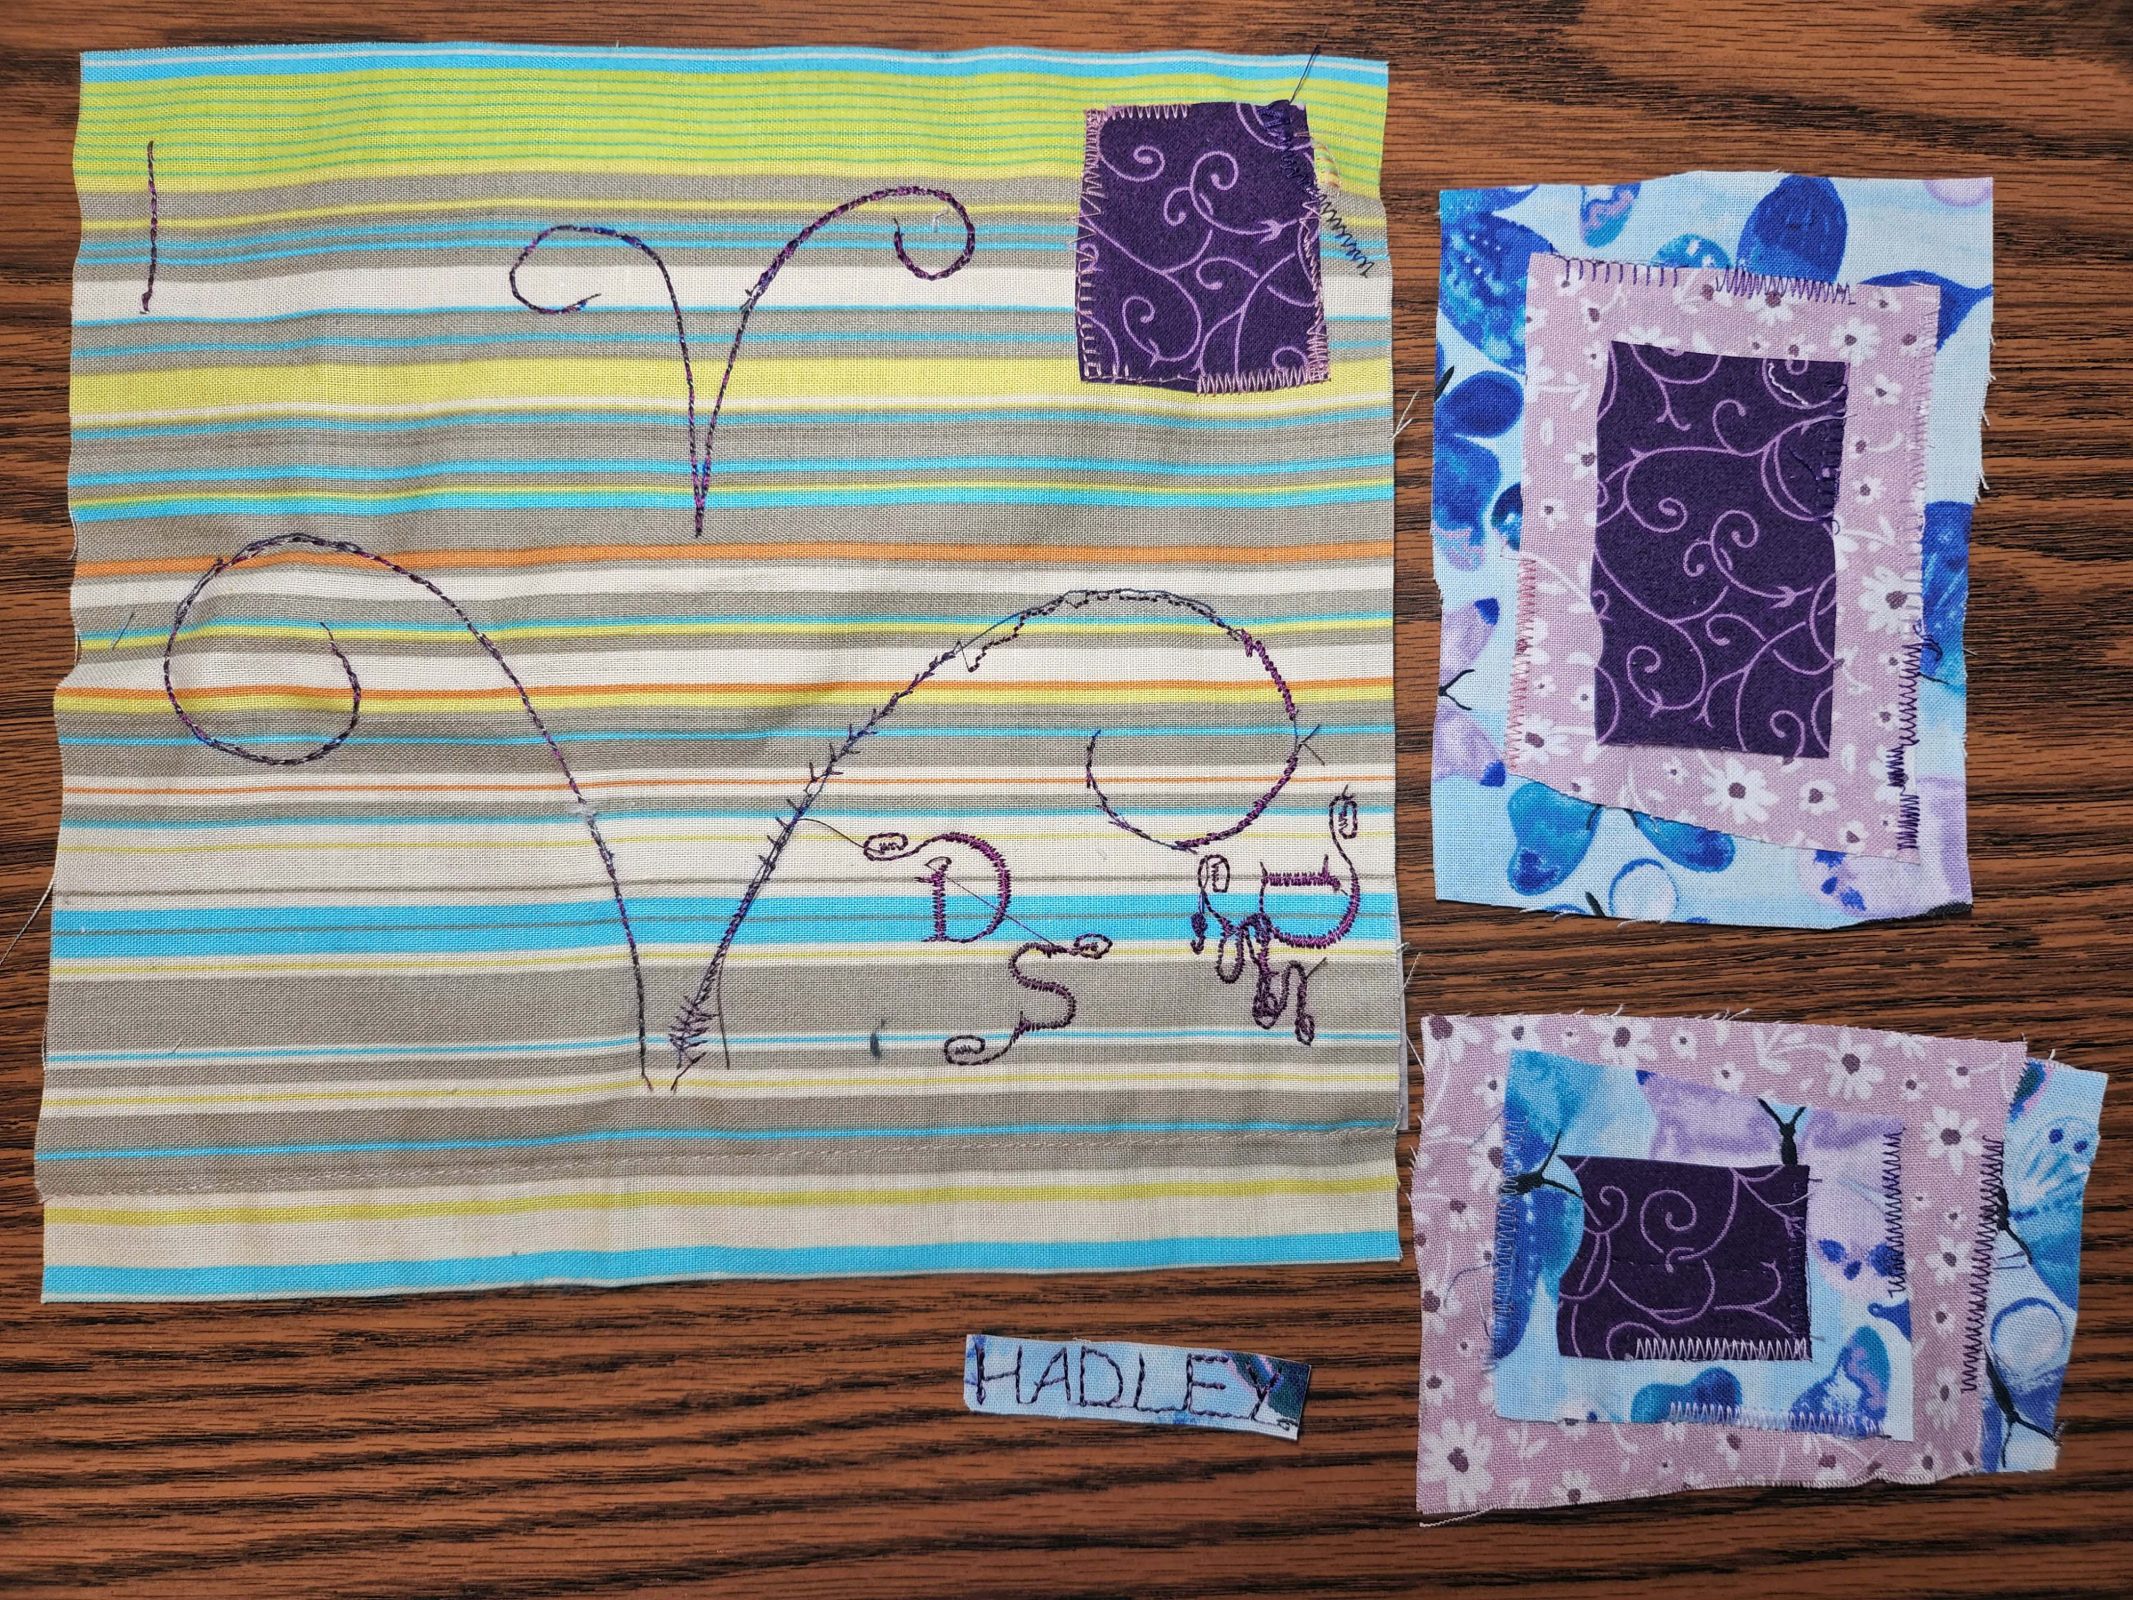
I’ve got fabric and I’ve got patterns, but there are more decisions to be made: Which colors shall I use for the butterflies, and in which combinations shall I use them? What kind of lettering design shall I choose? Which colors of threads (matching or contrasting) and which stitching patterns shall I select to attach the butterfly pieces to each other and to the quilt? How will I get the antennas drawn and how can I stitch them? I made lots of samples to help me make these decisions.
I decided to purchase a third fabric (the dark purple) for the butterfly markings; lettering will be Comic Sans (one of my sewing machine choices); thread should match the fabric; zigzag will be best for assembling the butterflies and for attaching them to the top quilt fabric; I’ll use a disappearing marker to draw the antennas and I’ll stitch them with a triple stitch and embroidery thread. I tried sewing a double line to make the antennas bolder, but it was too difficult to keep the two lines of stitching exactly side-by-side, so I went with less visible (but more error-free) antennas. Whew! I’m glad that’s all decided!
The next step was to make the appliqués. First, fuse the Wonder Under (I like it better than HeatnBond) to the fabric; second, mark the patterns on the backing of the fused Wonder Under; . . .
. . . third, cut the pieces along the pattern lines; . . .
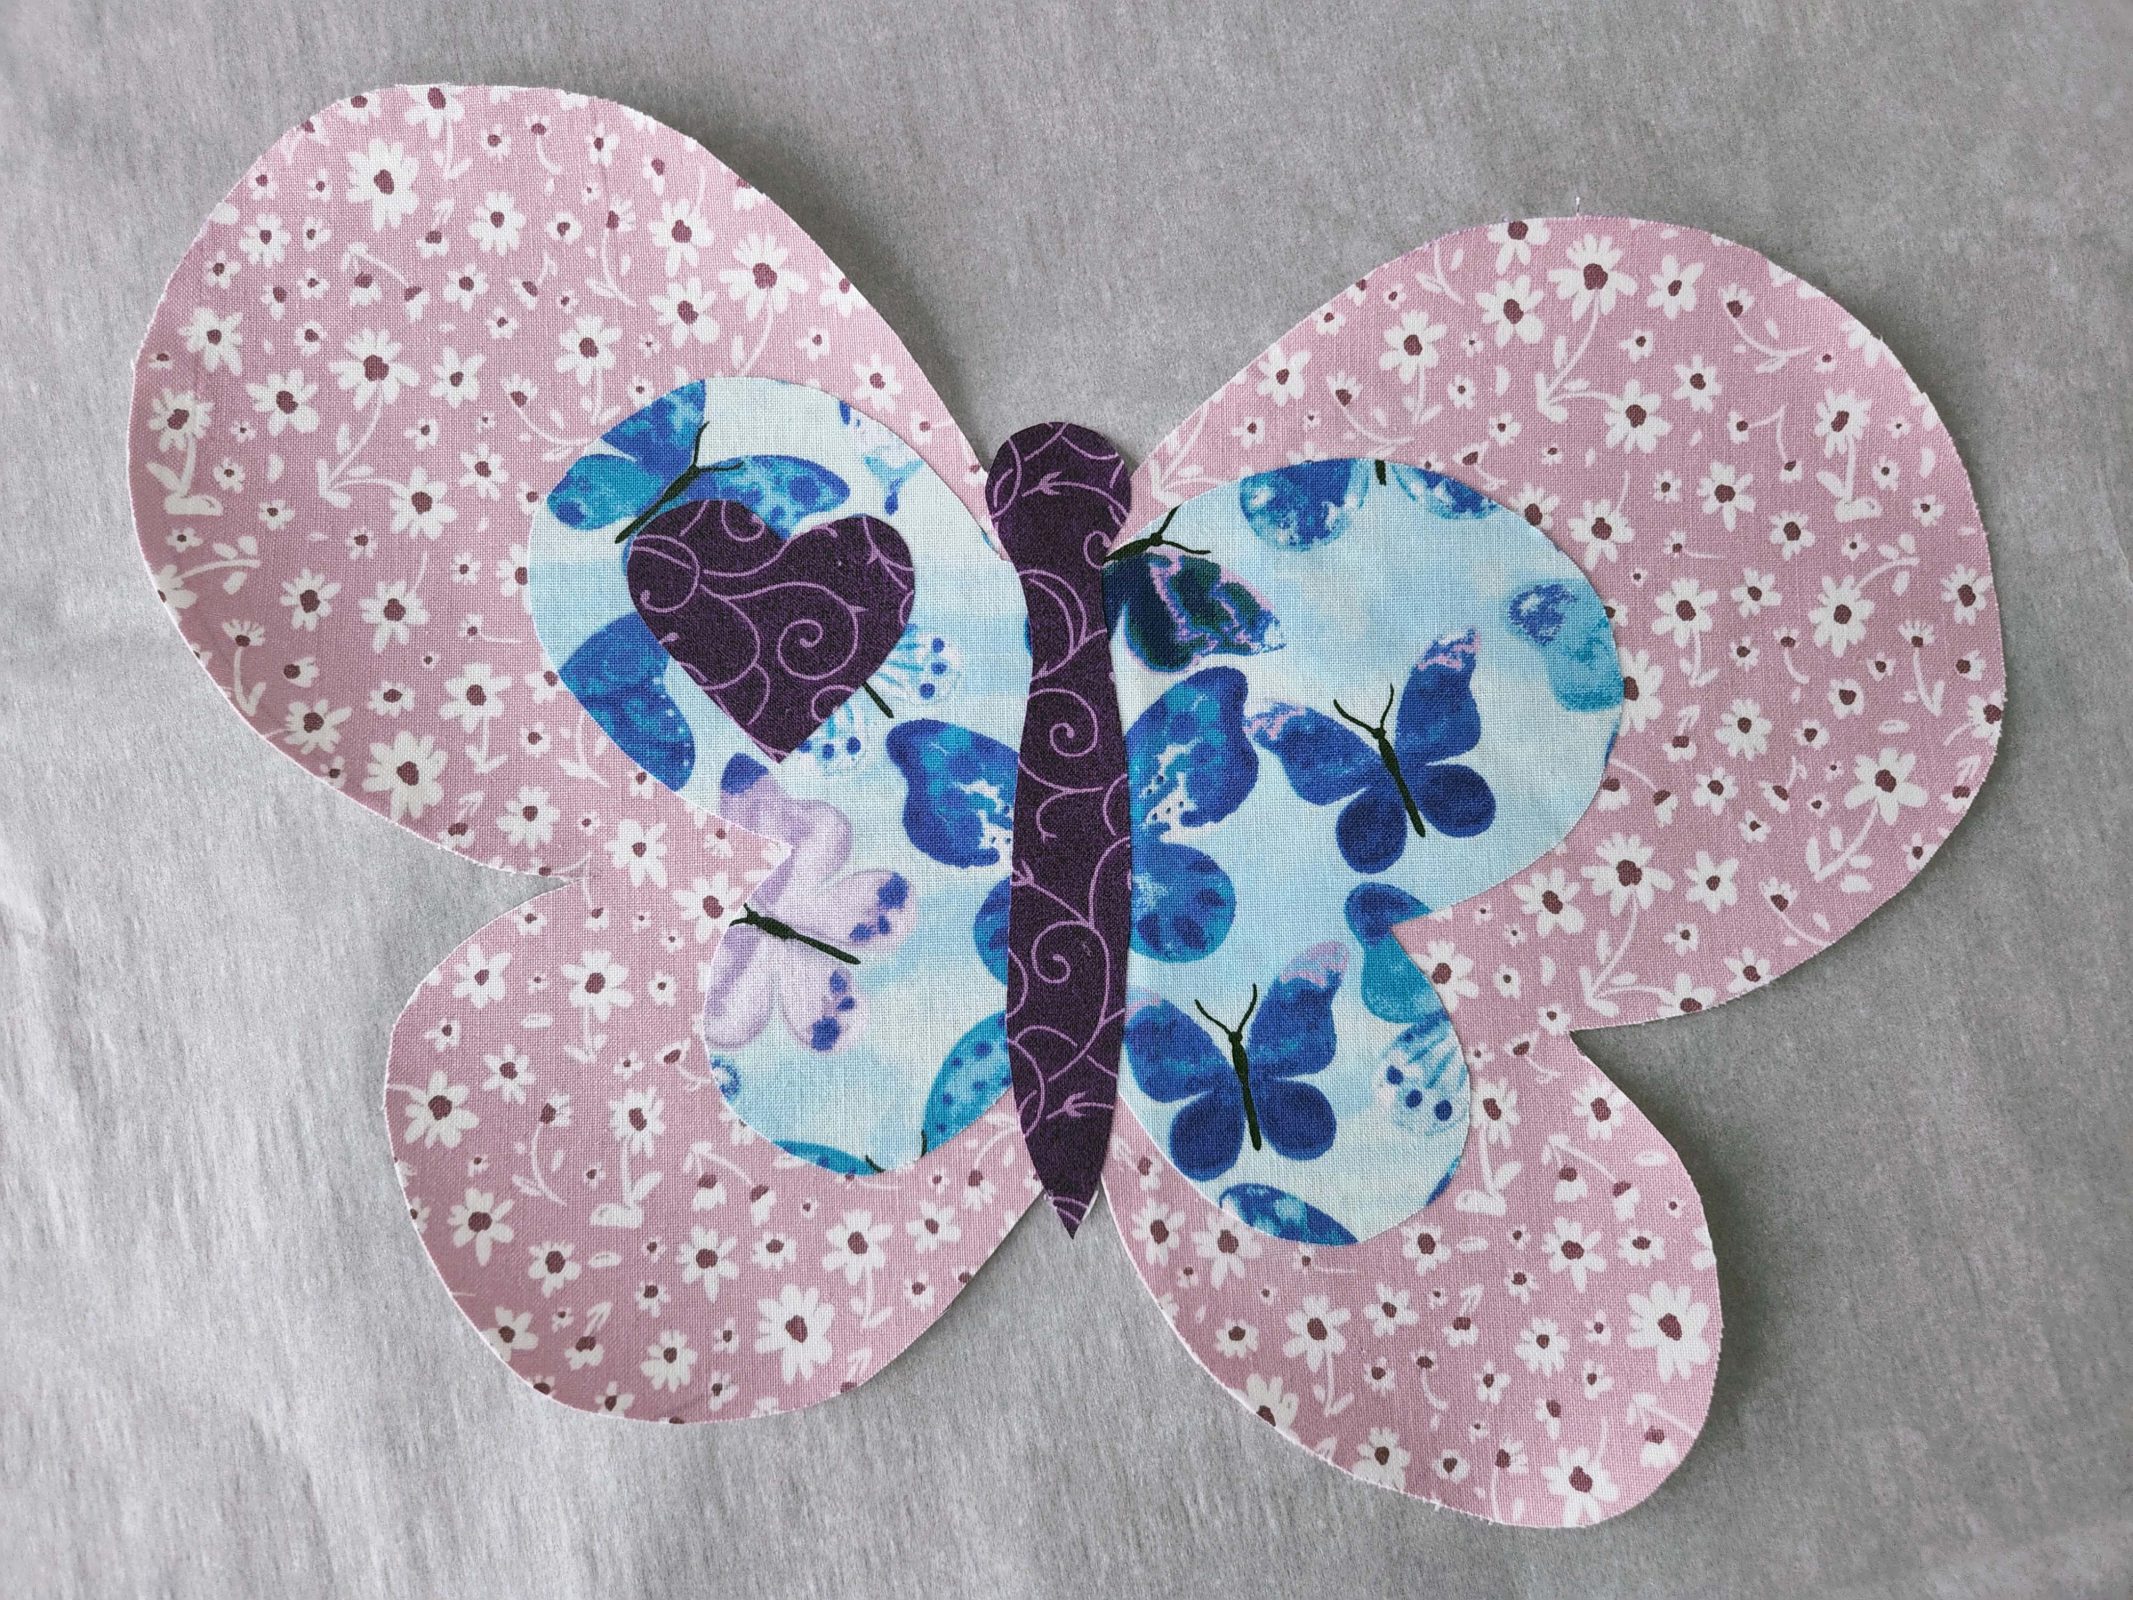
. . . fourth, fuse the butterfly pieces together, then zigzag the decorative pieces to the base butterfly; . . .
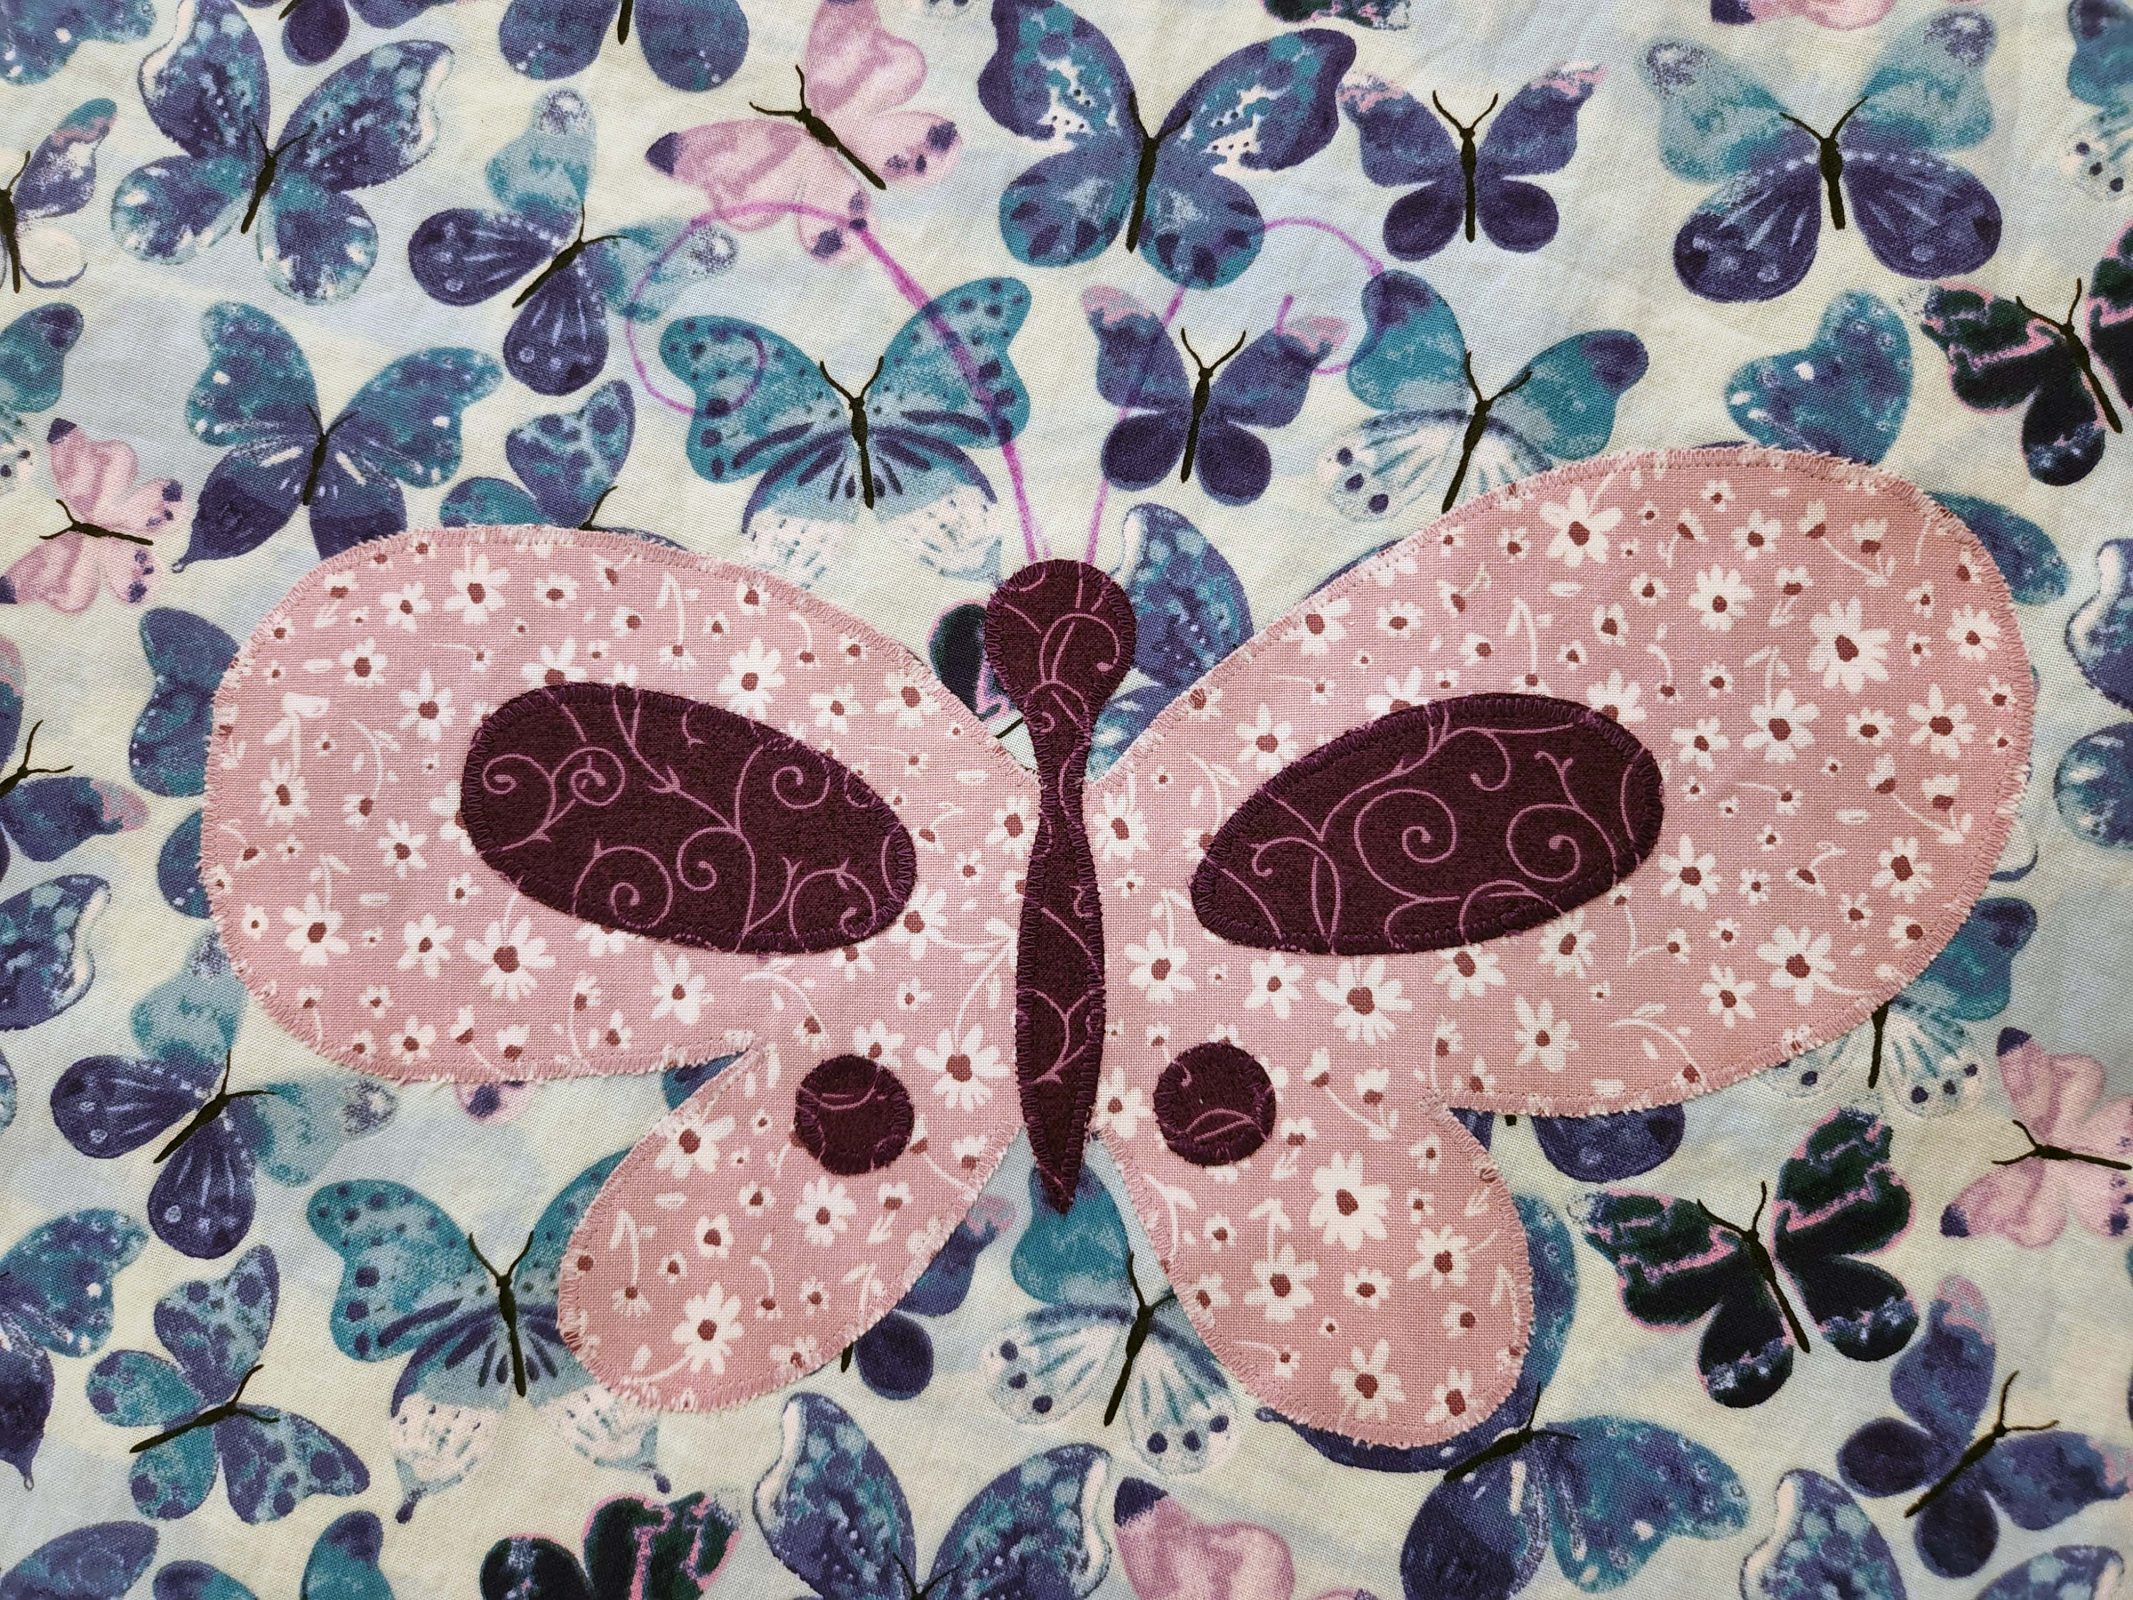
. . . fifth, attach the butterflies to the top fabric with zigzag stitches; sixth, draw the antennas; . . .
. . . seventh, eighth, and ninth, stitch the antennas, add the embroidery (“Hadley”), and draw the quilting lines; . . .
Those butterfly appliqués were a lot of work! They were fun, so I’m not complaining, but I kept track of my time and they took half the time of the entire project. I sewed Hadley’s name on one butterfly, my initials on another, and the year on a third butterfly.
After the appliqués were finished, it was time to attach the batting to the top fabric and then to attach the backing.
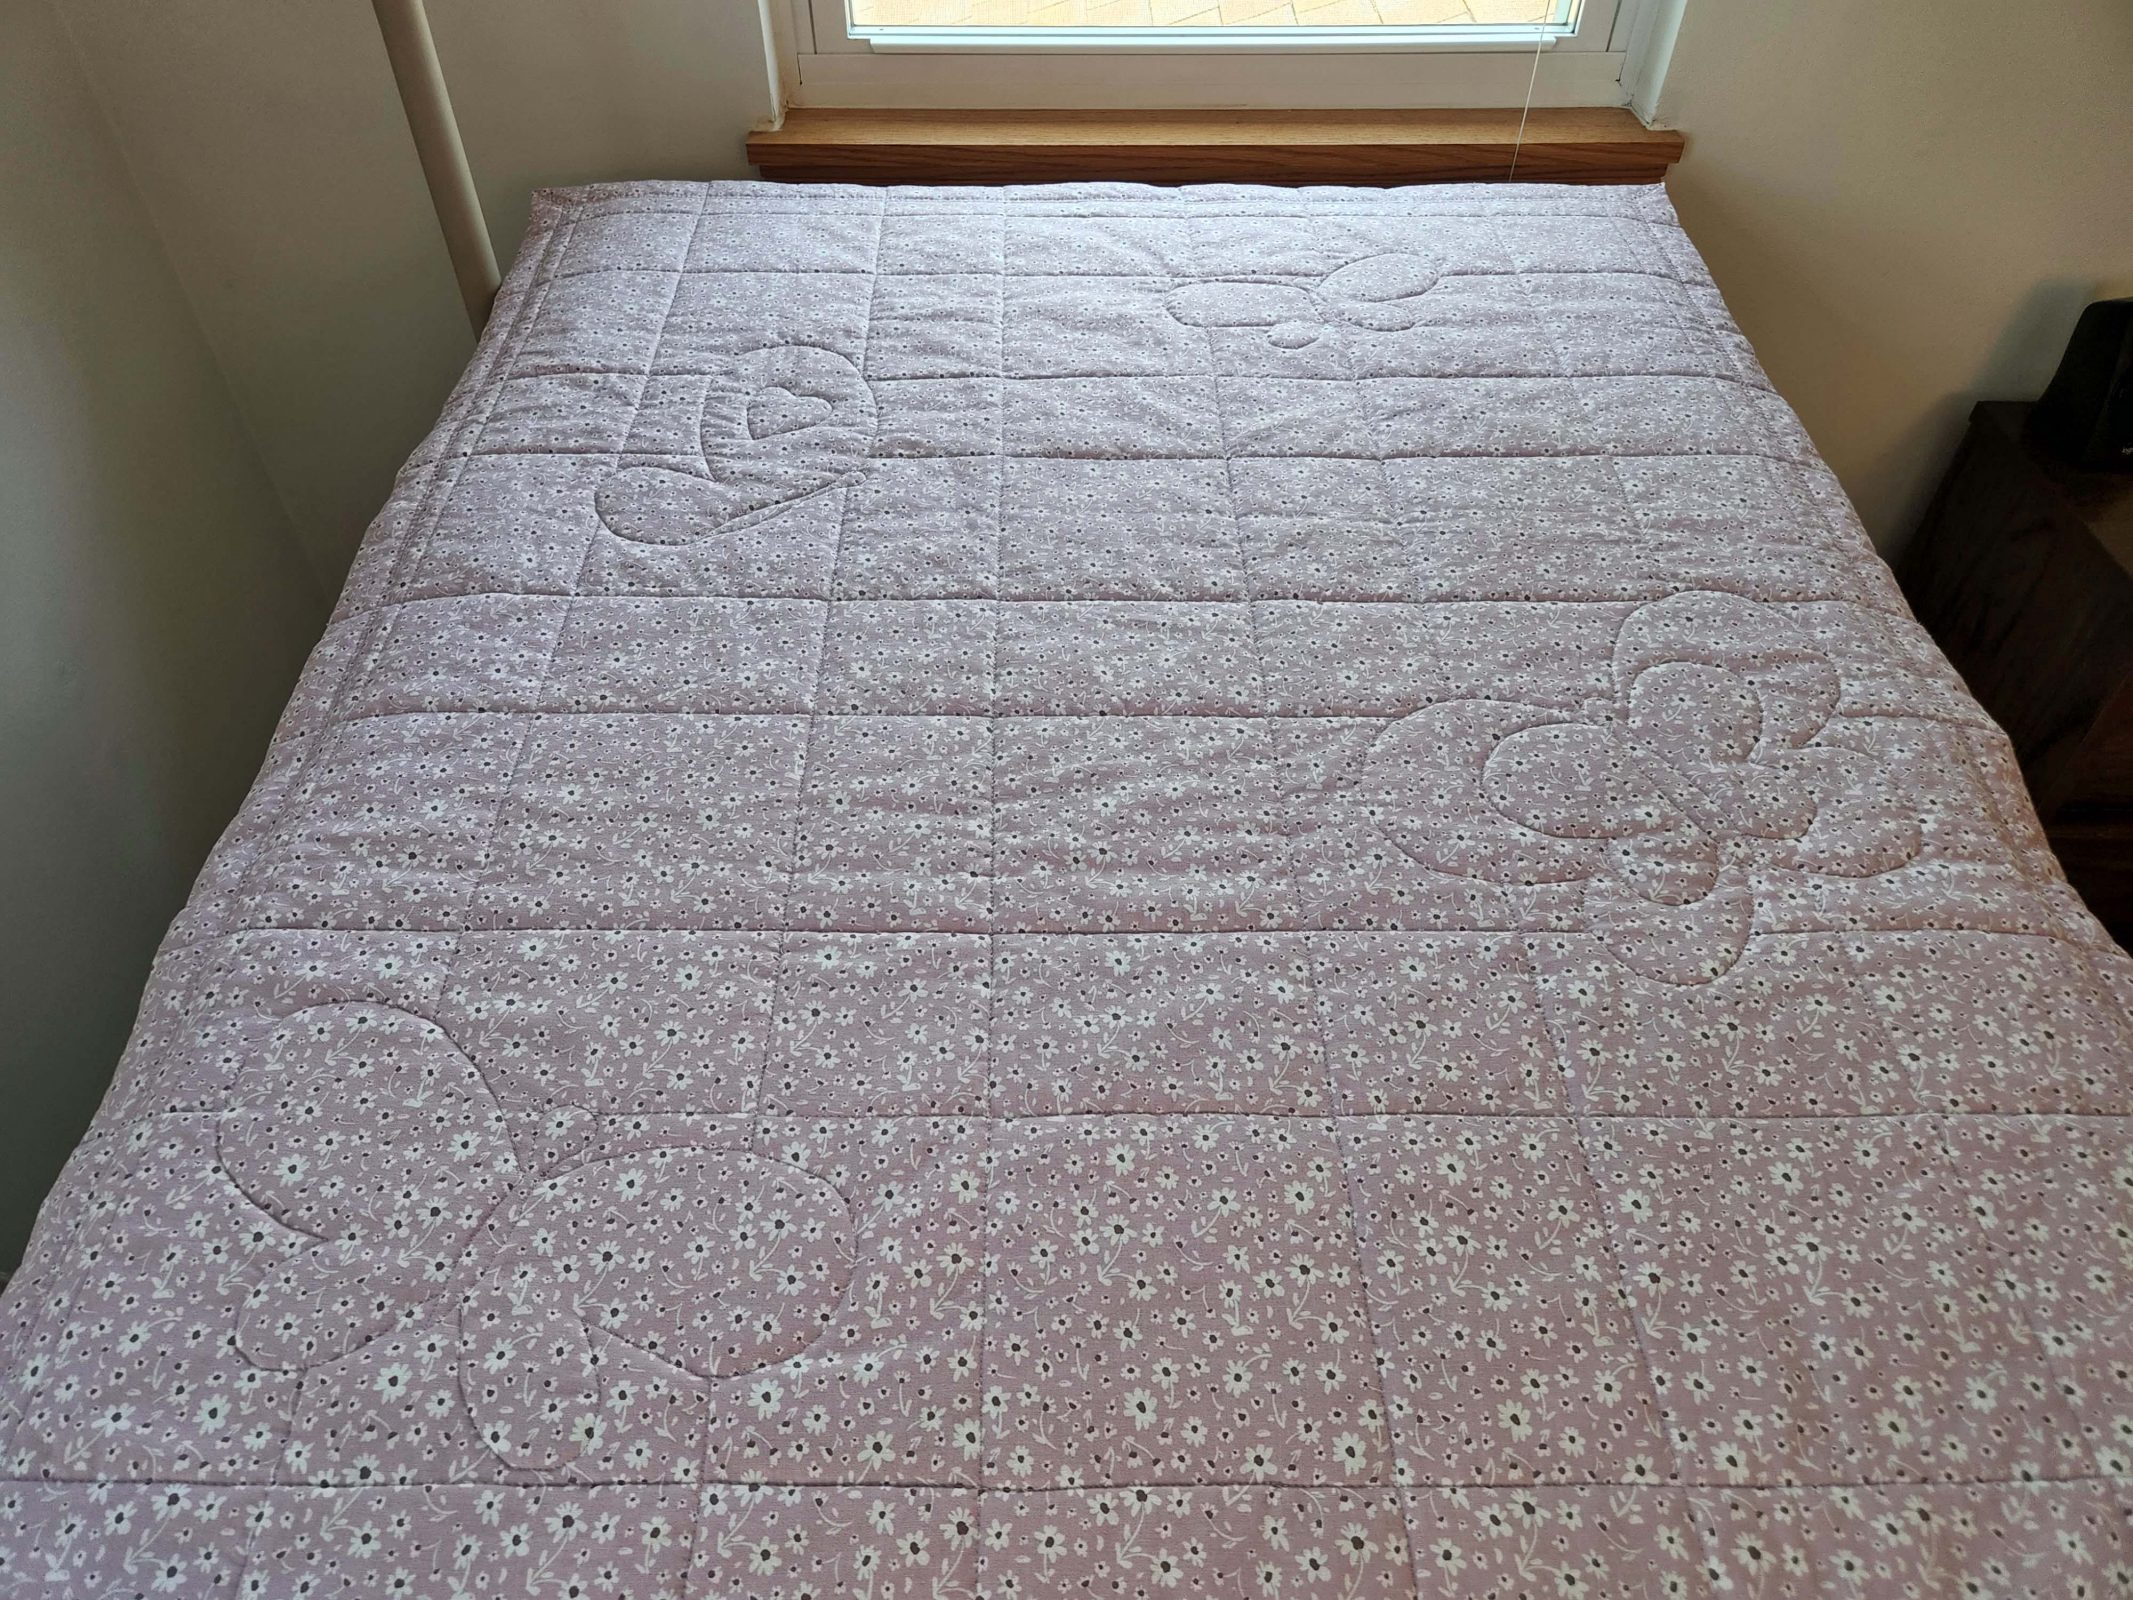
With everything put together into a single piece/quilt, the next step was to sew the quilting lines. I didn’t want to sew lines over the butterflies, but some of the butterflies covered more space than I wanted to leave unquilted. After several days of thought, my solution was to stitch in the ditch around the outlines of the butterfly wings and bodies. On the two largest butterflies, I also stitched around some of the butterfly markings. That stitching made the butterfly outlines visible on the back side of the quilt, which I think adds visual interest.
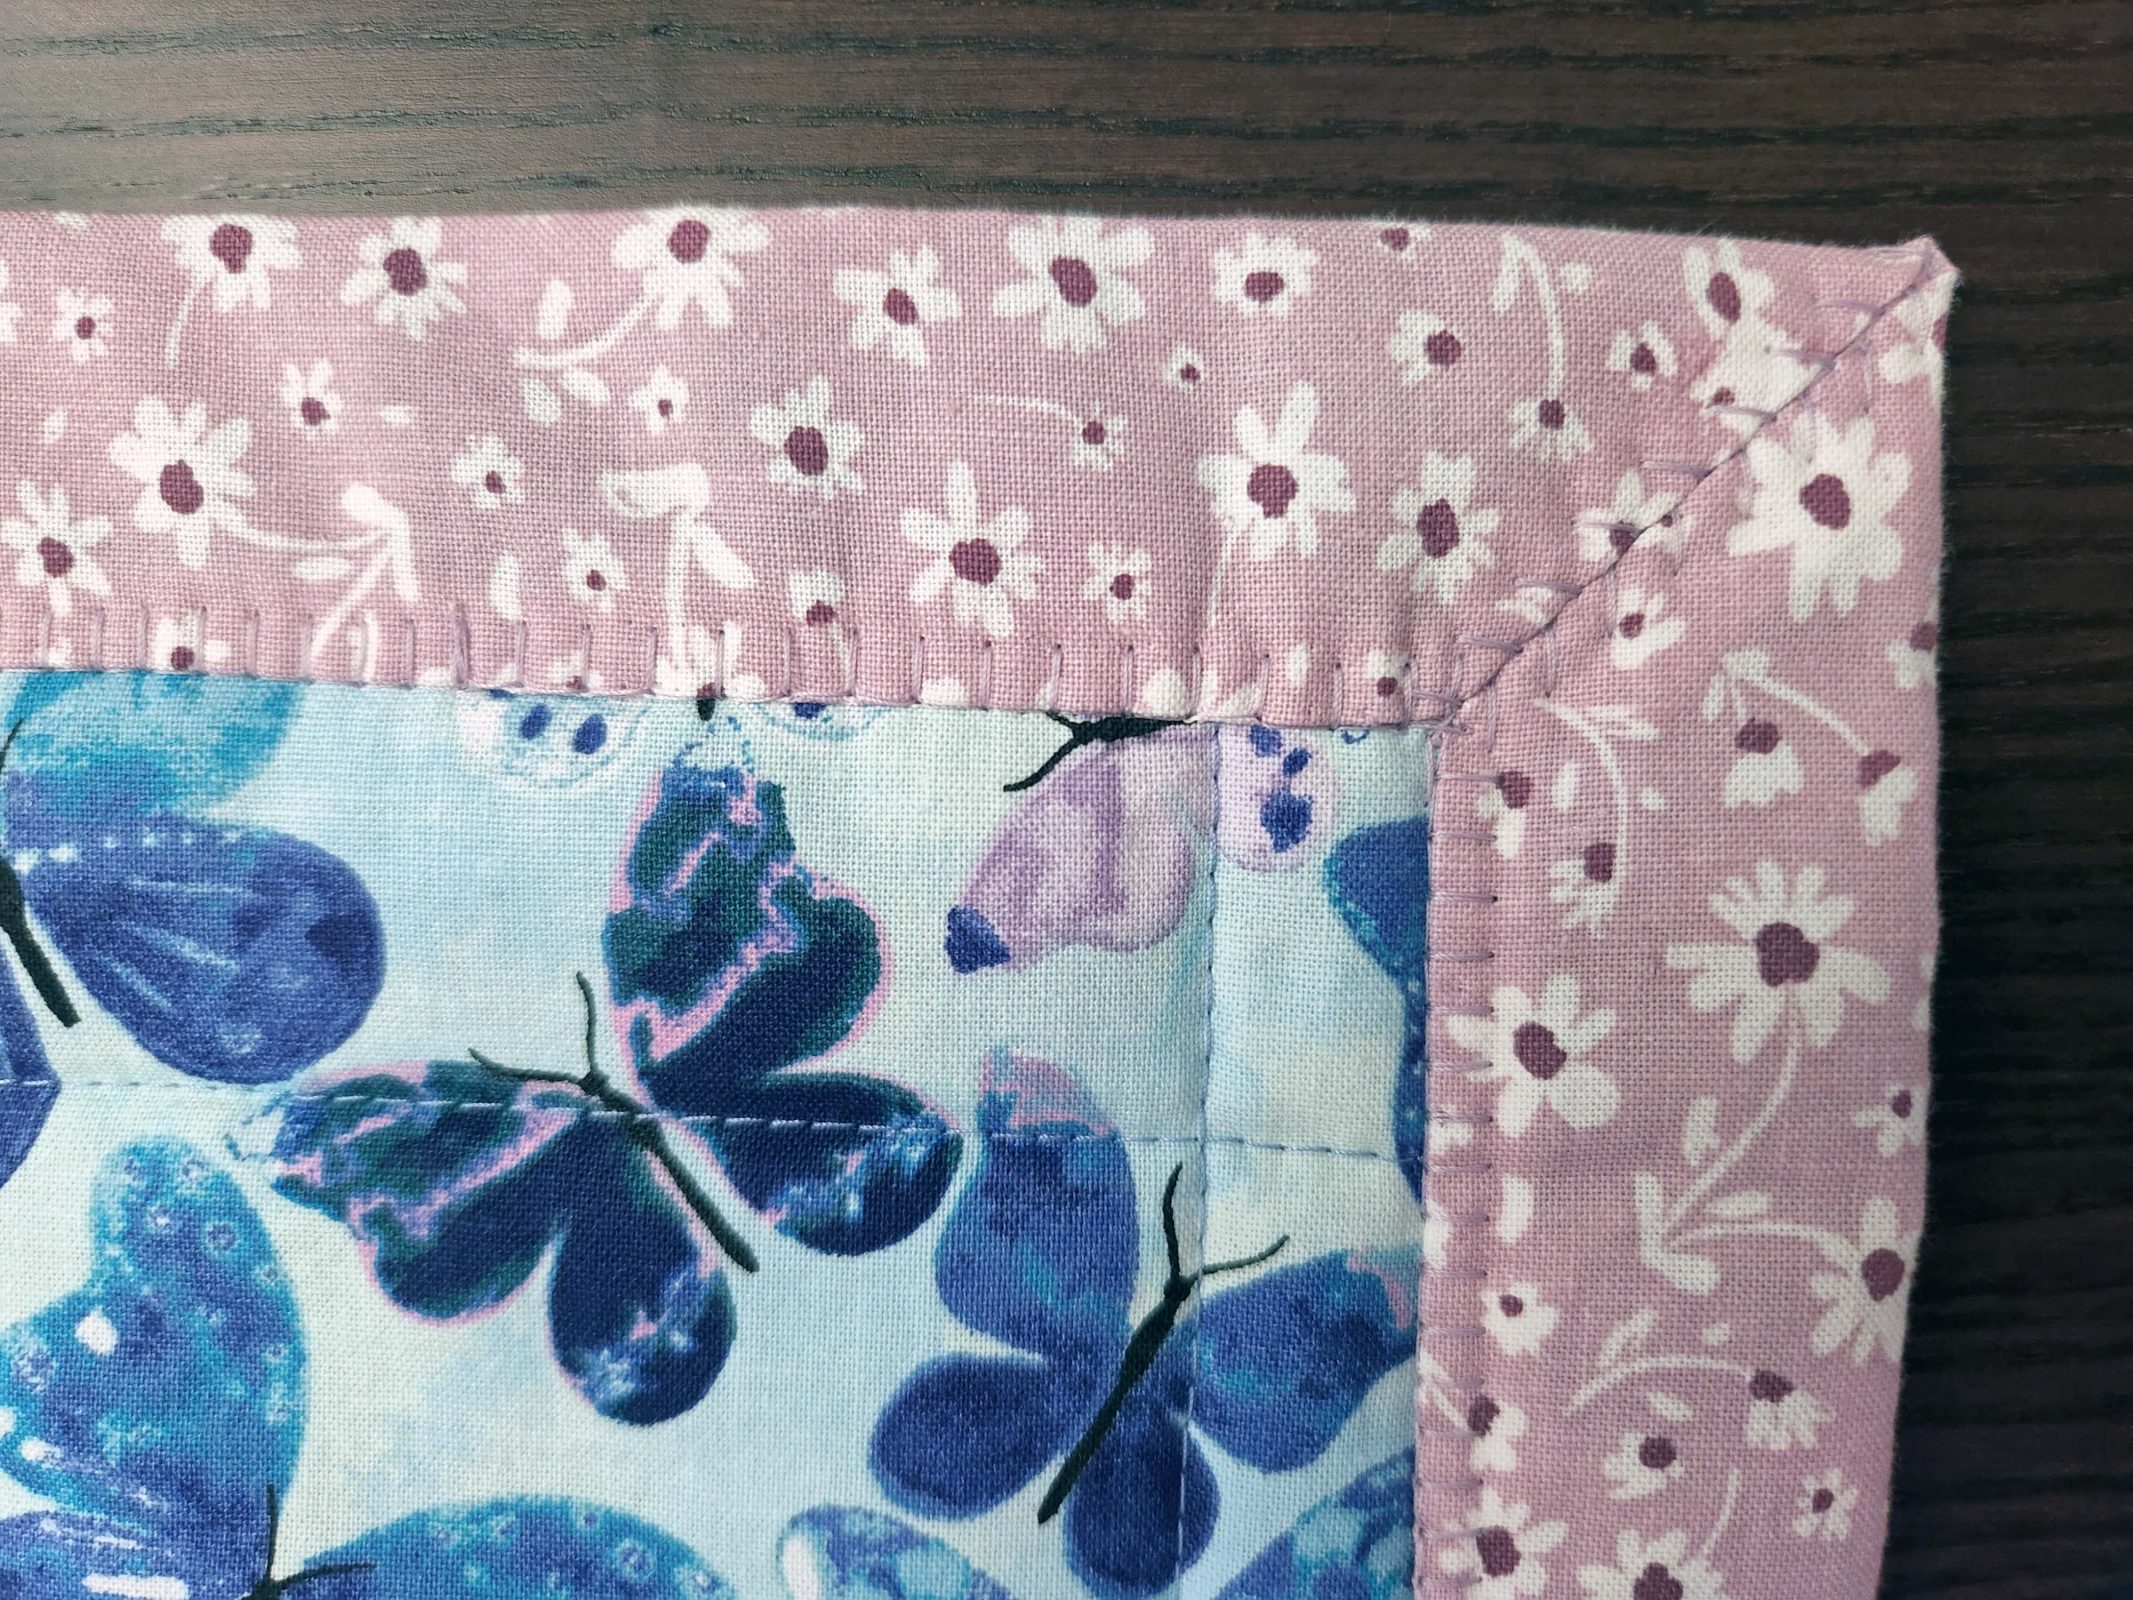
After the quilting lines were sewn, I finished the quilt by folding over the self-binding and attaching it with a decorative blanket stitch. Then I closed the mitered corners with a featherstitch.
Voilà! A first birthday gift for Hadley.
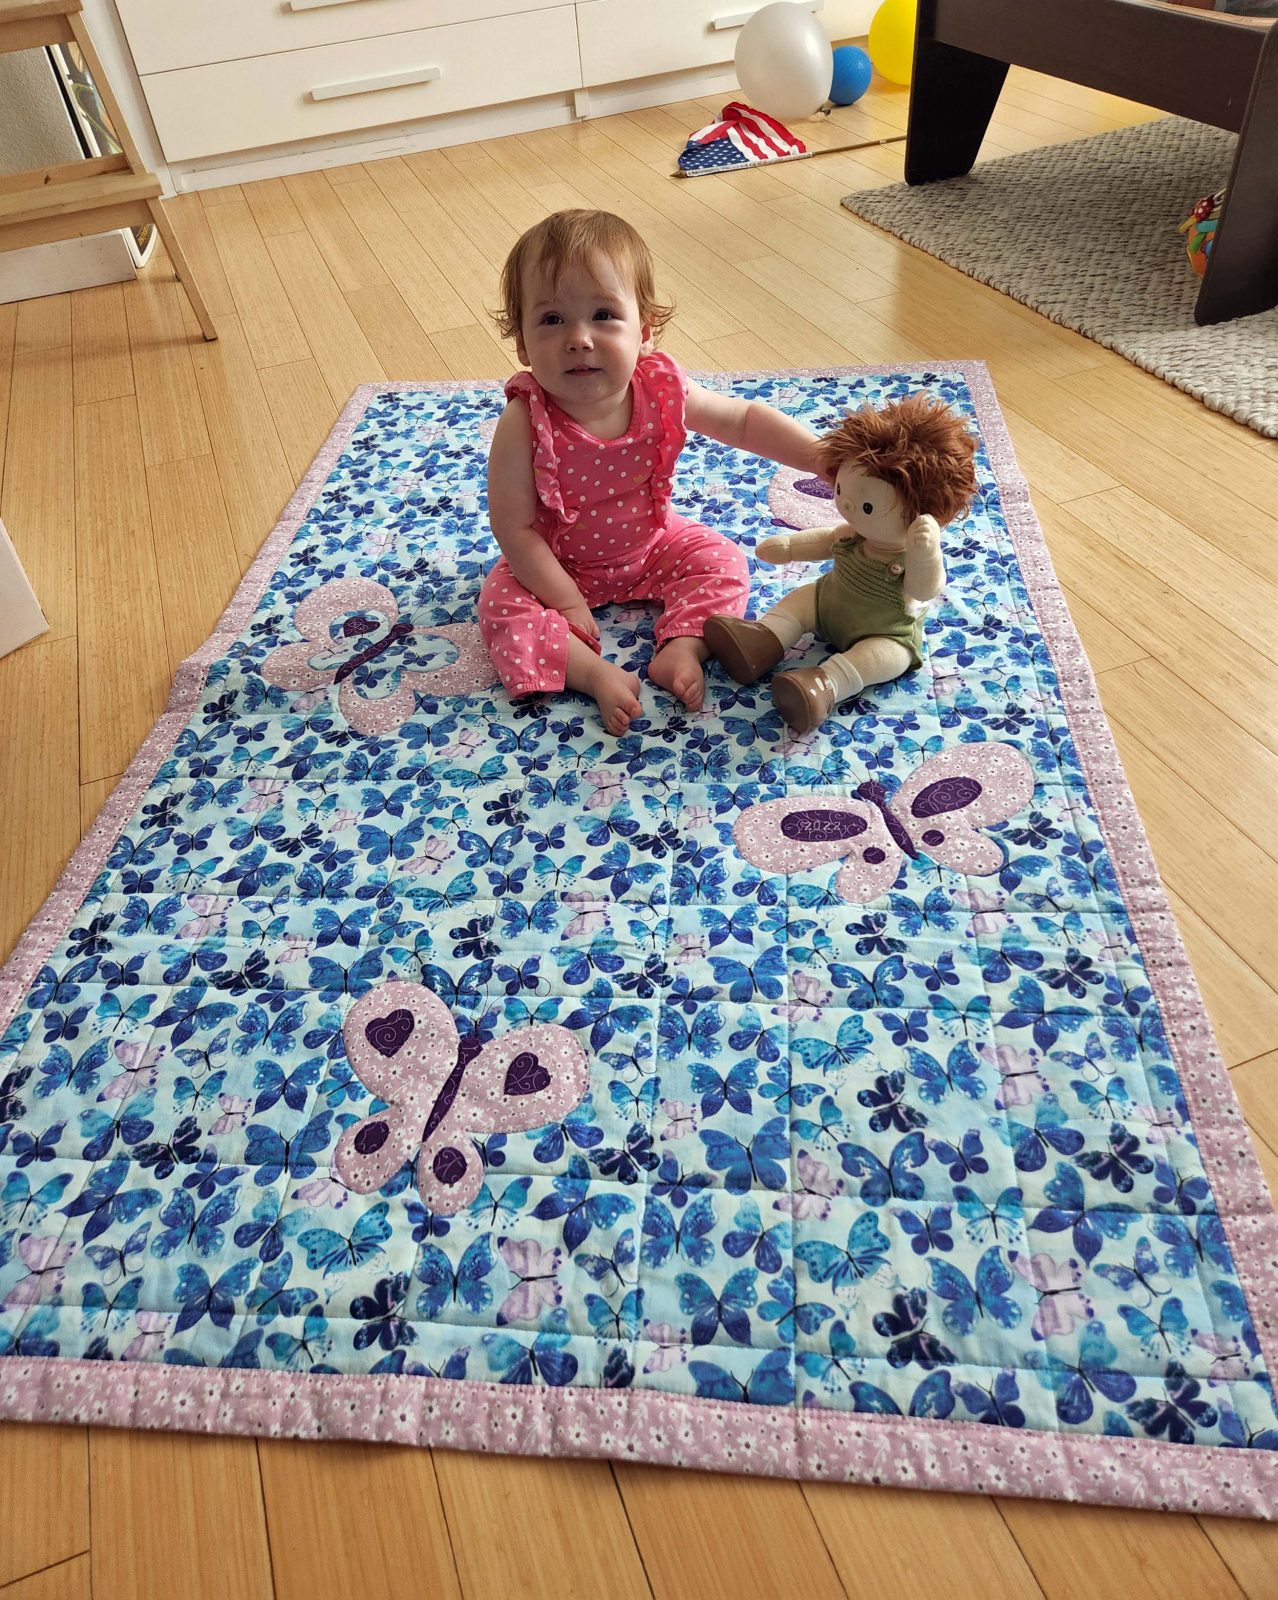
Here’s Hadley with her new quilt and her new doll. Happy first birthday, sweetheart!
Ted’s sister, Mutzie, (aka the Quilting Queen) gave Kari a small quilt when Kari was a toddler, and she also gave Kari a baby quilt for each of Kari’s three boys. Kari loves those quilts (she wore hers down to rags) and thought making a quilt for a baby gift would be a good idea for our next sewing project. Since Ollie’s birthday was coming up and since I’d be working with Kari on her quilt project, it seemed like a good idea for me to make a gift quilt for Ollie.
The last time I worked with a sewing partner was during the years my mom taught me how to sew. Now that Kari has decided it’s time for her to learn to sew, I have a sewing partner again and I’m really enjoying it. We start our mutual sewing projects by shopping for fabric and supplies together, a subset of sewing that’s also more fun to do with a partner. Kari chose fabrics in blues and yellows. She wanted to make a simple quilt for her first effort, so she planned to sew the edges together (wrong sides out) and turn the quilt through, then topstitch a “binding” edge and quilt it. She bought calico for the top fabric and fleece for the bottom because some of the quilts Mutzie made for the boys have a fleece backing and Kari loves the softness of it.
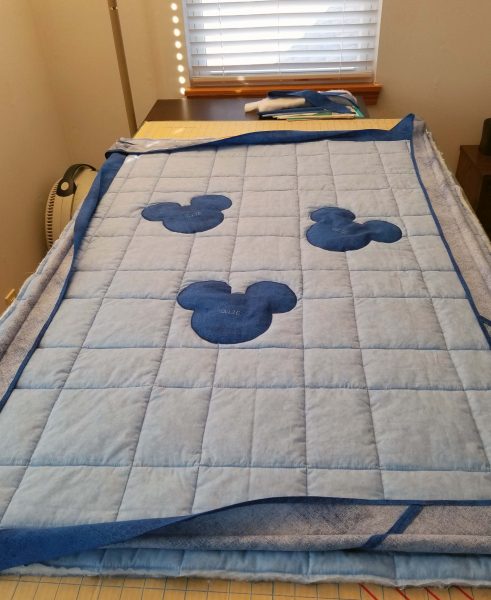
My choice of fabrics was calico in light and dark blues. Kaitlyn told me that Ollie looks good in blue and he loves his Mickey Mouse toy, so I decided to put some Mickey Mouse appliqués on his quilt. I planned to use a bias-cut binding around the edges. Kari’s quilt gift will stay in Missouri; mine is going to Utah. We chose a medium-weight batting for hers because more than that would be too much with the fleece backing; I went with a heavy-weight batting for Utah’s cold winters.
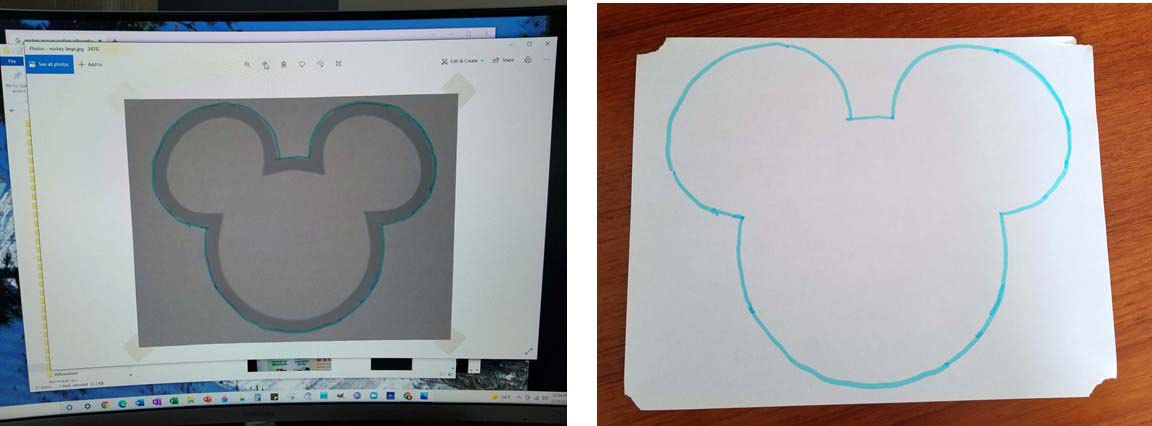
Things were looking good. We worked together on Kari’s quilt when she had time to come over for an afternoon and I worked on mine between our mother-daughter sessions. I’m not an artist, but I found a clipart Mickey Mouse-like outline online, zoomed the PC screen to my appliqué size, and traced a pattern.
I cut out the appliqués, fused them to the quilt top with HeatnBond, stitched around the edges, and admired my work. It looked good.
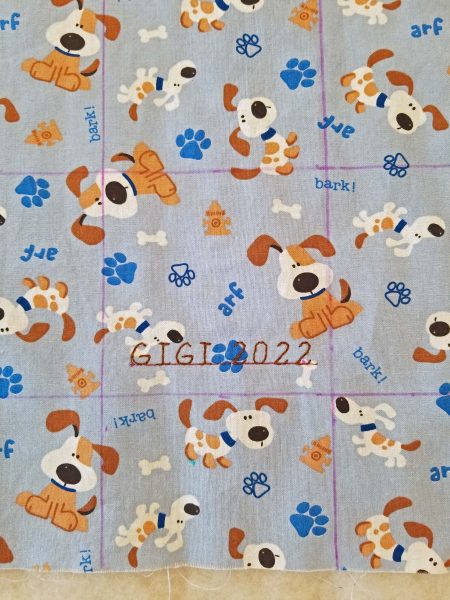
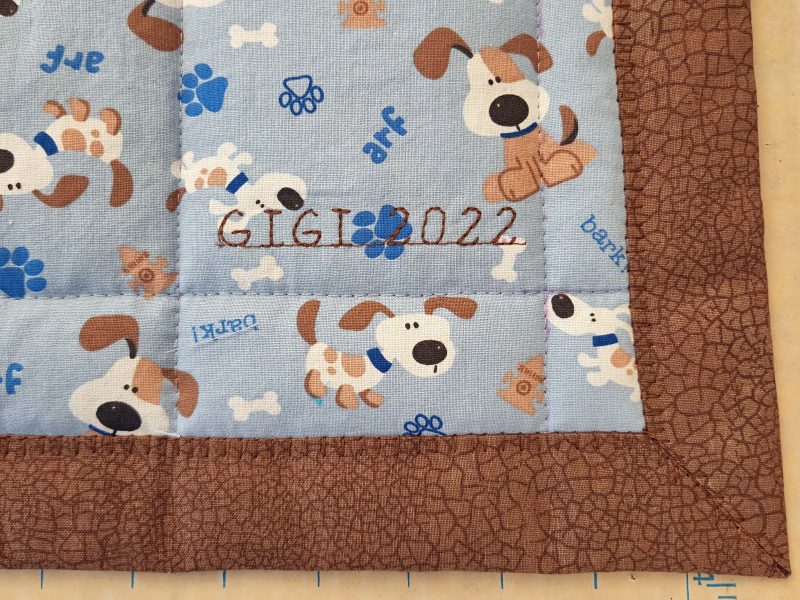
If this quilt ever becomes valuable (hah!), “Antiques Road Show” will raise its value with the provenance of a signature, so I decided to put my signature in a corner of the quilt. I estimated where the signature would fit without being covered by the binding and I stitched it. So far, so good.
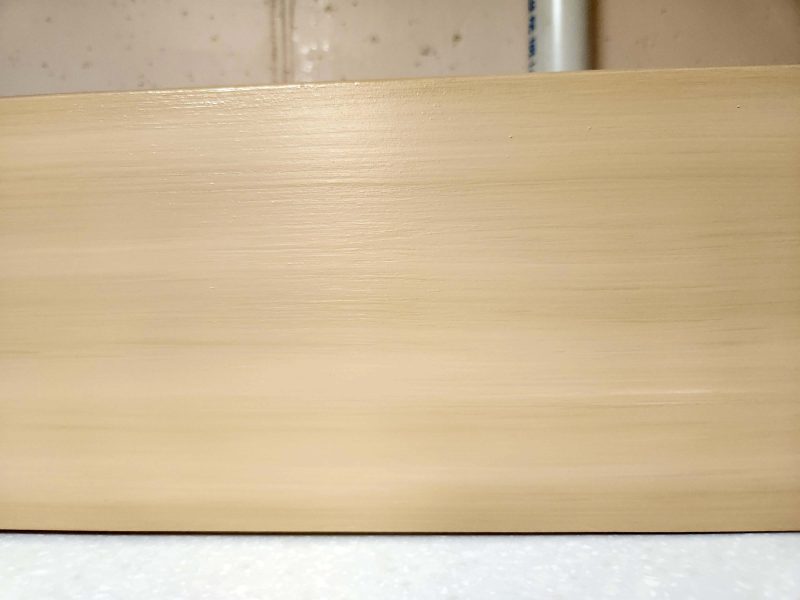
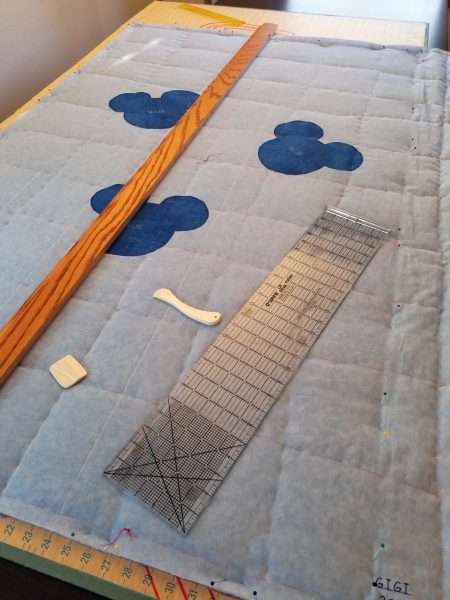
Then I pinned the top fabric, the batting, and the bottom fabric together, basted them, and marked my quilting lines. I was pondering how to draw long straight lines when I remembered that we have a spare 7-foot piece of finished oak baseboard in the basement. I checked to make sure it wasn’t warped, then washed it off and used it as a long straightedge. It worked great for marking the quilting lines.
As I was marking the lines, I discovered a problem or, in Bob Ross terms, a happy accident. One of the lines went right through the signature. With my seam ripper in hand, I ripped out the signature and repositioned it. After that, it was exciting to start sewing quilting lines to make my project look more like a quilt than like two pieces of fabric with a filling. I laid the quilted quilt on the table, examined the lines for straightness, and saw some more happy accidents. There were so many crooked places in the lines that I wasn’t pleased at all. I got out my seam ripper (again) and sewed the lines (again), then checked how everything looked (again). There were still some areas that needed adjusting, so I ripped (again) and re-sewed (again). 😢 Bob R’s happy accident thing is wearing thin.
After the third round of stitching lines, the quilt looked ok–not great, but passable–so I moved on to the binding. I started pinning the binding near the signature and guess what . . . the binding covered the bottom edge of the signature. Dang it! How many happy accidents can one project have??? I ripped out the signature (again) and stitched it (again). Then I sewed the binding to the top of the quilt, mitered all the corners, folded it over and pinned it to the bottom, making sure I caught the bottom edge with my top pins. I was ready to “stitch in the ditch” to attach the back of the binding and finish the quilt.
But, . . . when I finished that job and turned the quilt over, almost half of my stitches in the ditches had failed to catch the edge of the binding, in spite of how carefully I’d pinned it. I’d been pretty patient about all the do-overs so far, but this was the last straw. I’d already clocked 43+ hours on this quilt because I’d ripped out so much of what I’d done and re-sewed it at least twice and sometimes three times. I’d had it! Good-bye, Bob Ross, and take your happy accidents with you!
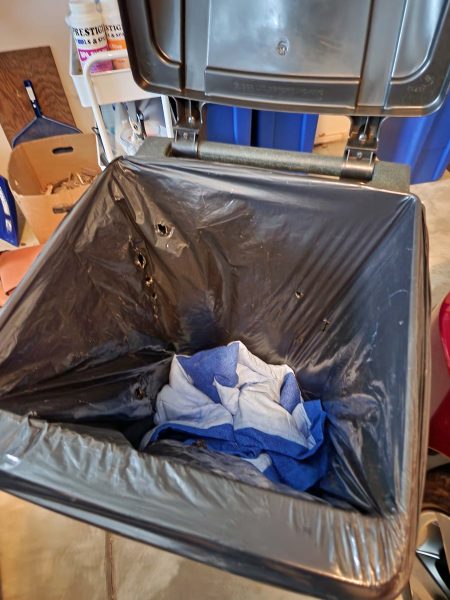
I was tired of the way this quilt was behaving and I told Ted I sincerely believed it was cursed and the universe was giving me a message. I was not happy with how my (almost) finished quilt looked and I felt like I’d have to make excuses for all the things that were not up to my standards. I definitely didn’t want another seamstress to see it up close and I did not want to give work of this quality to Ollie. “Despondent” perfectly described my mindset at that moment. I think the heavy-weight batting was the problem. It was too thick for my sewing machine to do its best work and it definitely made the quilt heavy. Not warm and cozy heavy, but “take this thing off of me” heavy. I decided (with Ted’s full support) to start over, and this is what I did with the Mickey Mouse quilt.
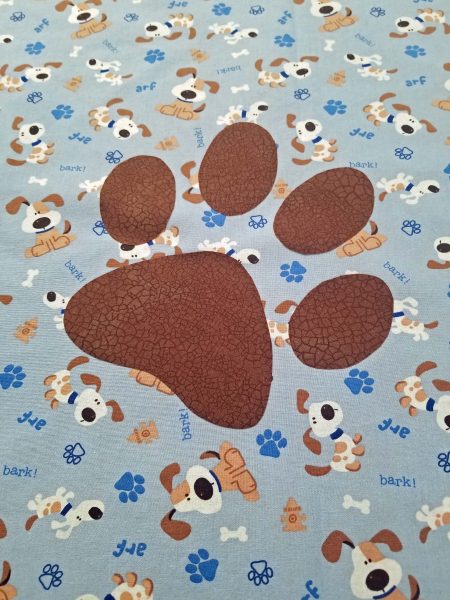
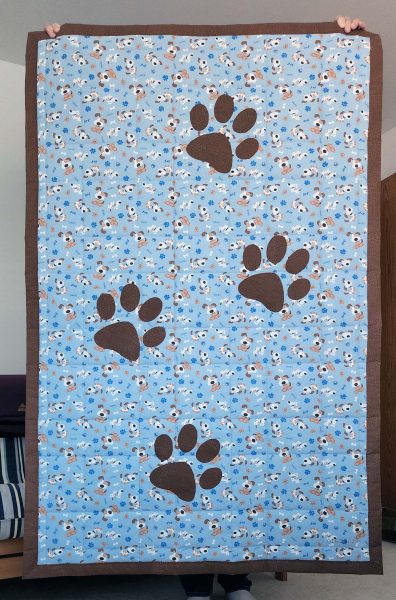
I bought some lighter batting, chose a blue fabric with a puppy print (remember, Ollie looks good in blue), and a brown fabric for the backing. The print I chose won’t remind Ollie of his Mickey Mouse toy, but what little kid doesn’t like puppies? I decided to stay with my original basic idea–appliqués and a binding–but instead of messing with a bias binding, I chose to do a self-binding.
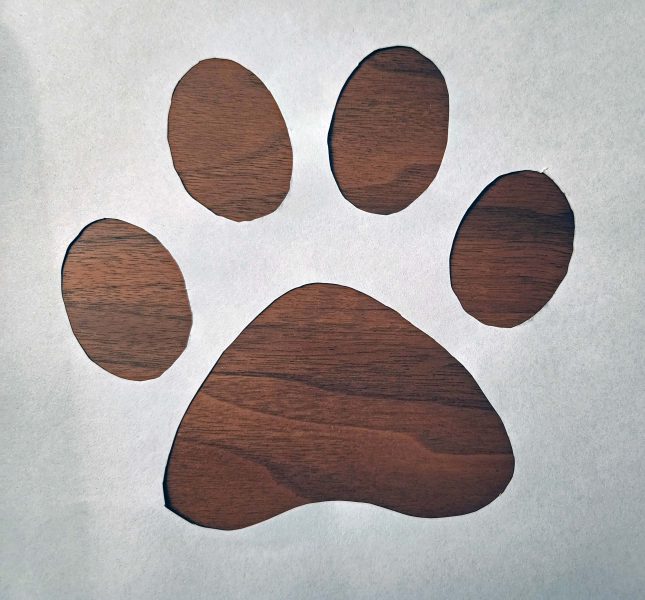
To complement the puppy-patterned fabric, I chose puppy paw prints for my appliqués. The Mickey Mouse appliqués were a single piece of fabric; the paw prints had five pattern pieces each. I printed copies of my pattern and cut the pattern pieces out of one of the sheets to create a template. It was so easy to place the template on the quilt fabric, fit the adhesive-bonded pieces into it, and iron them in place.
Never let it be said that I don’t learn from my mistakes. This time, I drew my quilting lines before sewing the signature in the corner. I knew exactly where to place it and it was in the right place the first time.
I put the three layers together, basted them, and sewed the quilting lines. Every single line was straight the first time! The heavy batting was definitely the problem. Folding over the edge for the self-binding was easy. I attached it with a decorative stitch, and that turned out very nicely. A feather stitch closed the open miters at the corners.
Voilà! In less than half the time I spent on the Mickey Mouse quilt, I had a quilt that I think is even cuter and that I was excited to give to Ollie. Anyone who wants to examine it–seamstress or not–is welcome to do so, because I’m proud of this work, not embarrassed by it. The trash can was the right place for the Mickey Mouse quilt and this one is for you, Ollie.
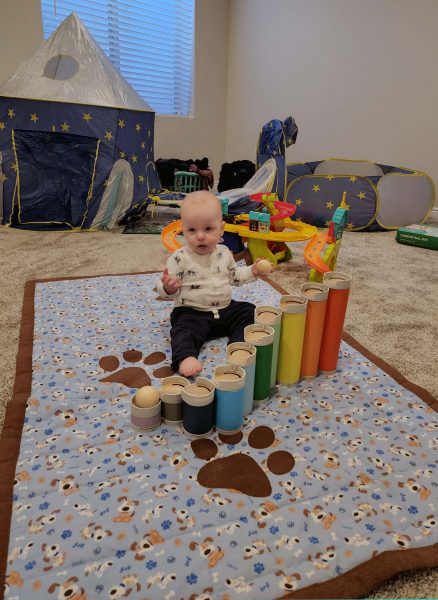
The trials and tribulations I experienced with the Mickey Mouse quilt were happy accidents after all. The puppy quilt turned out beautifully and, when Ollie saw it, he pointed at the puppies and said one of the three words in his current vocabulary–“dog.” Happy first birthday, Ollie.
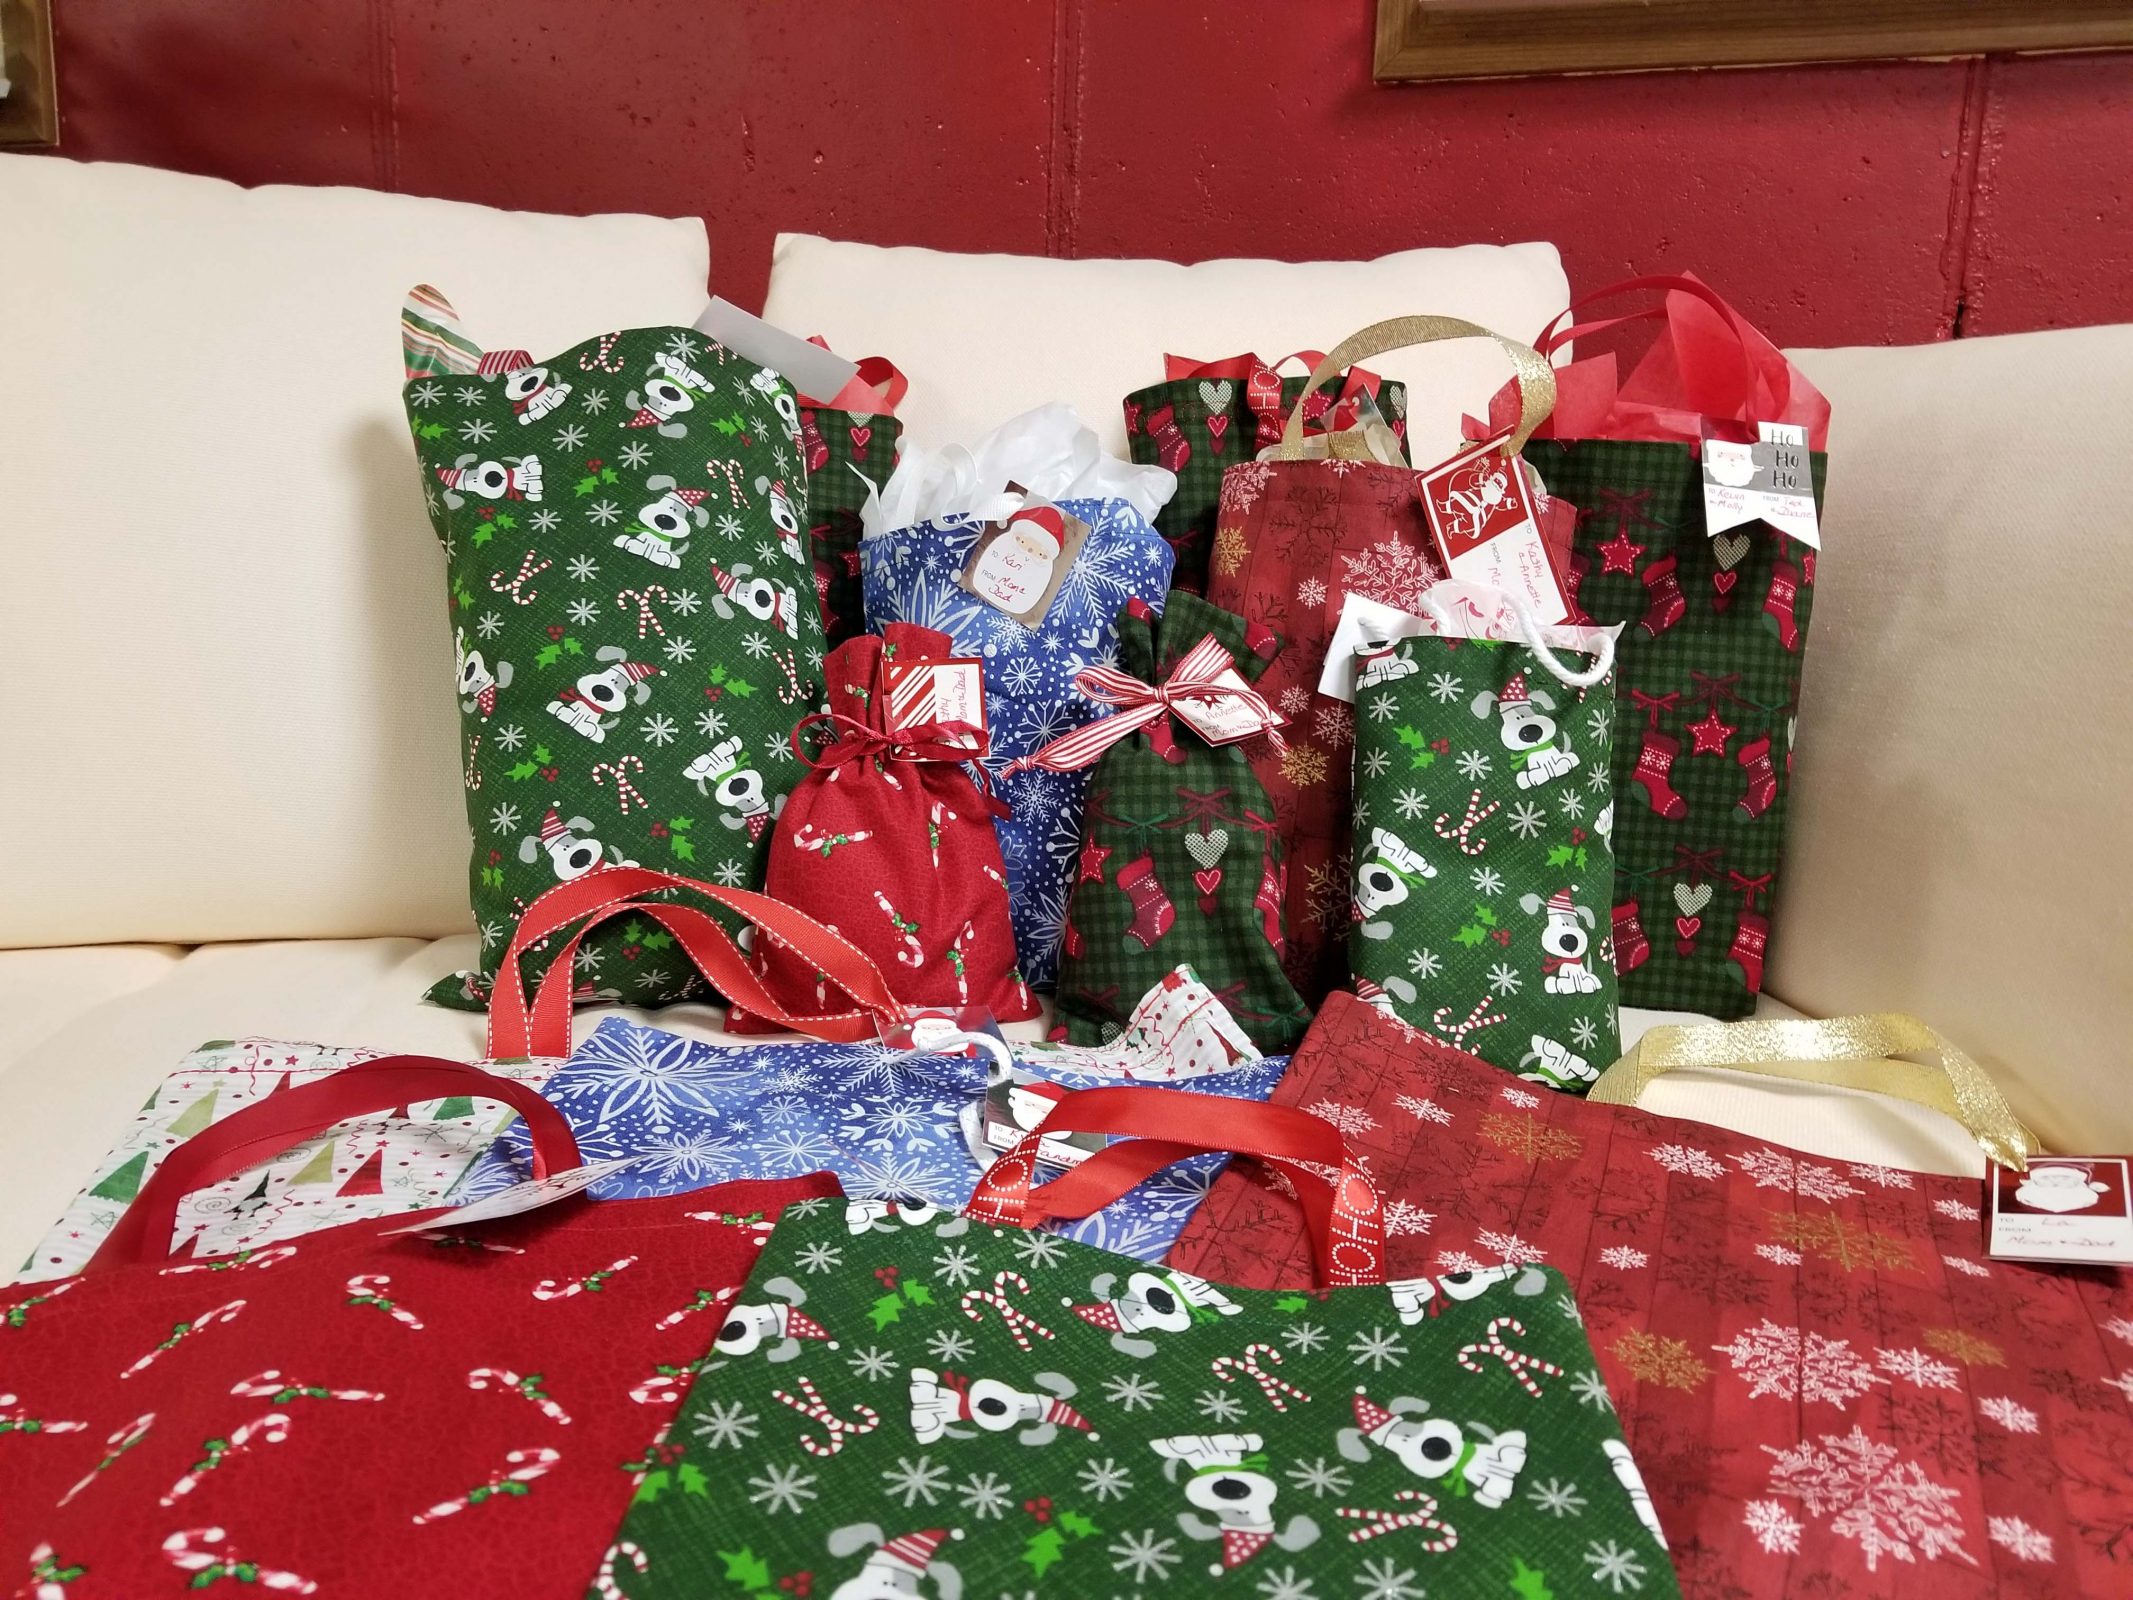
After learning a variety of sewing skills while making drapes for Teddy’s and Dylan’s bedrooms, Kari said she wanted to learn some additional skills by making re-usable Christmas gift bags. We worked together one afternoon and completed one bag for her. She took notes as we went along and has been working on her own, making additional bags at home. That’s a teacher’s dream: the student who transitions through learning and practicing to independence.
As long as I was going to teach Kari how to sew gift bags, I decided to make some for myself. Rectangular gifts are easy to wrap with paper; the gift bags are great for oddly-shaped items and for soft items (usually clothing) that don’t come in a box.
I made a variety of bag styles: sacks with handles, sacks with drawstrings and top ruffles, and rectangular-bottomed bags (like shopping bags). The finished products present a colorful display.
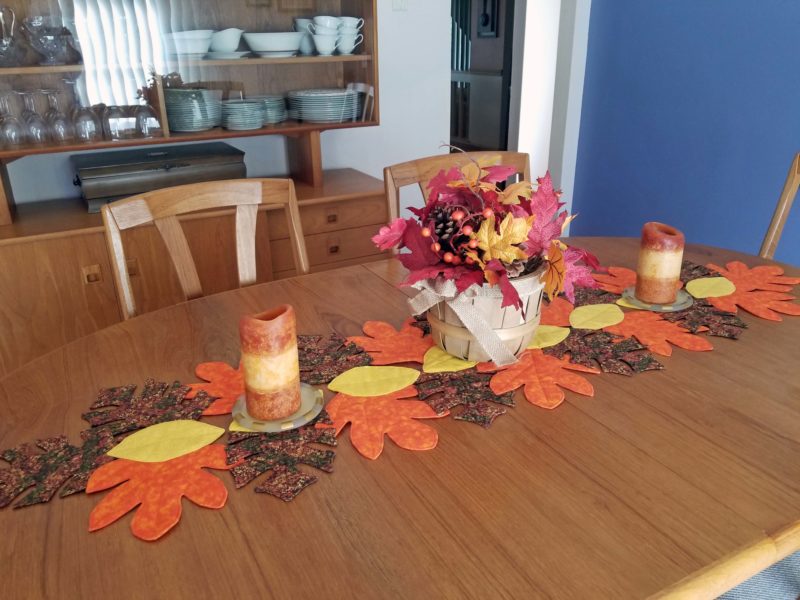
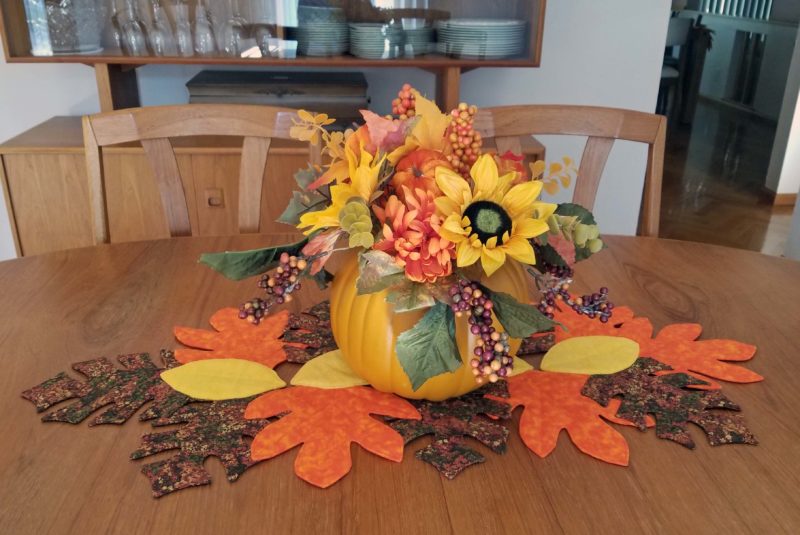
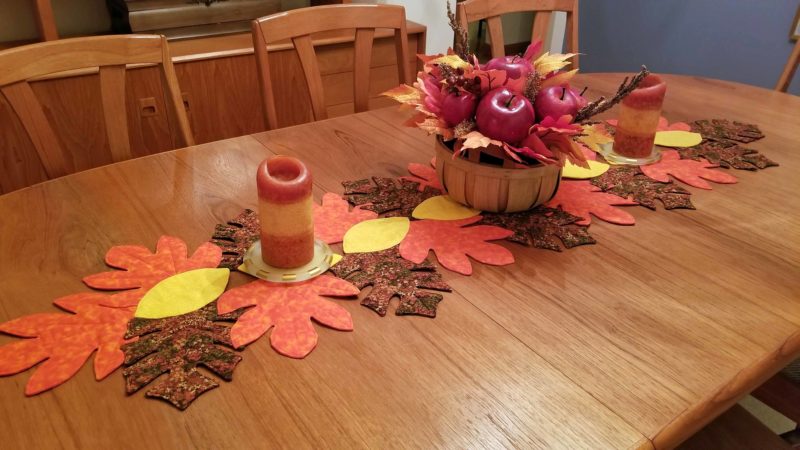
I recently sewed a fall runner for our dining room table. The directions told me to make 16 of each type of leaf, so I did, but I decided I didn’t need a runner that long. Because I already had the extra leaves, my choices were to (1) throw them away; (2) make a smaller table centerpiece for the kitchen table; or (3) make a centerpiece and give it to someone else. I chose (3). I’m celebrating a friend’s birthday with her this week. She has a smaller table than I do and she decorates with lots of fall colors, so I decided to give it to her for her birthday.
Here’s my table runner.
This is the smaller centerpiece I made with the leftover leaves.
Now it’s time to work on another project. Will it be something new or will I work on the project I hoped to finish by February 2021 (first paragraph of the link) and haven’t touched for almost a year? Time will tell.
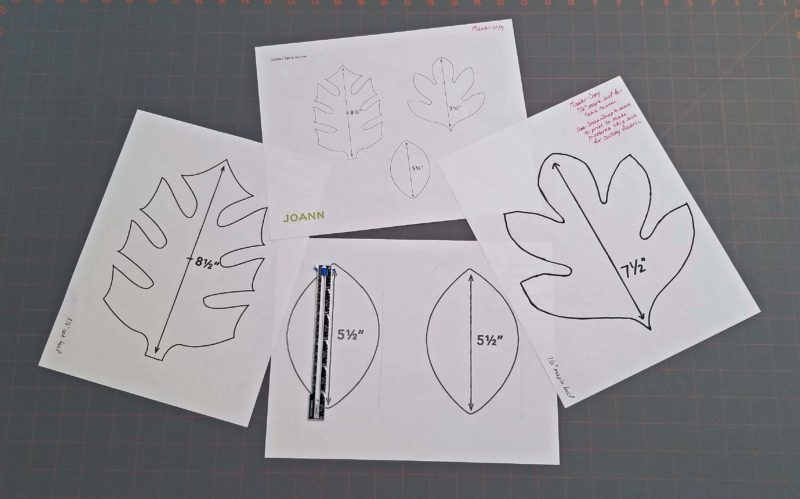
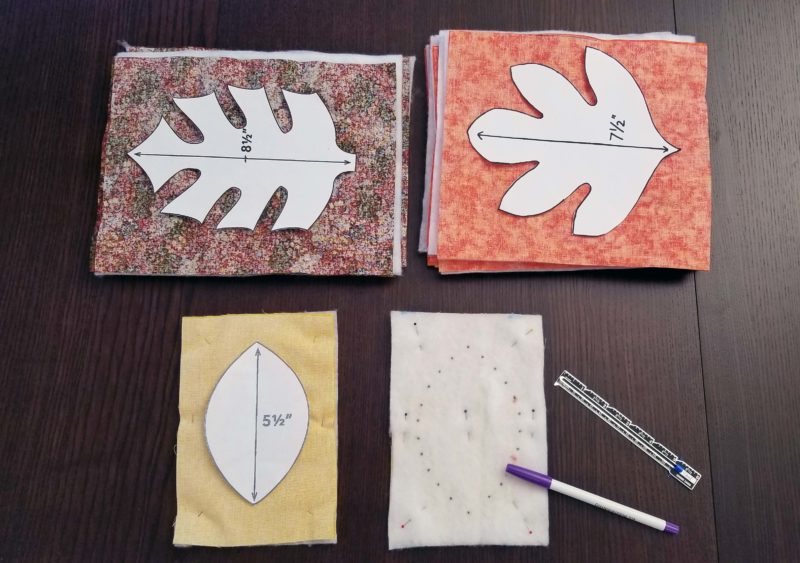
Last year, I saw a pattern for a fall table runner and I liked it. This year, I had time to make it. It was a Joann Fabrics project, so I downloaded it. The patterns were included, but not in the size needed (the top sheet of paper in the photo below). I thought about graphing the patterns to a larger size, but that was difficult so I came up with an easier idea. I scanned each individual leaf pattern and saved it as an image, then inserted it into a Word document. I set the screen display to 100 percent and enlarged the image until my ruler showed it to be the right size. When I printed the pages, I had properly-sized patterns.
I bought brown fabric for the oak leaves, orange for the maple leaves, and yellow for the oval leaves. There were three layers to cut for each leaf–two layers of fabric and an inner layer of craft-weight quilt batting. After cutting out the patterns, I marked them on the white batting and pinned the batting to two pieces of leaf fabric.
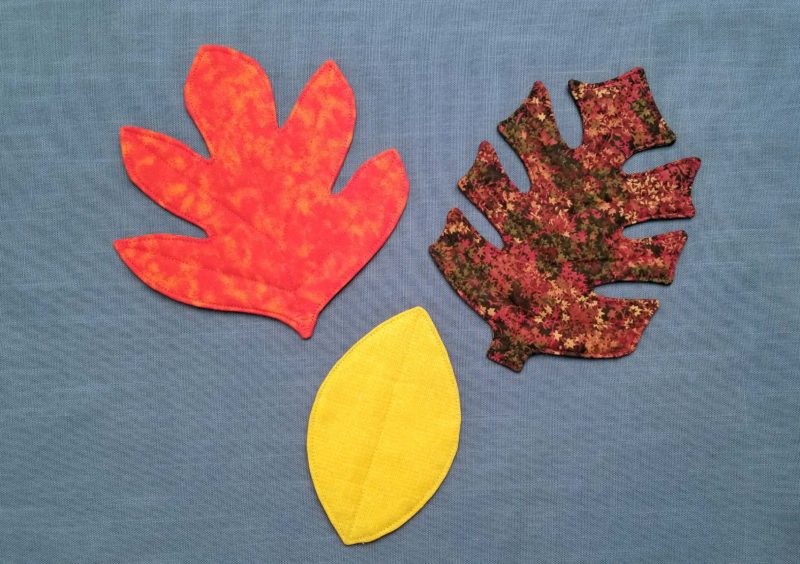
I sewed around the edges and turned the leaves through. The oval leaves were easy to turn; the maple leaves weren’t bad; the oak leaves were a real pain! After turning, clipping, and pressing the leaves, I topstitched around each one and then sewed “veins” on them to give depth to the quilted look. Only the center vein of the oval leaf shows well in the photo, but there is a stitched line down the center of each maple and oak leaf lobe.
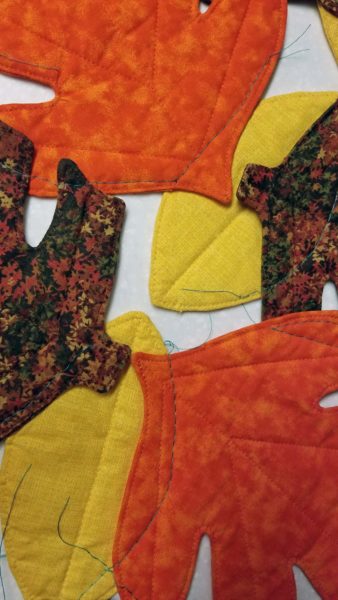
After sewing all the leaves, the directions told me to “arrange them in a pleasing pattern.” I used the project picture to get started and then did my best to fake creativity. Then I was instructed to sew the pieces together in a “free style.” Hah! That was far beyond my creative ability. I didn’t see any way I could sew the pieces together in a continuous and attractive manner, so I went with the alternate idea: join them by hand. The directions warned that joining the pieces by hand would increase the time needed to complete the project. No kidding! You can’t fool those project designers! I pinned the pieces together in my “pleasing pattern” and then machine basted them in a very free style (wherever two leaves overlapped) with a contrasting (blue) thread to hold them in place for my hand stitching.
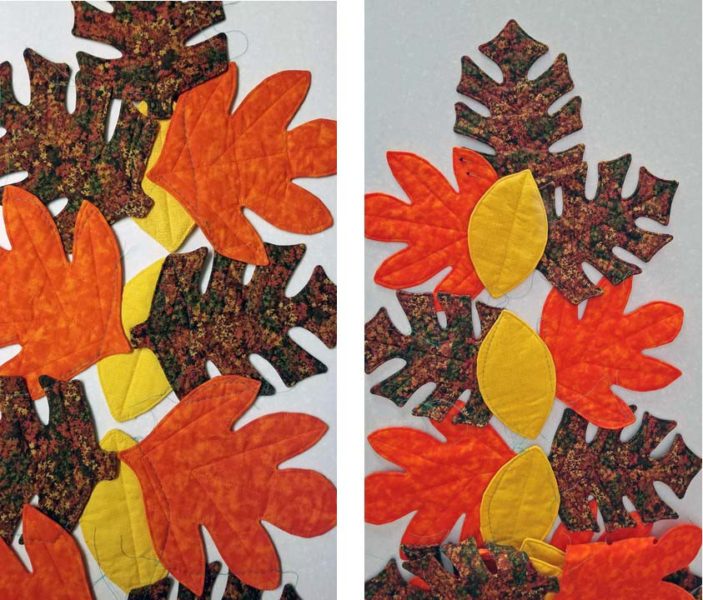
Then I moved to a comfortable chair with an end table at my side and spent hours hand-stitching the leaves together. My mother, an expert and professional seamstress, taught me that the back/inside of a garment or project needs to look as nice as the front/outside or the front/outside won’t look as nice as it should, so I stitched every joined edge on both sides of my runner. Patience is indeed a virtue. Thank you, Mom? Yes, thank you. I’m proud of my work and I probably wouldn’t feel as good about it if I hadn’t followed your advice. Ignoring the basting stitches that I haven’t yet removed, can you tell that the left photo is the underside and the right photo is the top side of my runner?
I think the finished runner looks very nice and very fall-like on our dining room table.
The project directions told me to cut and sew 16 leaves of each type, but when I put the leaves together, I decided I didn’t want a runner that long, so I stopped with ten each of the maple and oak leaves and eight of the oval leaves. I already have the additional leaves marked and ready to sew. Instead of throwing them away, I’m going to make a centerpiece that will be about half the size of my runner. I might keep the centerpiece for myself or I might give it to someone as a gift. I’ve never made anything like this before, so it was fun to try something new. Happy fall!
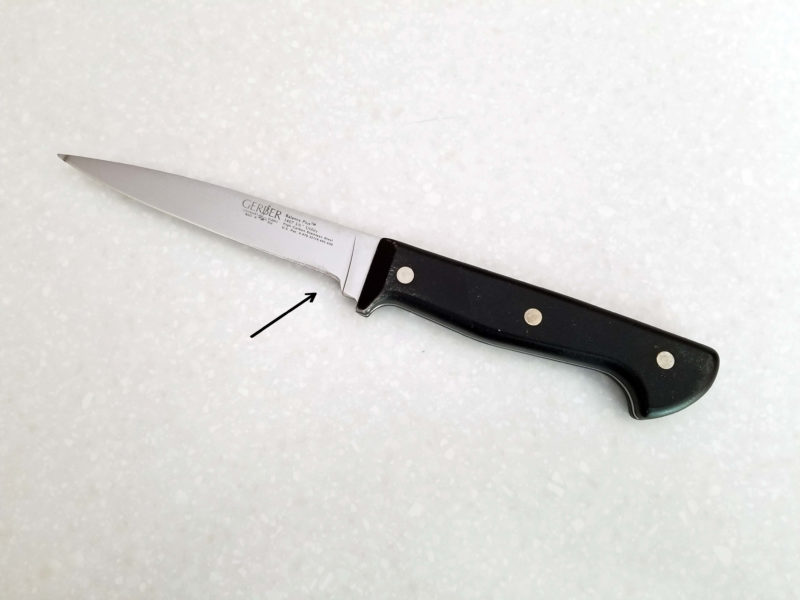
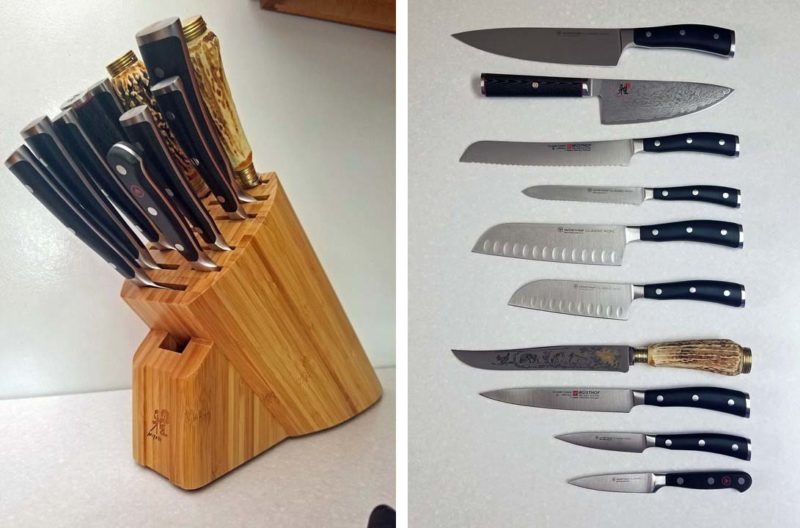
When Ted and I bought our first house and felt “settled,” one of the things I wanted was a set of good kitchen knives. We shopped and bought Gerber knives. After 48 years of use and sharpening, they have become notched at the handle end of the blade. The arrow shows where the blade edge used to be flush with the visible portion of the tang. I decided it’s time for new knives.
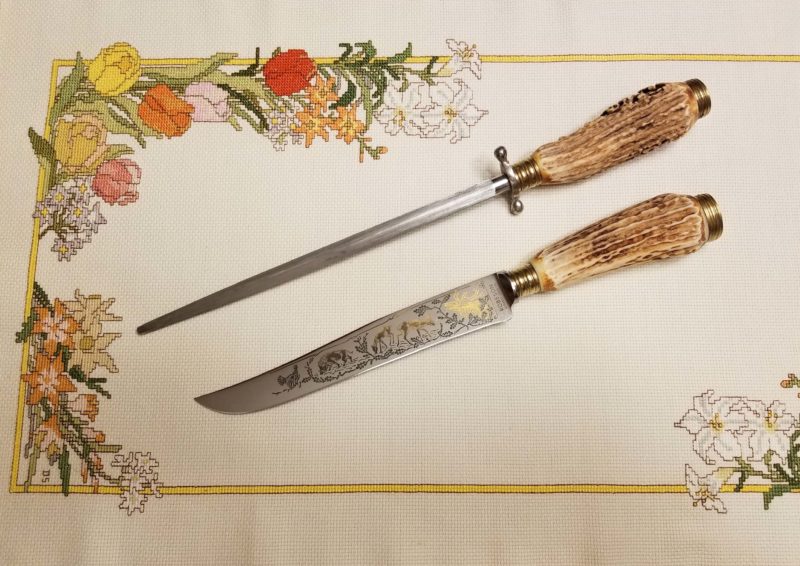
I checked all my knives and noted which ones I use a lot, which ones I might not replace, and which other styles of knives I might want. I decided to keep the bone-handled knife and honing steel Ted and I received as a wedding gift because they are so beautiful. And yes, that’s the honing steel I was using when I sliced my wrist.
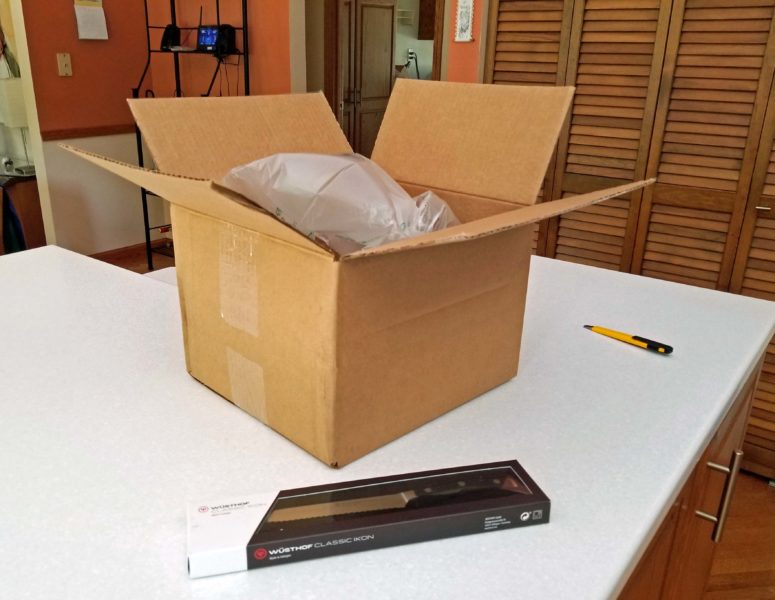
I liked my Gerber knives, so I went online to see if I could get some more. The answer is “no.” I learned that, in the 1970s, sometime after I bought my kitchen knives, Gerber dropped its kitchen line and now makes only hunting knives. I don’t hunt, so I did some more online research, went to Williams-Sonoma to see what they had to offer, and decided to go with Wüsthof. I kept the wedding gift knife and the Miyabi rocker knife I bought several years ago and added eight new knives. I treated myself to a new knife block as well. Of course, the supply chain is still out of whack from the COVID pandemic, so I only took one knife home with me. The rest trickled in, one knife at a time, over a period of three months. (Don’t you just love the supply chain?) Each knife arrived over-packaged. Does Wüsthof have only one size shipping box? On the other hand, none of the knives had shipping damage.
The new knives are amazingly sharp! Wüsthof sharpens its knives to a 14-degree edge; most knives are sharpened to a 15-degree edge. That single degree of difference is definitely noticeable.
Now that I have new knives, what shall I do with the old ones? I asked Kathy and Kari if they were interested in them. Kathy already has a set of knives and a knife block, but Kari said my old knives will be better than what she currently has and she’ll take the block too. That was easy!
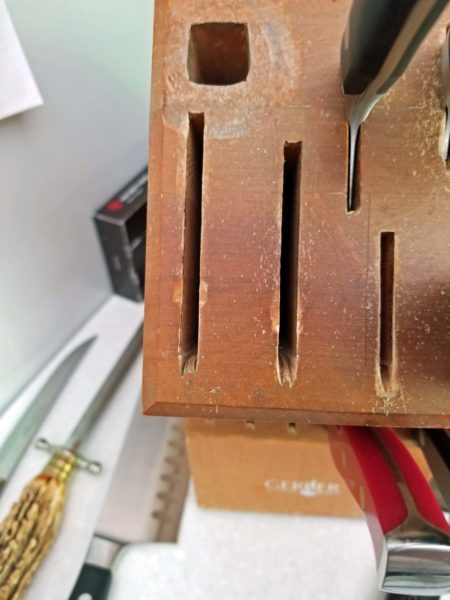
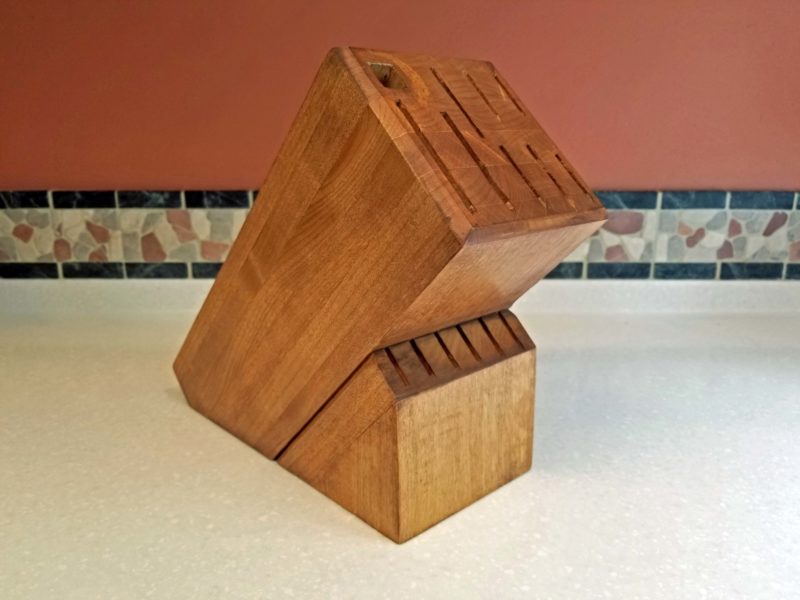
When I removed the knives from my old block to replace it with the new one, the old one looked pretty bad. That’s not surprising, since it’s 48 years old and has been used daily. You can see how putting the knives and the honing steel in and out created wear on the openings, and how the finish at the bottom edge is worn from years of wiping the countertop beside the block.
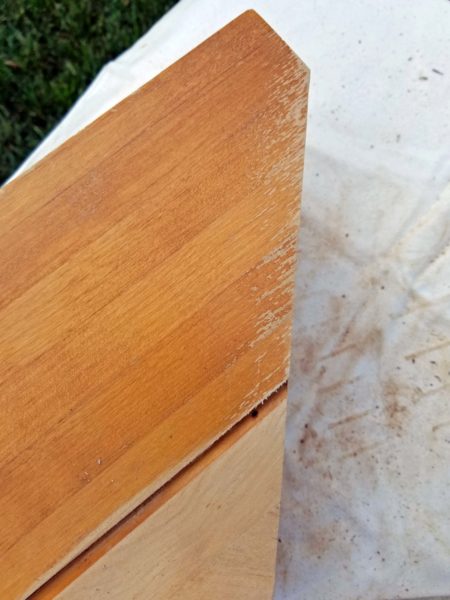
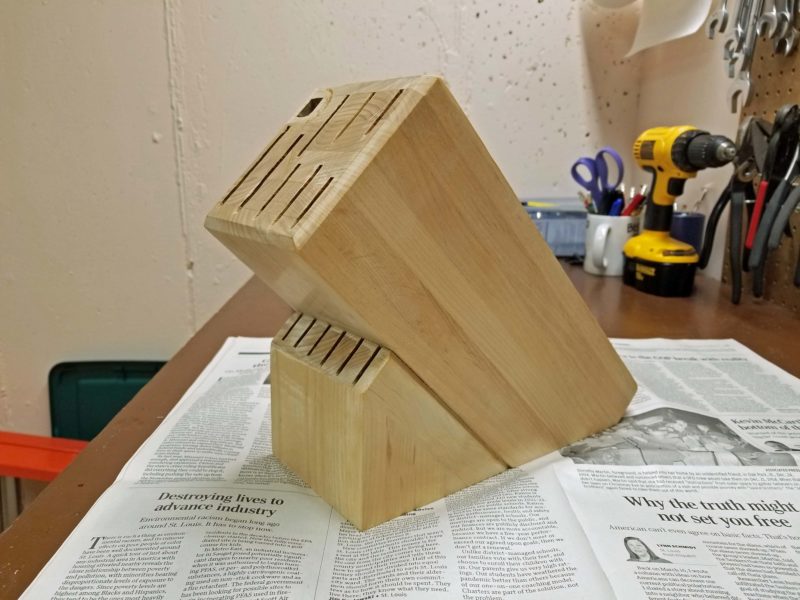
I felt badly about giving something that looked so worn to Kari, so I decided to refinish the block for her. It was easy to sand the finish off with my power sander. You can see more damage on this side of the block where it rubbed against the side of the refrigerator for many years. The bare wood shows where I’ve partially sanded the block.
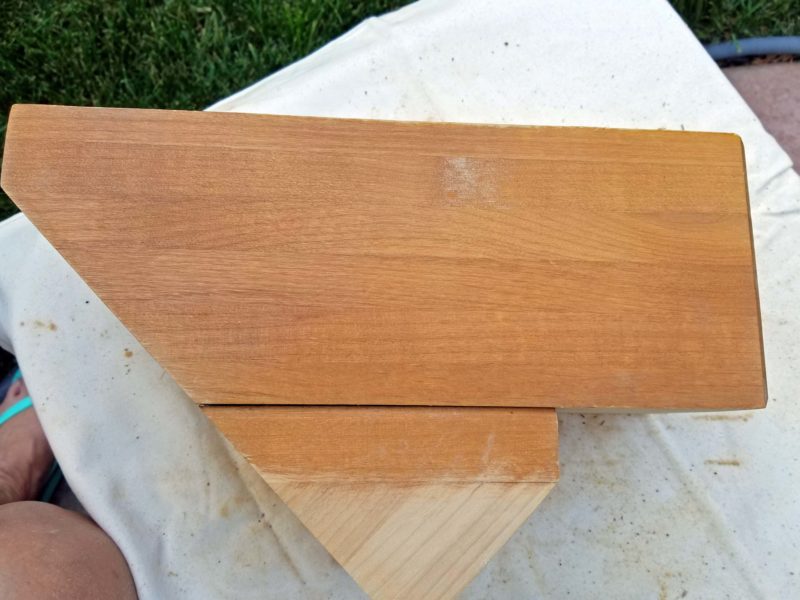
When I had the block sanded clean, the wood was beautiful. I finished the sanding portion of the project with a 600 grit sandpaper, and that made the surface feel as smooth as glass.
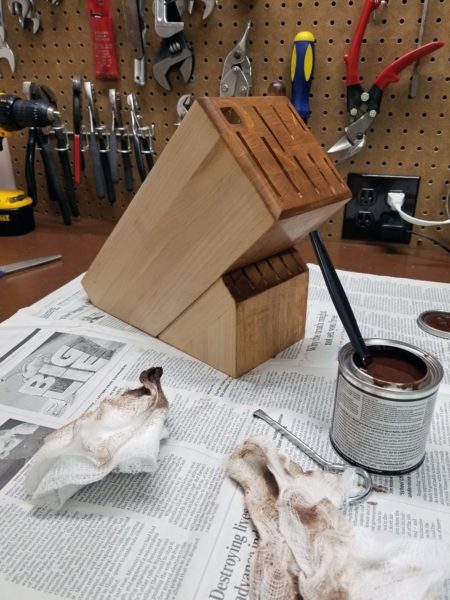
The next step was stain. I almost hated to put stain on the wood because the bare wood looked so pretty. I debated leaving the natural finish but, in the end, I went with a wiping stain and rubbed it in as much as I could.
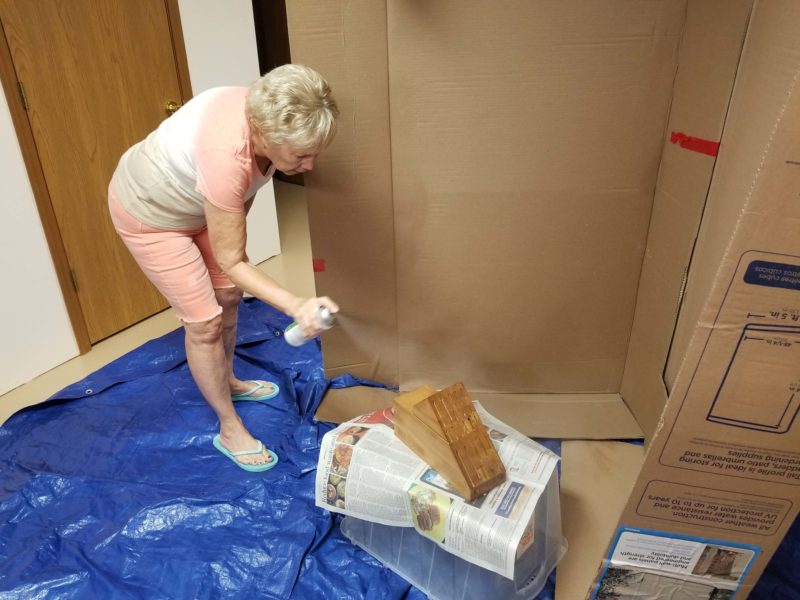
When the stain dried, it was time for varnish. I tried spray-on varnish for the first time. I wanted only a thin coat of varnish, and I thought it would be easier to apply a thin coat with a spray than with a brush. Luckily, we just bought a storage shed. Ted suggested we use the shed box to form a wall to catch the overspray.
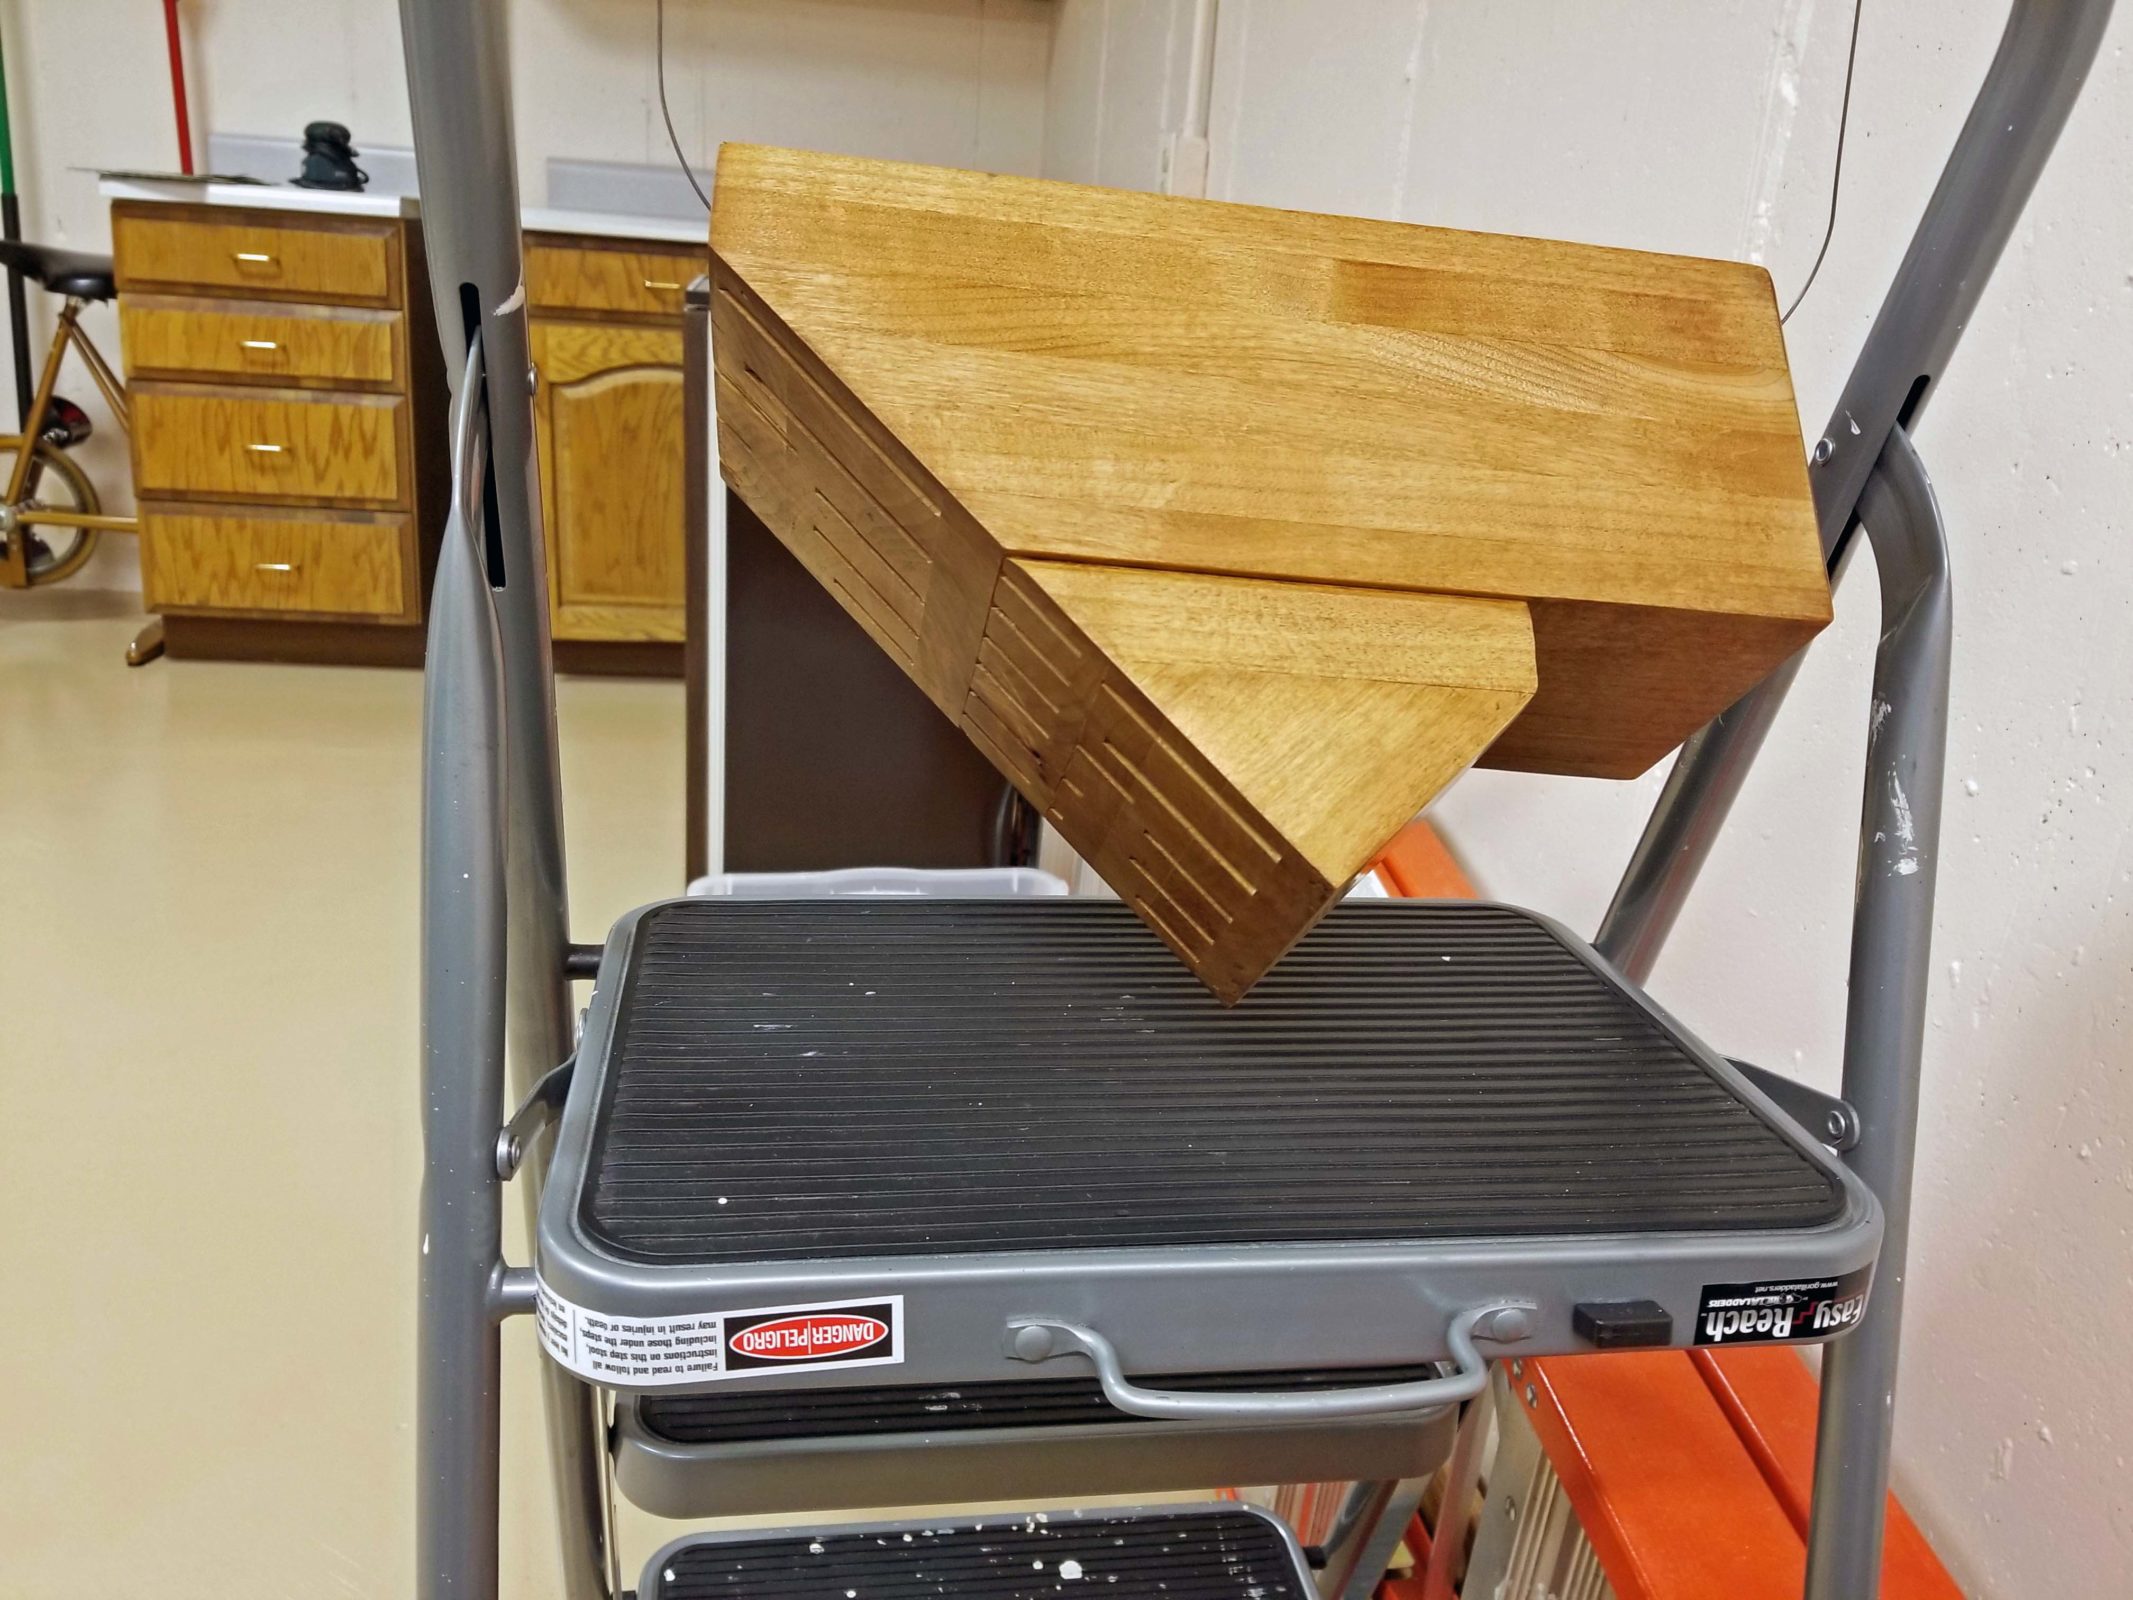
The spray varnish dried to touch in about five minutes and was thoroughly dry in four hours. With such a short drying time, it was possible for me to spray all sides of the block right away, rather than waiting a day to do whichever side had been on the bottom. When the entire varnished block was dry to touch (roughly 30 minutes), I fed a wire through the honing steel opening and suspended the block from two nails in a ceiling joist to finish drying. I hung the drying block over a step stool so that if the wire hanger failed for any reason, the block wouldn’t have far to fall.
And here’s the re-finished block–not looking shabby–for Kari. I haven’t re-finished anything for a few years, so this was fun for me. Now Kari and I both have updated kitchen knives and blocks.
When Ted and I ordered a replacement bay window for our kitchen last August, I decided new windows deserved new valances. Those currently on the windows might be twenty years old. (Time flies. Who’s counting?) At the time, I didn’t realize it would take six months to get the windows.
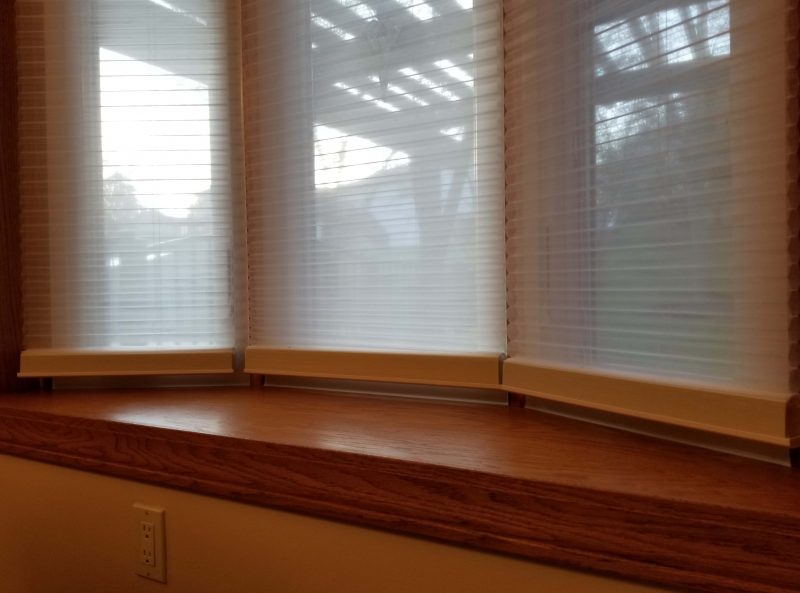
When Ted and I excitedly (?) re-hung the blinds–which are only three years old, not twenty–on the new windows in February, we discovered that they didn’t look very nice. To allow for the window-opening cranks on the old windows, the two outer blinds were made shorter than the center one. The new windows have recessed cranks, so the two shorter blinds looked like mistakes on the new windows.
I talked to the decorator about this and she suggested sending the blinds to the manufacturer to have the cords made two inches longer. (Because of the style of my blinds and the mechanism that operates them, re-stringing the cords is not a simple thing.) There was enough fabric in the length of the blinds to accommodate the extra two inches, so the adjustment was covered by my lifetime warranty. Great!
I stalled again on making the valances, deciding to wait until I had blinds on all three windows. In today’s market, however, instant gratification is becoming harder to find. It took eight weeks to get my adjusted blinds back. On the bright side, we now have three equally long blinds on these windows.
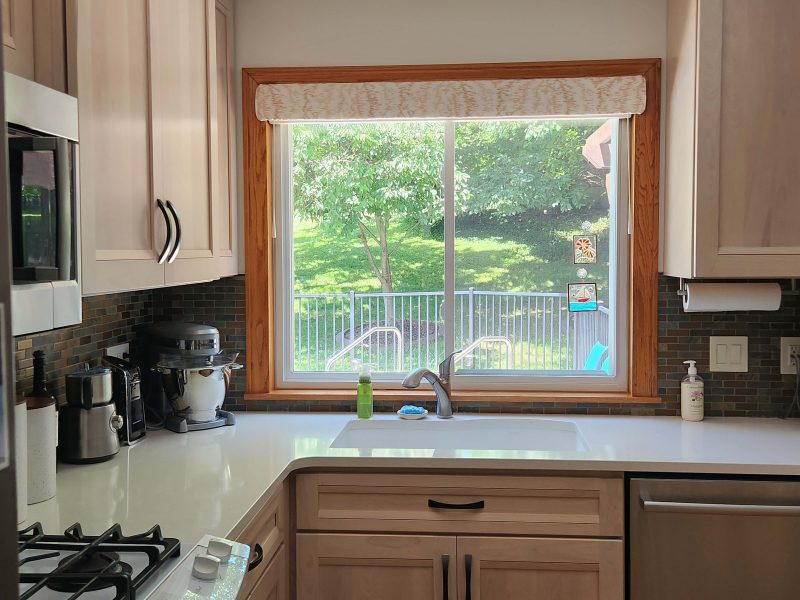
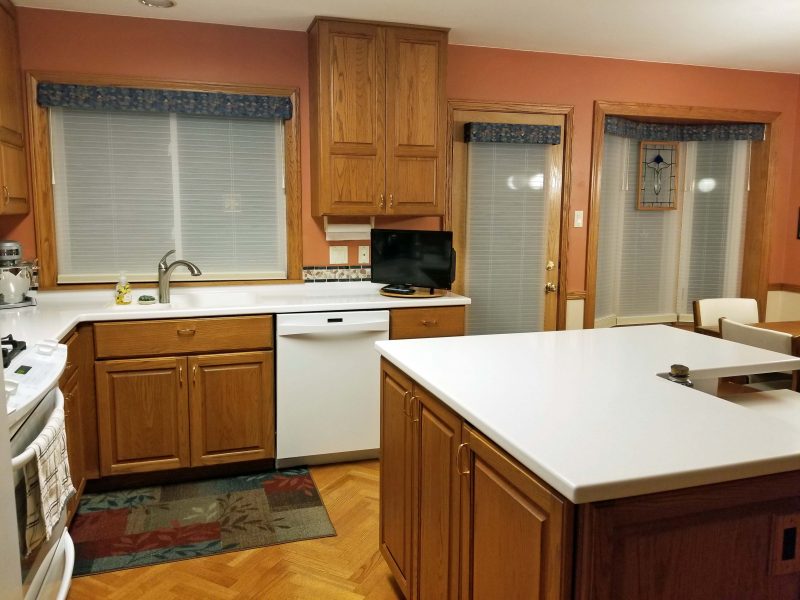
Eight months after deciding to replace the kitchen valances, with the windows replaced and the blinds adjusted, I headed for my sewing machine. It was a quick project. These are the old valances . . .
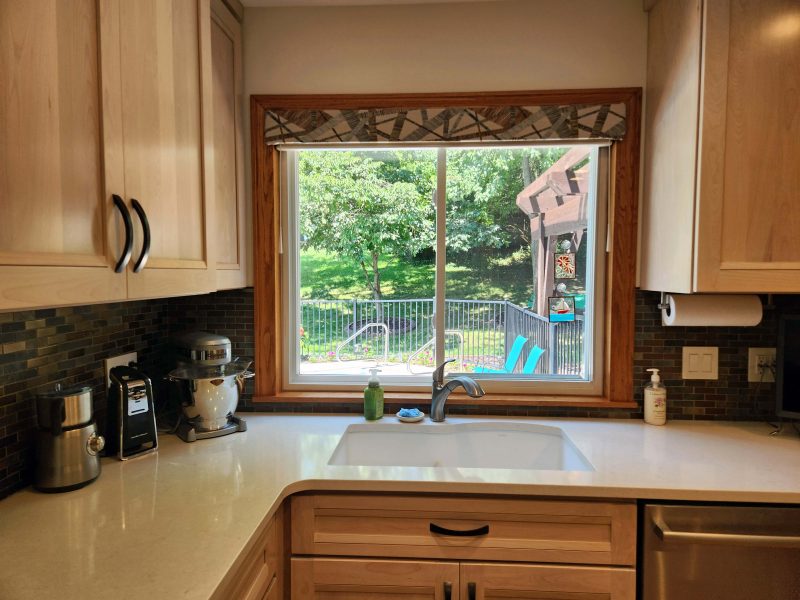
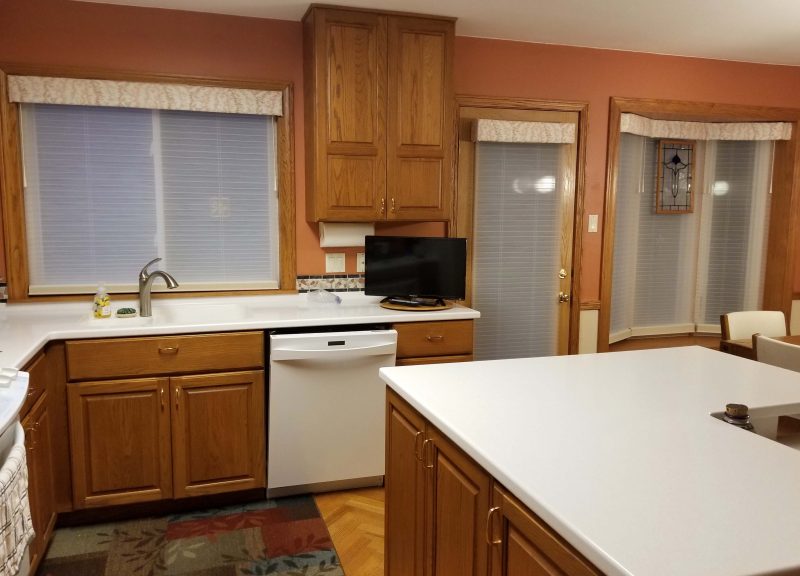
. . . and these are the new ones. There’s not a striking difference, but the lighter color is a nice change.
For several years, Kari has has been telling me she wants to learn to sew. A few years ago, I gave her a Christmas gift coupon for free sewing lessons, and she finally cashed it in. She decided to make draperies for Teddy’s bedroom. Her theory for choosing that project was that draperies would be pretty easy because they’re all straight seams.
Kari and I shopped together for fabric. We talked about different styles of draperies she could make and then we did some browsing. She took pictures of fabrics she thought Teddy would like, then went back to the store a few days later to purchase her final selections.
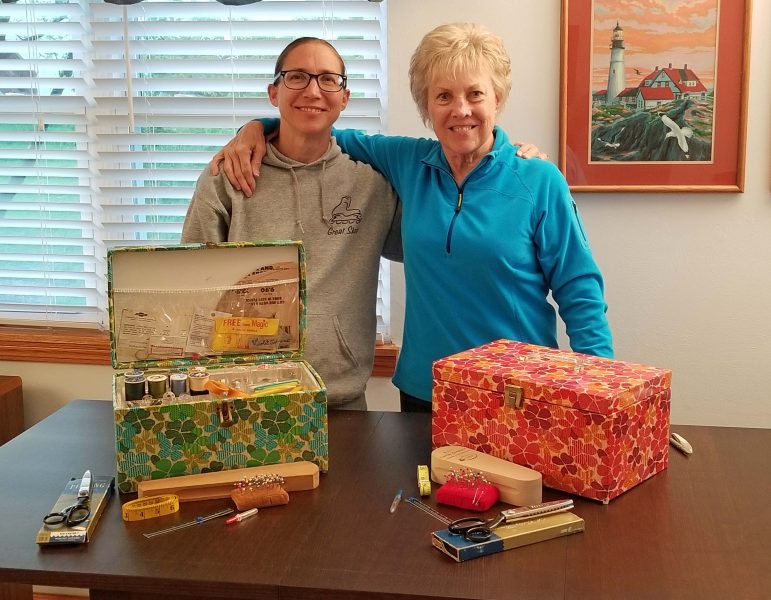
We decided to work at my house because I have a project room where we could simply leave things in progress. Kari measured Teddy’s window, then brought her fabric and her sewing box to my house. Before we went to work, we took some time to compare our sewing boxes. We have matching boxes because my mother bought one for herself and one for me when I was in college, and Kari has my mother’s box, including its contents. We shared memories of my mom / Kari’s grandma while we looked through the sewing boxes. Some of the items in our boxes match because my mom provided me with the same items she had.
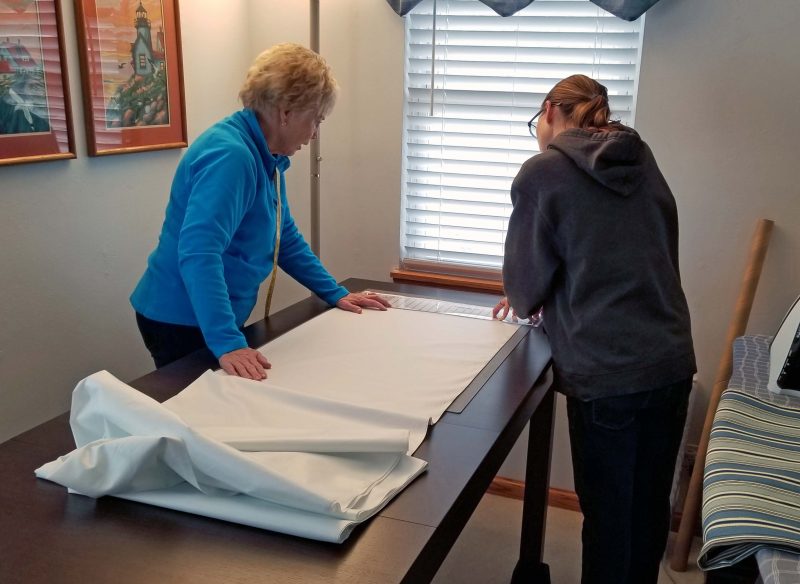
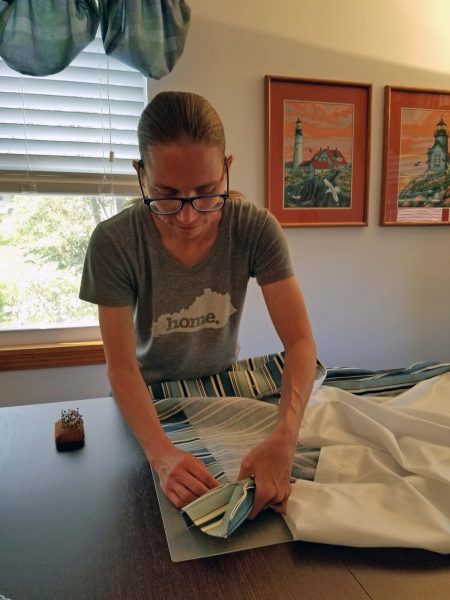
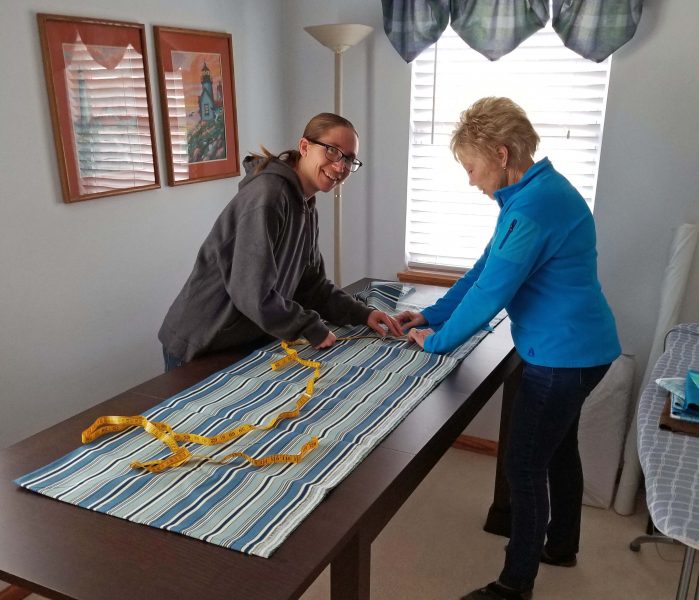
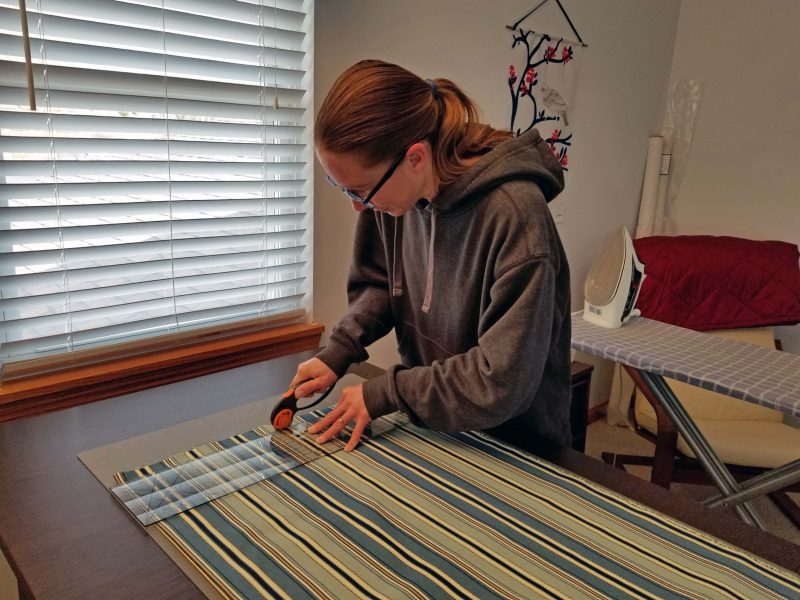
The first day of a sewing project is kind of dull because it’s all prep work: figuring, measuring, squaring the fabric, marking, cutting, etc. At the end of the session, you have nothing to show for those hours except a pile of cut fabric. We started by measuring and cutting the fabric. I had some leftover lining that I convinced Kari to use for Teddy’s drapes, so we measured and cut the lining too.
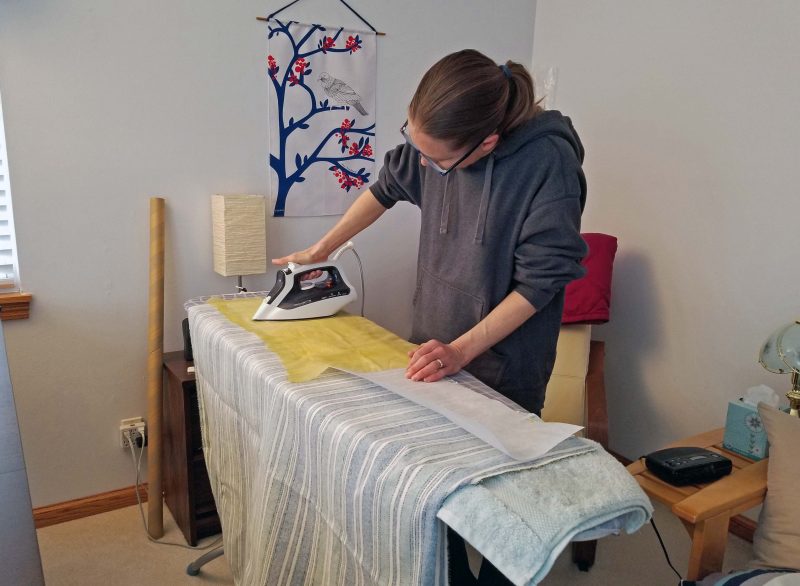
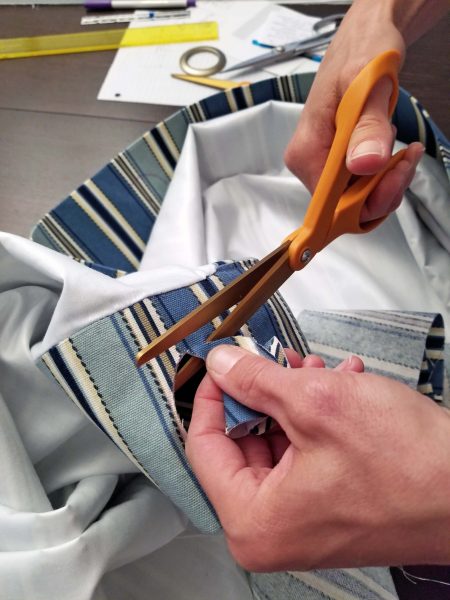
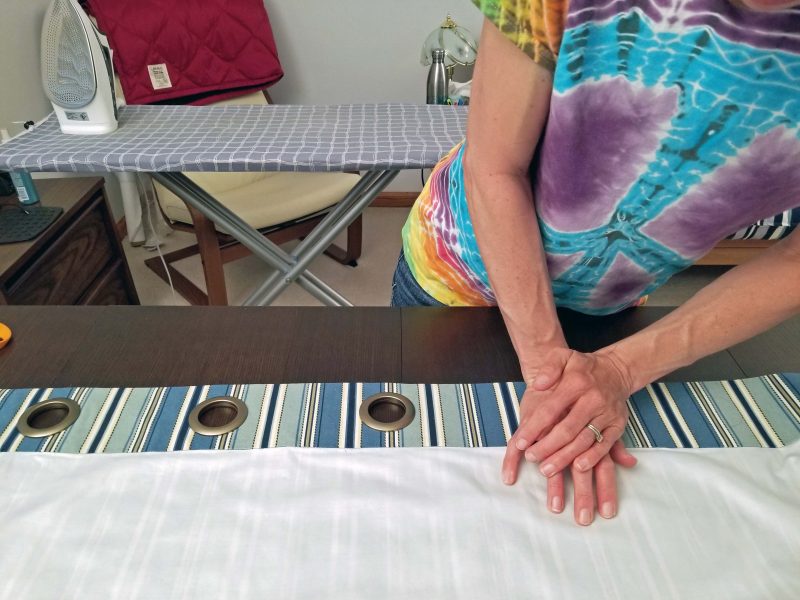
Because Kari decided to hang the panels from grommets, I suggested a heavyweight interfacing at the top to keep the fabric in the header from becoming floppy. Kari got a lesson on how to use a pressing cloth to apply iron-on interfacing.
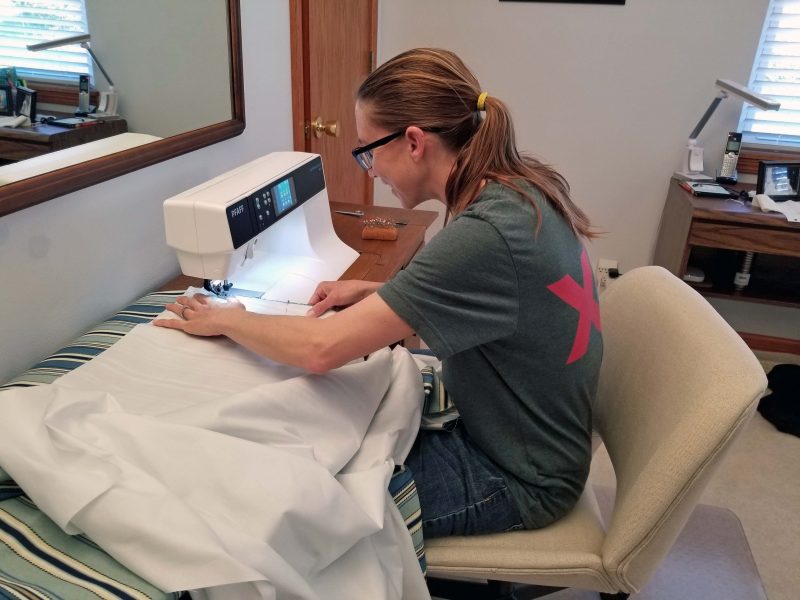
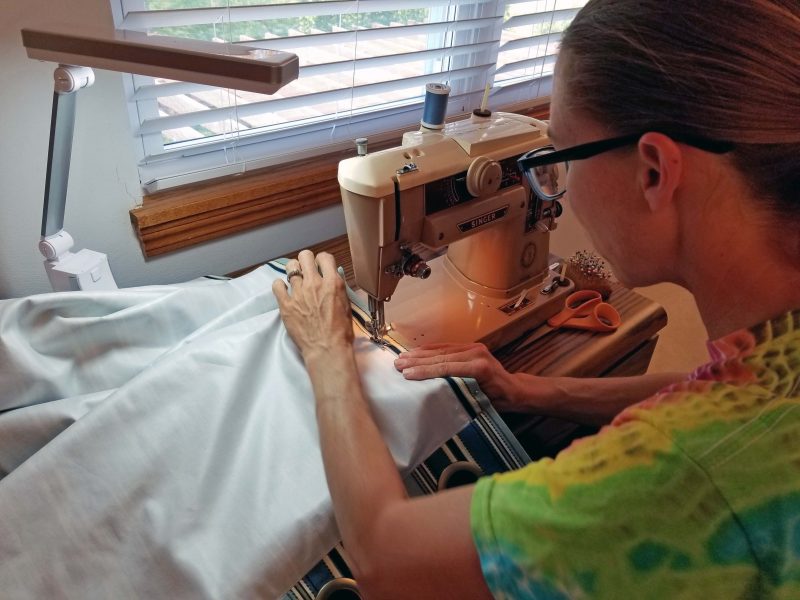
The spool pin on Kari’s sewing machine is broken and the replacement she ordered hasn’t arrived, so we used my sewing machine. Here’s a picture of Kari attaching the lining to the fabric. After sewing the fabric and the lining together, Kari told me I was right about the lining. (I knew she’d like it.)
Neither of us had ever used grommets, but we discovered that they’re pretty easy to install: mark, cut, and snap together. Kari did a perfect job of grommet installation.
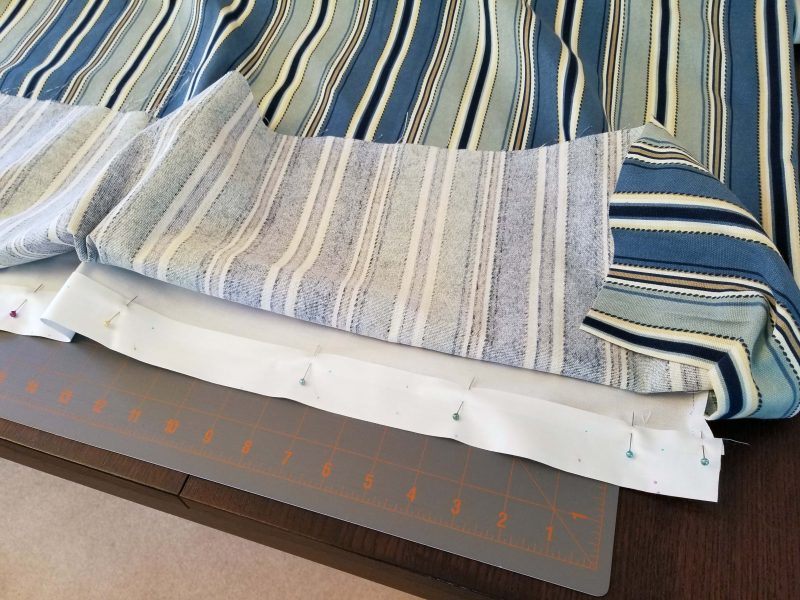
Then it was time to hem the first panel. Using Kari’s window measurements, we pinned the hem in place and she took the panel home and hung it from her new rod to check the length. All that time we spent measuring paid off: it was perfect. When she brought the panel back to my house, we marked and sewed the lining and the drapery hems.
It took four sewing sessions to finish both panels. After the first session, Kari said she would enjoy using my “heritage” sewing machine. (That would be my now-58-year-old sewing machine, which I haven’t had the heart to get rid of. I bought it in college and it has sentimental value to me.) I set up my vintage machine for Kari and she used it for the remaining sewing sessions. In the photo below, she’s finishing the topstitching on the side hems of the second panel.
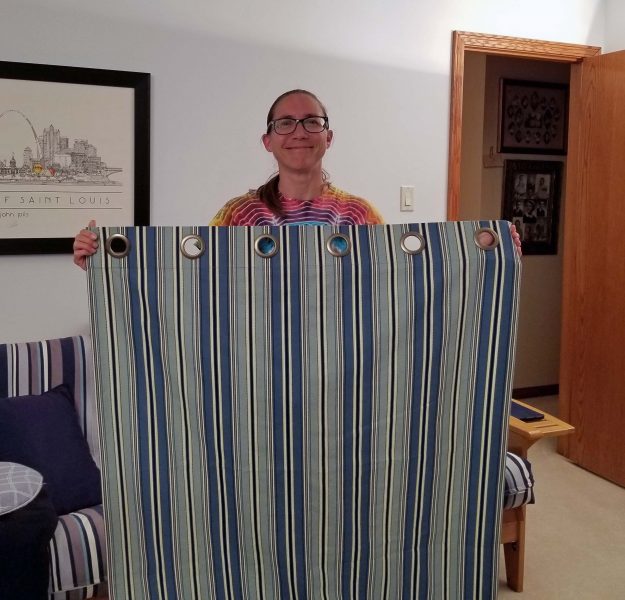
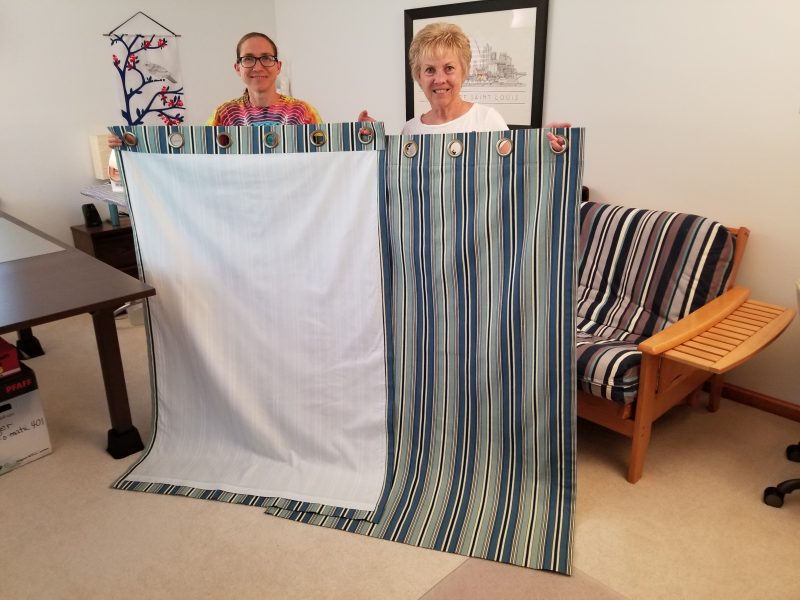
Kari said she wanted a picture of both of us with her finished draperies, so we called Ted to play cameraman. Here we are showing off Kari’s successful first sewing project.
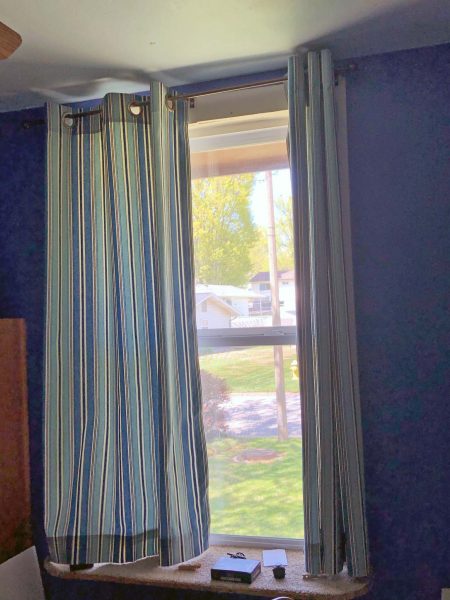
And voilá! Teddy has new draperies in his bedroom. Don’t they look nice?
Kari told me this project has inspired her. Now she wants to make a cover for her sewing machine, draperies for other windows in her house, and Christmas gift bags. She was disappointed when I told her we’ll have to wait for late summer or early fall for the Christmas fabrics to be available in the stores. I’m looking forward to sewing together again. It reminds me of my mom teaching me to sew. Pass it on, right?
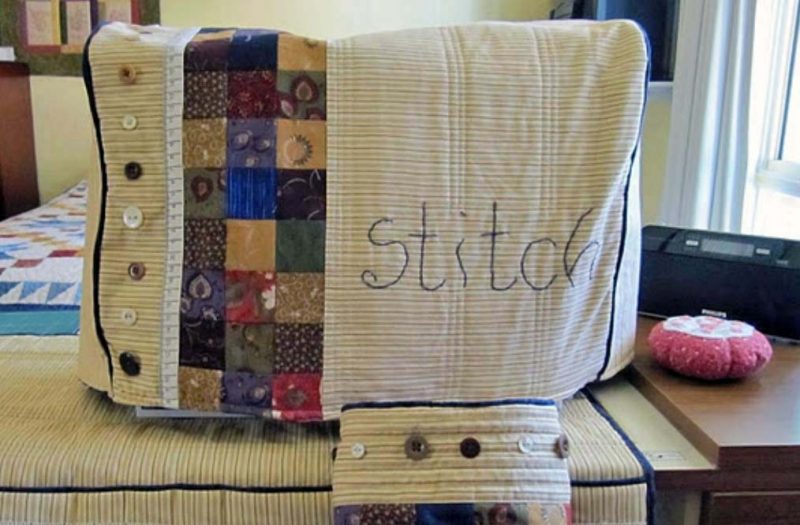
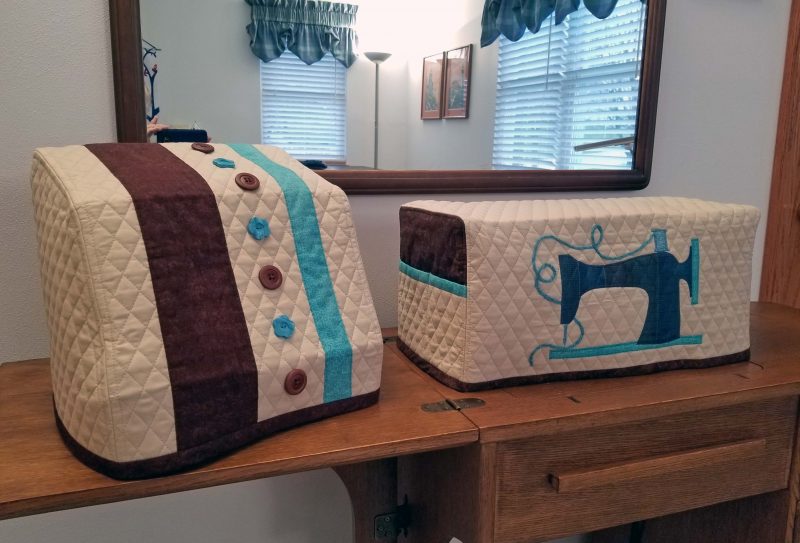
Now that my sewing machine cover is finished, I’m on a roll and decided to sew a cover for my serger as well. We had five rainy days in a row, so it was a good indoor project. My sewing machine came with a made-to-fit case, but my serger was sold in its birthday suit, so it needs a pretty dust cover.
Drawing a pattern for the serger was more of a challenge than doing that job for my sewing machine. My sewing machine is basically block-shaped, so I only needed to measure the dimensions of the block, then draw two rectangular pattern pieces.
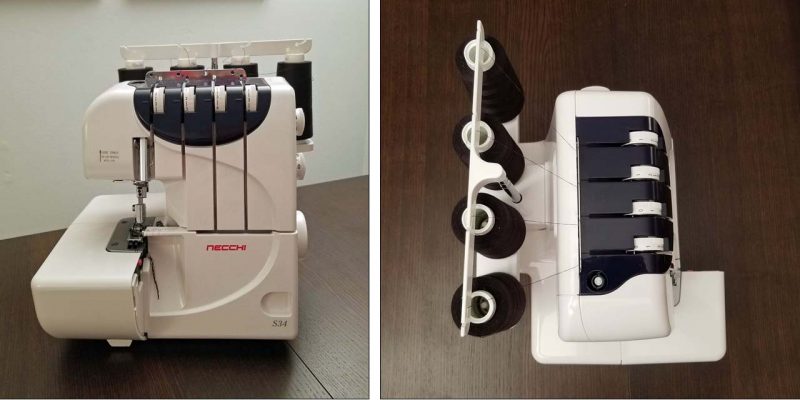
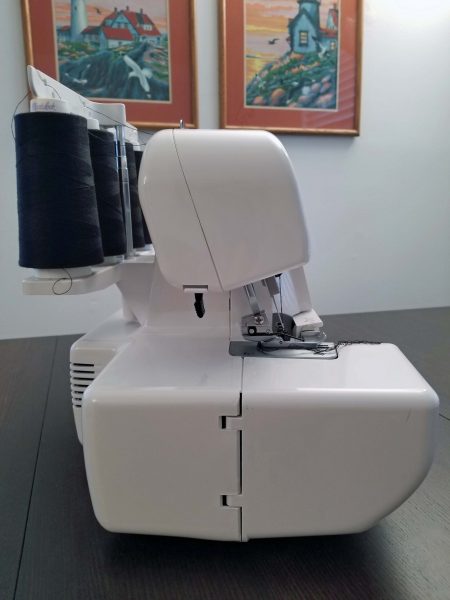
The serger, on the other hand, is–let’s say–“irregularly shaped.” That sounds nicer than “weird.” The spool stand and thread holder extend beyond the hand wheel on the right side of the machine. The cloth plate extends beyond the upper body of the serger on the left and in the front.
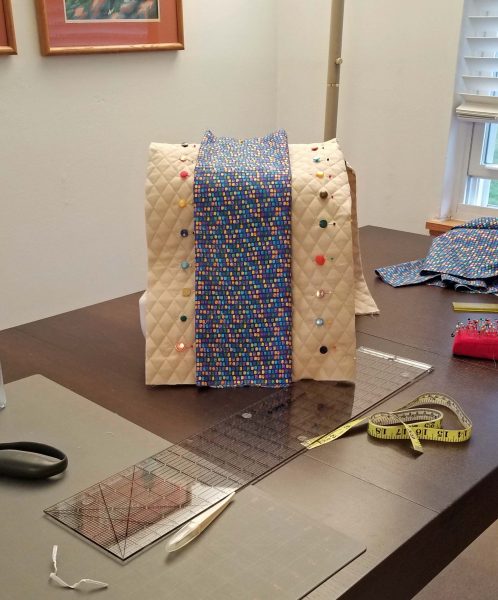
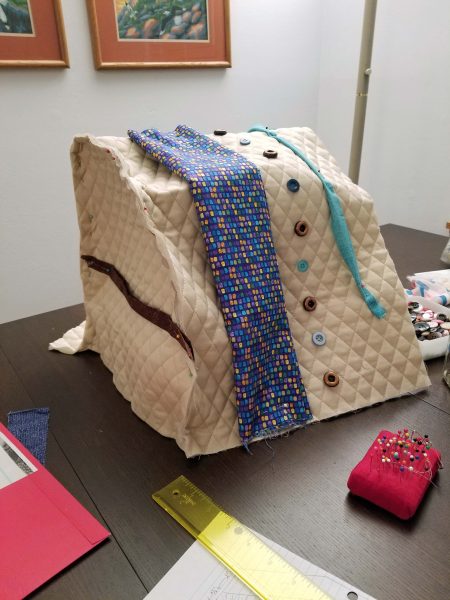
The top of the serger is offset from the bottom, and the back of the top is higher than the front. I can let the back side of the cover hang from the thread guide (the white top bar), but if I make the front square like a box, the upper part is going to sag. Where does one put the ruler to measure an odd shape like this?? I set each extended section against a wall and measured outward from the wall.
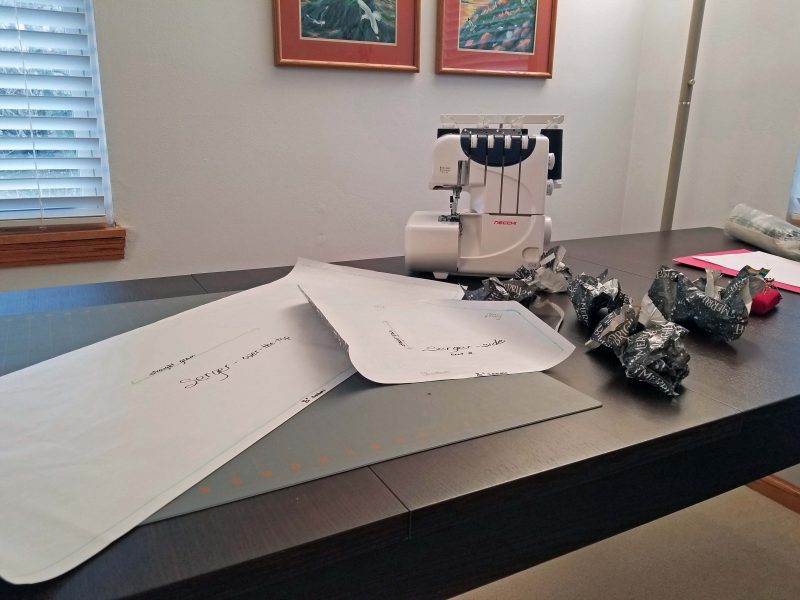
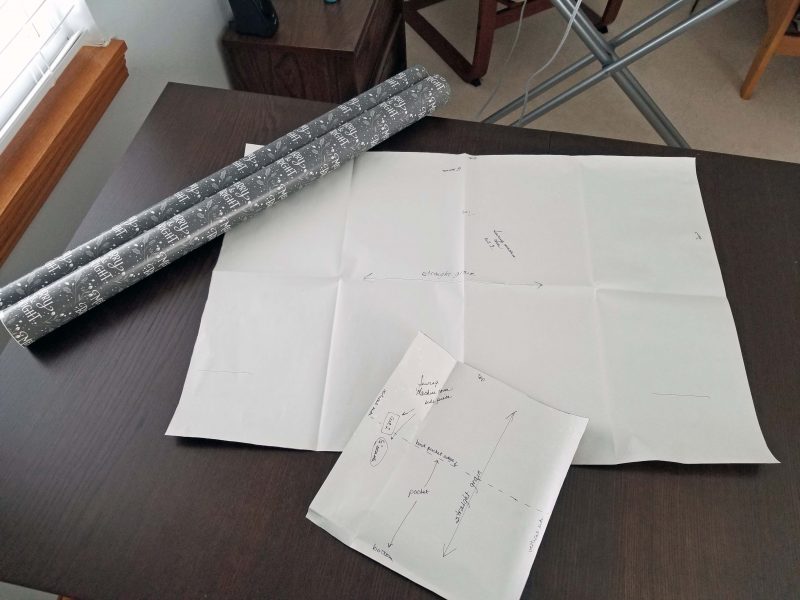
The next step was to translate those measurements into a flat paper pattern. I drew the long, over-the-top piece first, because that was the easy part. Then I had to take my height, width, and whatever measurements to draw a side piece that would shape the over-the-top piece to my serger. I drew and cut out a side piece and held it up against the serger to see if the angles and corners were in the right places. They weren’t. After a number of tries, I eventually got it right. It’s a good thing I have a lot of this ugly gift wrap left on the roll.
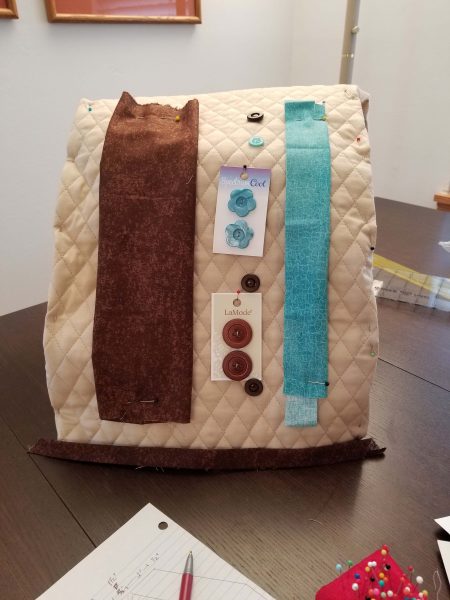
Ok, I’ve got a pattern, but what will I do to make the finished product more attractive than the plain fabric I’m using for the cover? This was my original decorative idea (thank you, Google), but it’s a sewing machine cover and my serger is too narrow to attach a fabric band, then sew the word “Stitch” large enough to be read from more than a foot away.
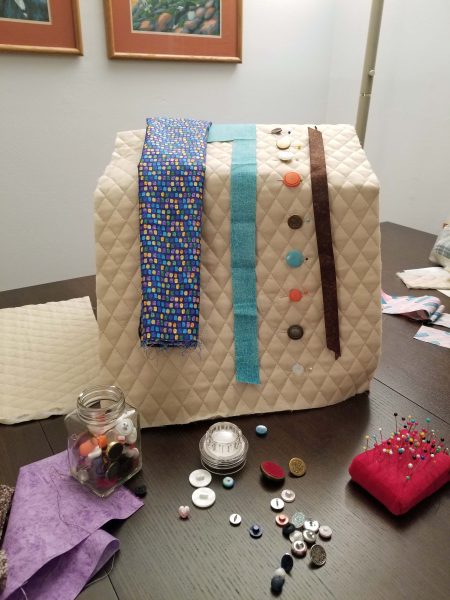
I got out my box of scrap fabric and tried different ideas, including decorative pockets. The fabrics weren’t necessarily the colors I wanted to use; I was just looking for a design style that appealed to me. My plan was to worry about the details after I created a design I liked. BTW, creative design is not my long suit, so don’t laugh.
This process took hours. I finally set it aside to ponder the problem overnight. The next day I asked myself why I was trying so hard to come up with a new idea. I really like the colors I used on my sewing machine cover, so why am I avoiding using the same colors to make a coordinated set of covers for my two machines?
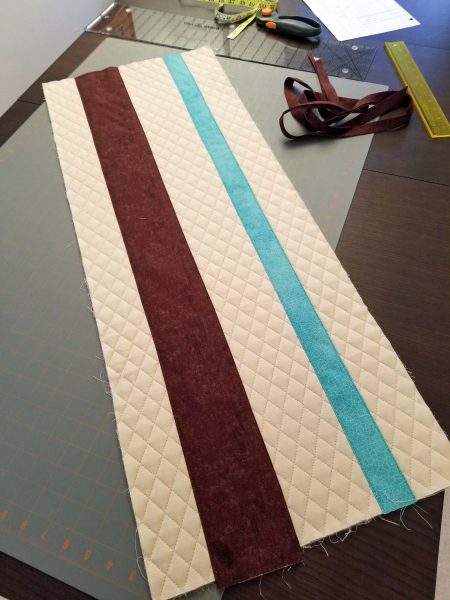
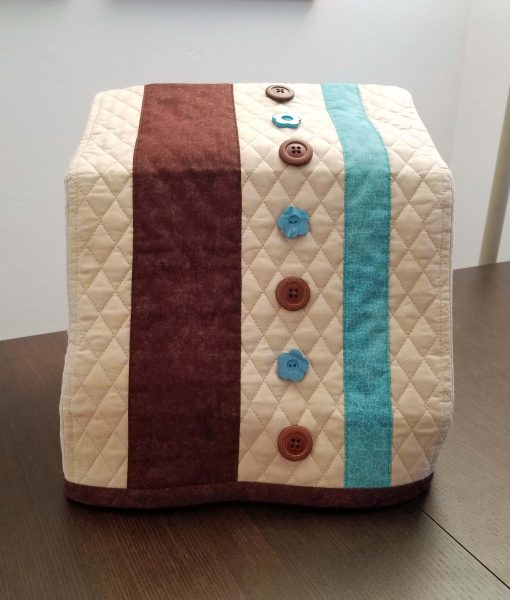
The answer: Because I used scraps for my sewing machine cover, so I’d need to buy more brown and turquoise fabric. I was trying too hard to avoid shopping for fabric when I have a boxful of scraps. I didn’t have any suitable large buttons in my button box either, so I had to buy buttons too. When I did, I finally felt good about sewing my serger cover pieces together.
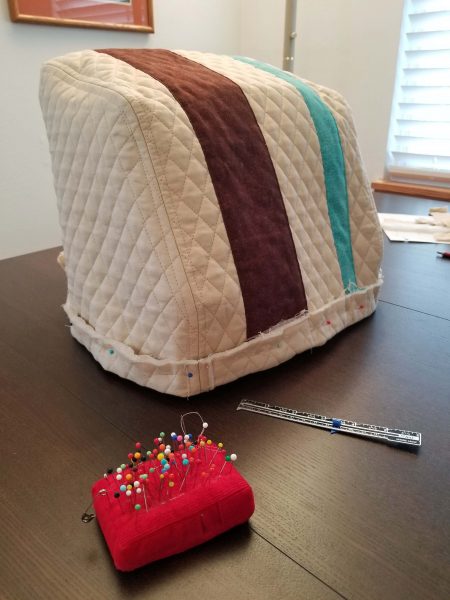
My sewing machine cover had two 90-degree rounded corners on each side that needed clipping and notching; my serger cover has a 90-degree rounded corner at the back and two angles on the front that needed clipping and notching on each side. I edge-stitched the seams to keep them flat. Just like with my sewing machine cover, I cut some extra length on my fabric because it’s easier to trim it off than to add it later. I’ve got to start trusting my measurements. Again, just like with my sewing machine cover, I needed to cut off the extra length I added.
When I finished the cover, I was very pleased. The fit is perfect, all the corners and angles are in the right places, I like my decorative design, and I like the colors. I also like having a coordinated set of covers.
When I bought my sewing machine (December 2016), I also bought some fabric to make a cover for it. Do I have a cover for my machine? Of course I do–a matching custom-fitted carrying case came with the machine–but when I’m working on a project and want to leave my machine out for a few days or weeks, I want a simple dust cover to drop over it. I decided the time has come to dig out that four-year-old piece of fabric and make my dust cover. After mulling over ideas for a few days, I searched online for patterns and designs.
I couldn’t find anything closer to a pattern than “how to measure your sewing machine,” so I had to be a bit more creative than I’d planned. Not that sewing a basic box to fit over my sewing machine is that complicated. There were serious (?) decisions to be made, however, such as whether to make the long piece fit over the top of the machine from side to side or from front to back (I chose front to back) and how to make the finished product a little more exciting than a blah fabric box.
Ok, we are go to sew. I measured my sewing machine as directed and created a pattern (a large rectangle and a small rectangle–woo-ee!). I even remembered to add seam allowances, and I measured generously for the hem on the theory that it’s easier to cut an inch off than to add an inch if it’s too short. I didn’t have paper large enough for my over-the-top piece, so I used a roll of Christmas gift wrap that I don’t like.
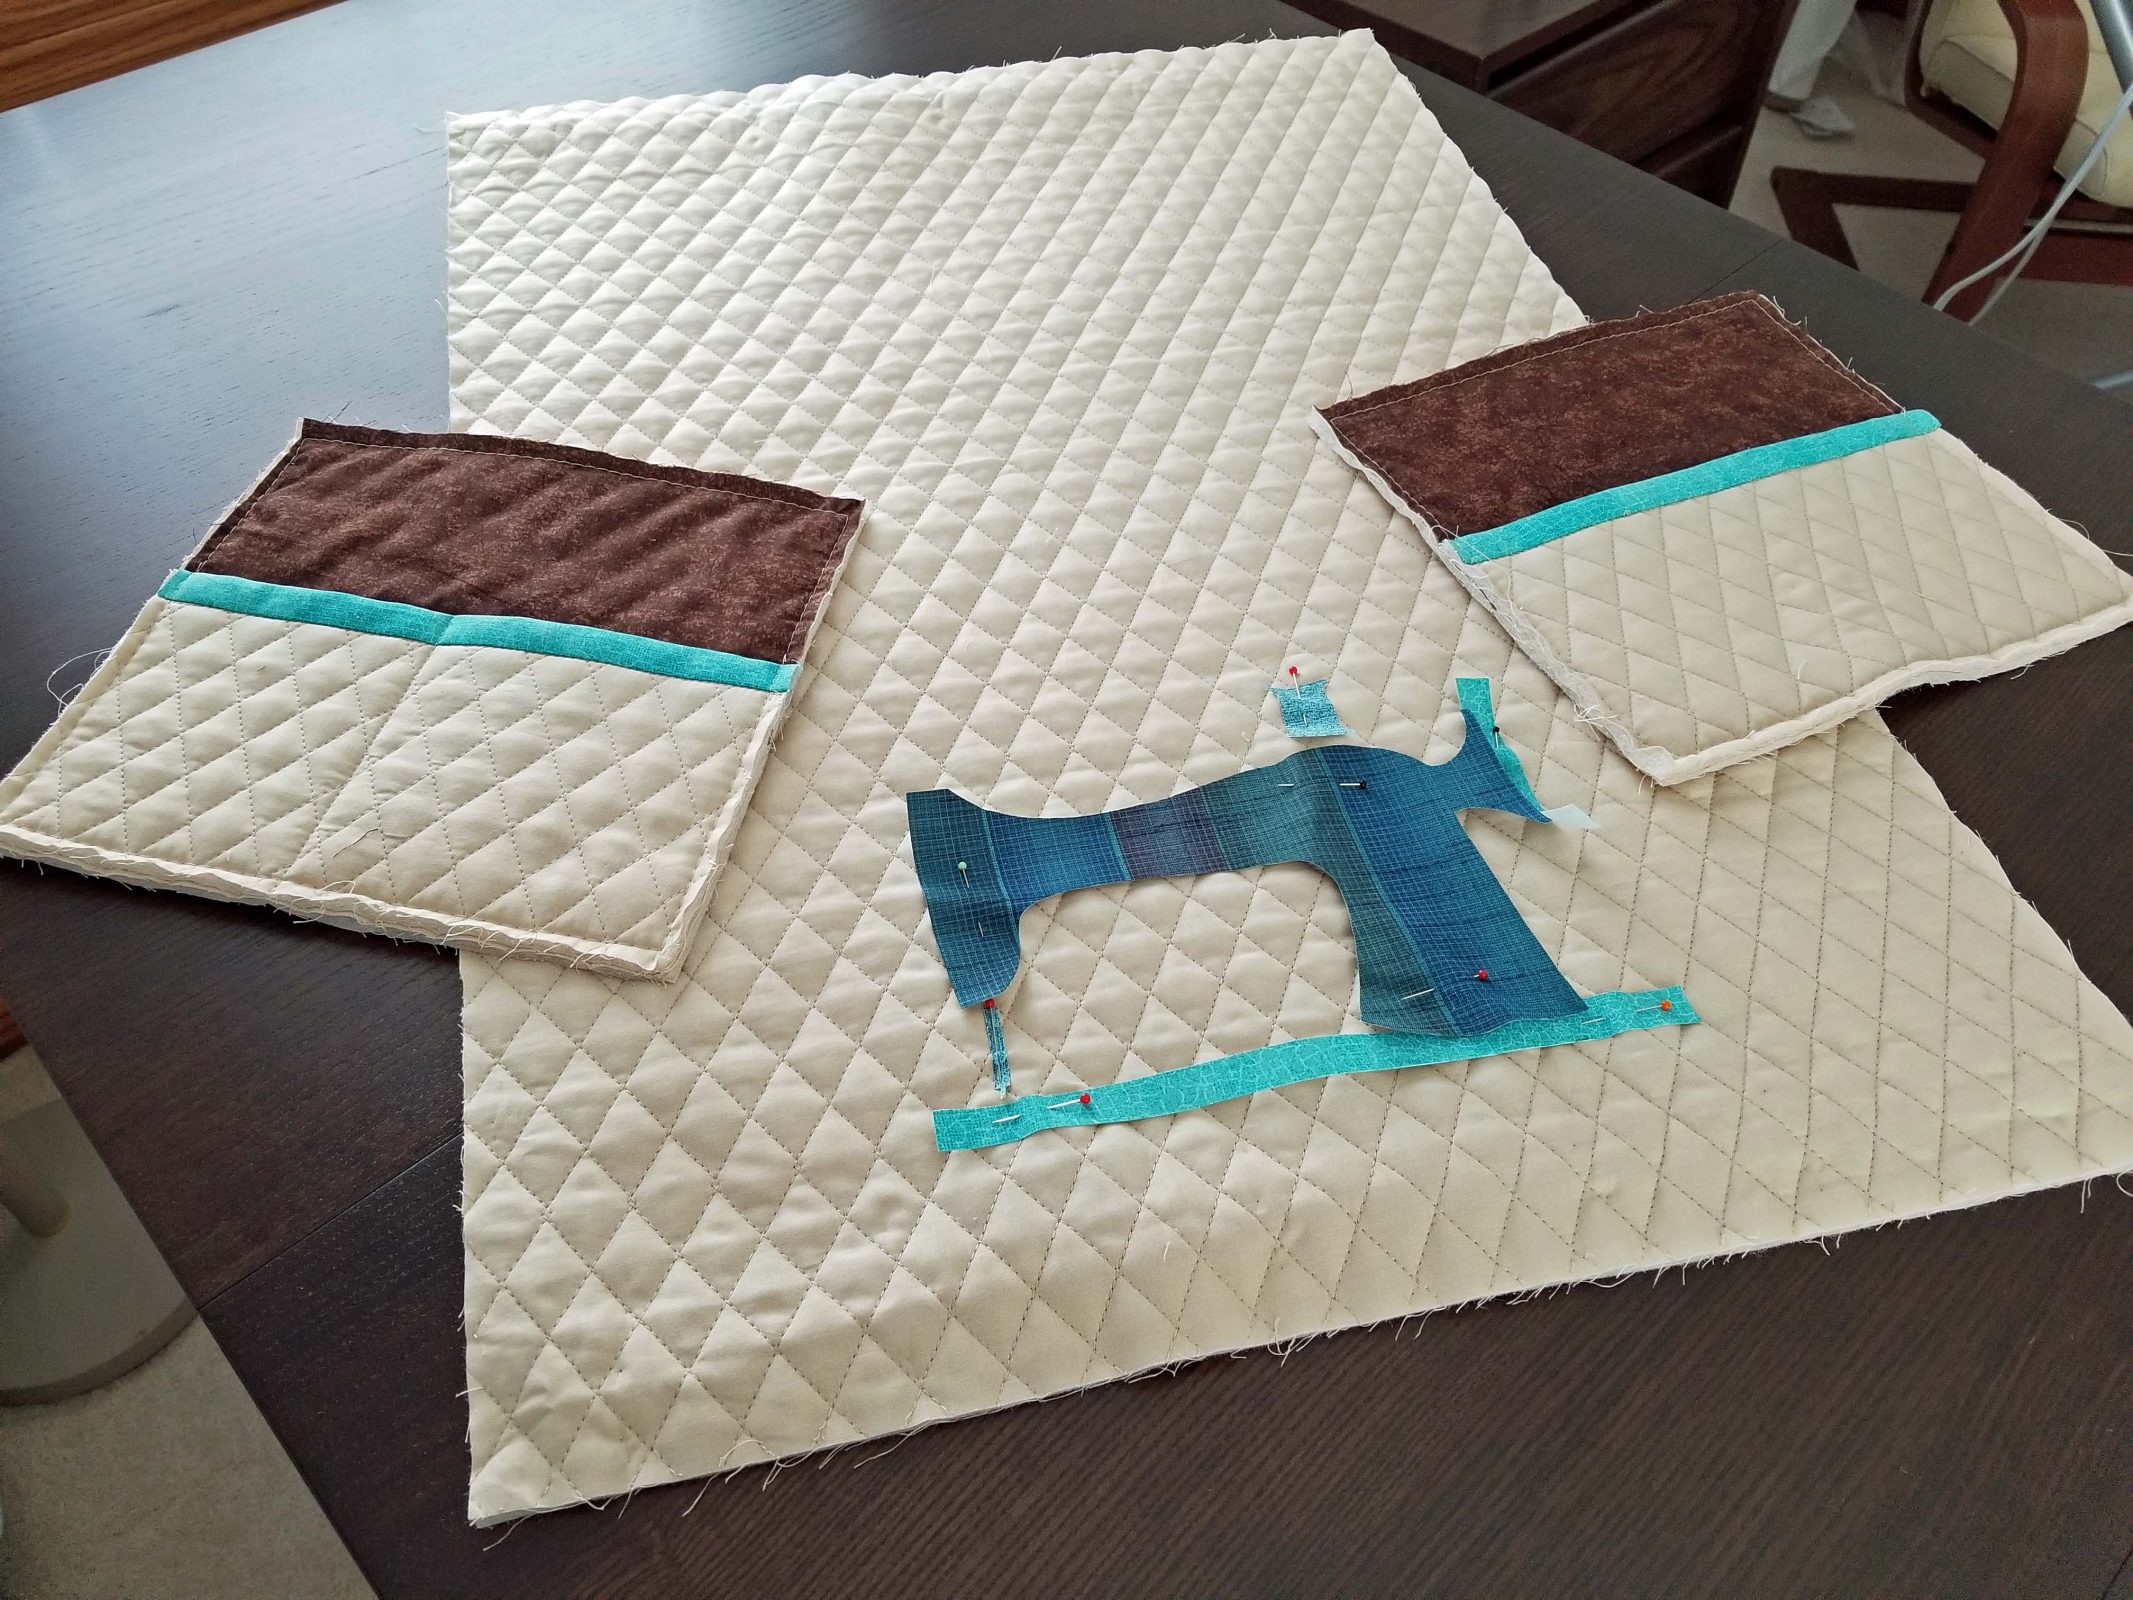
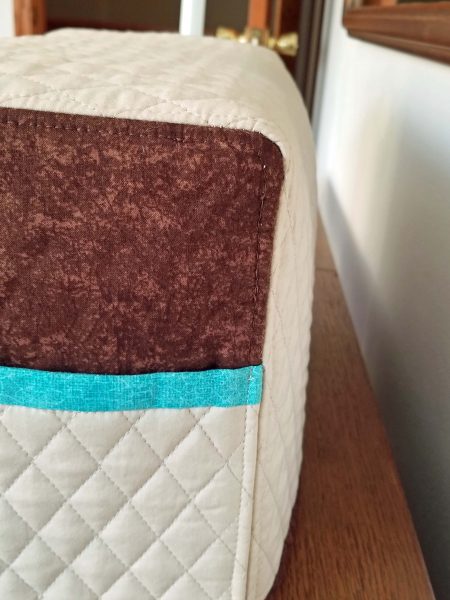
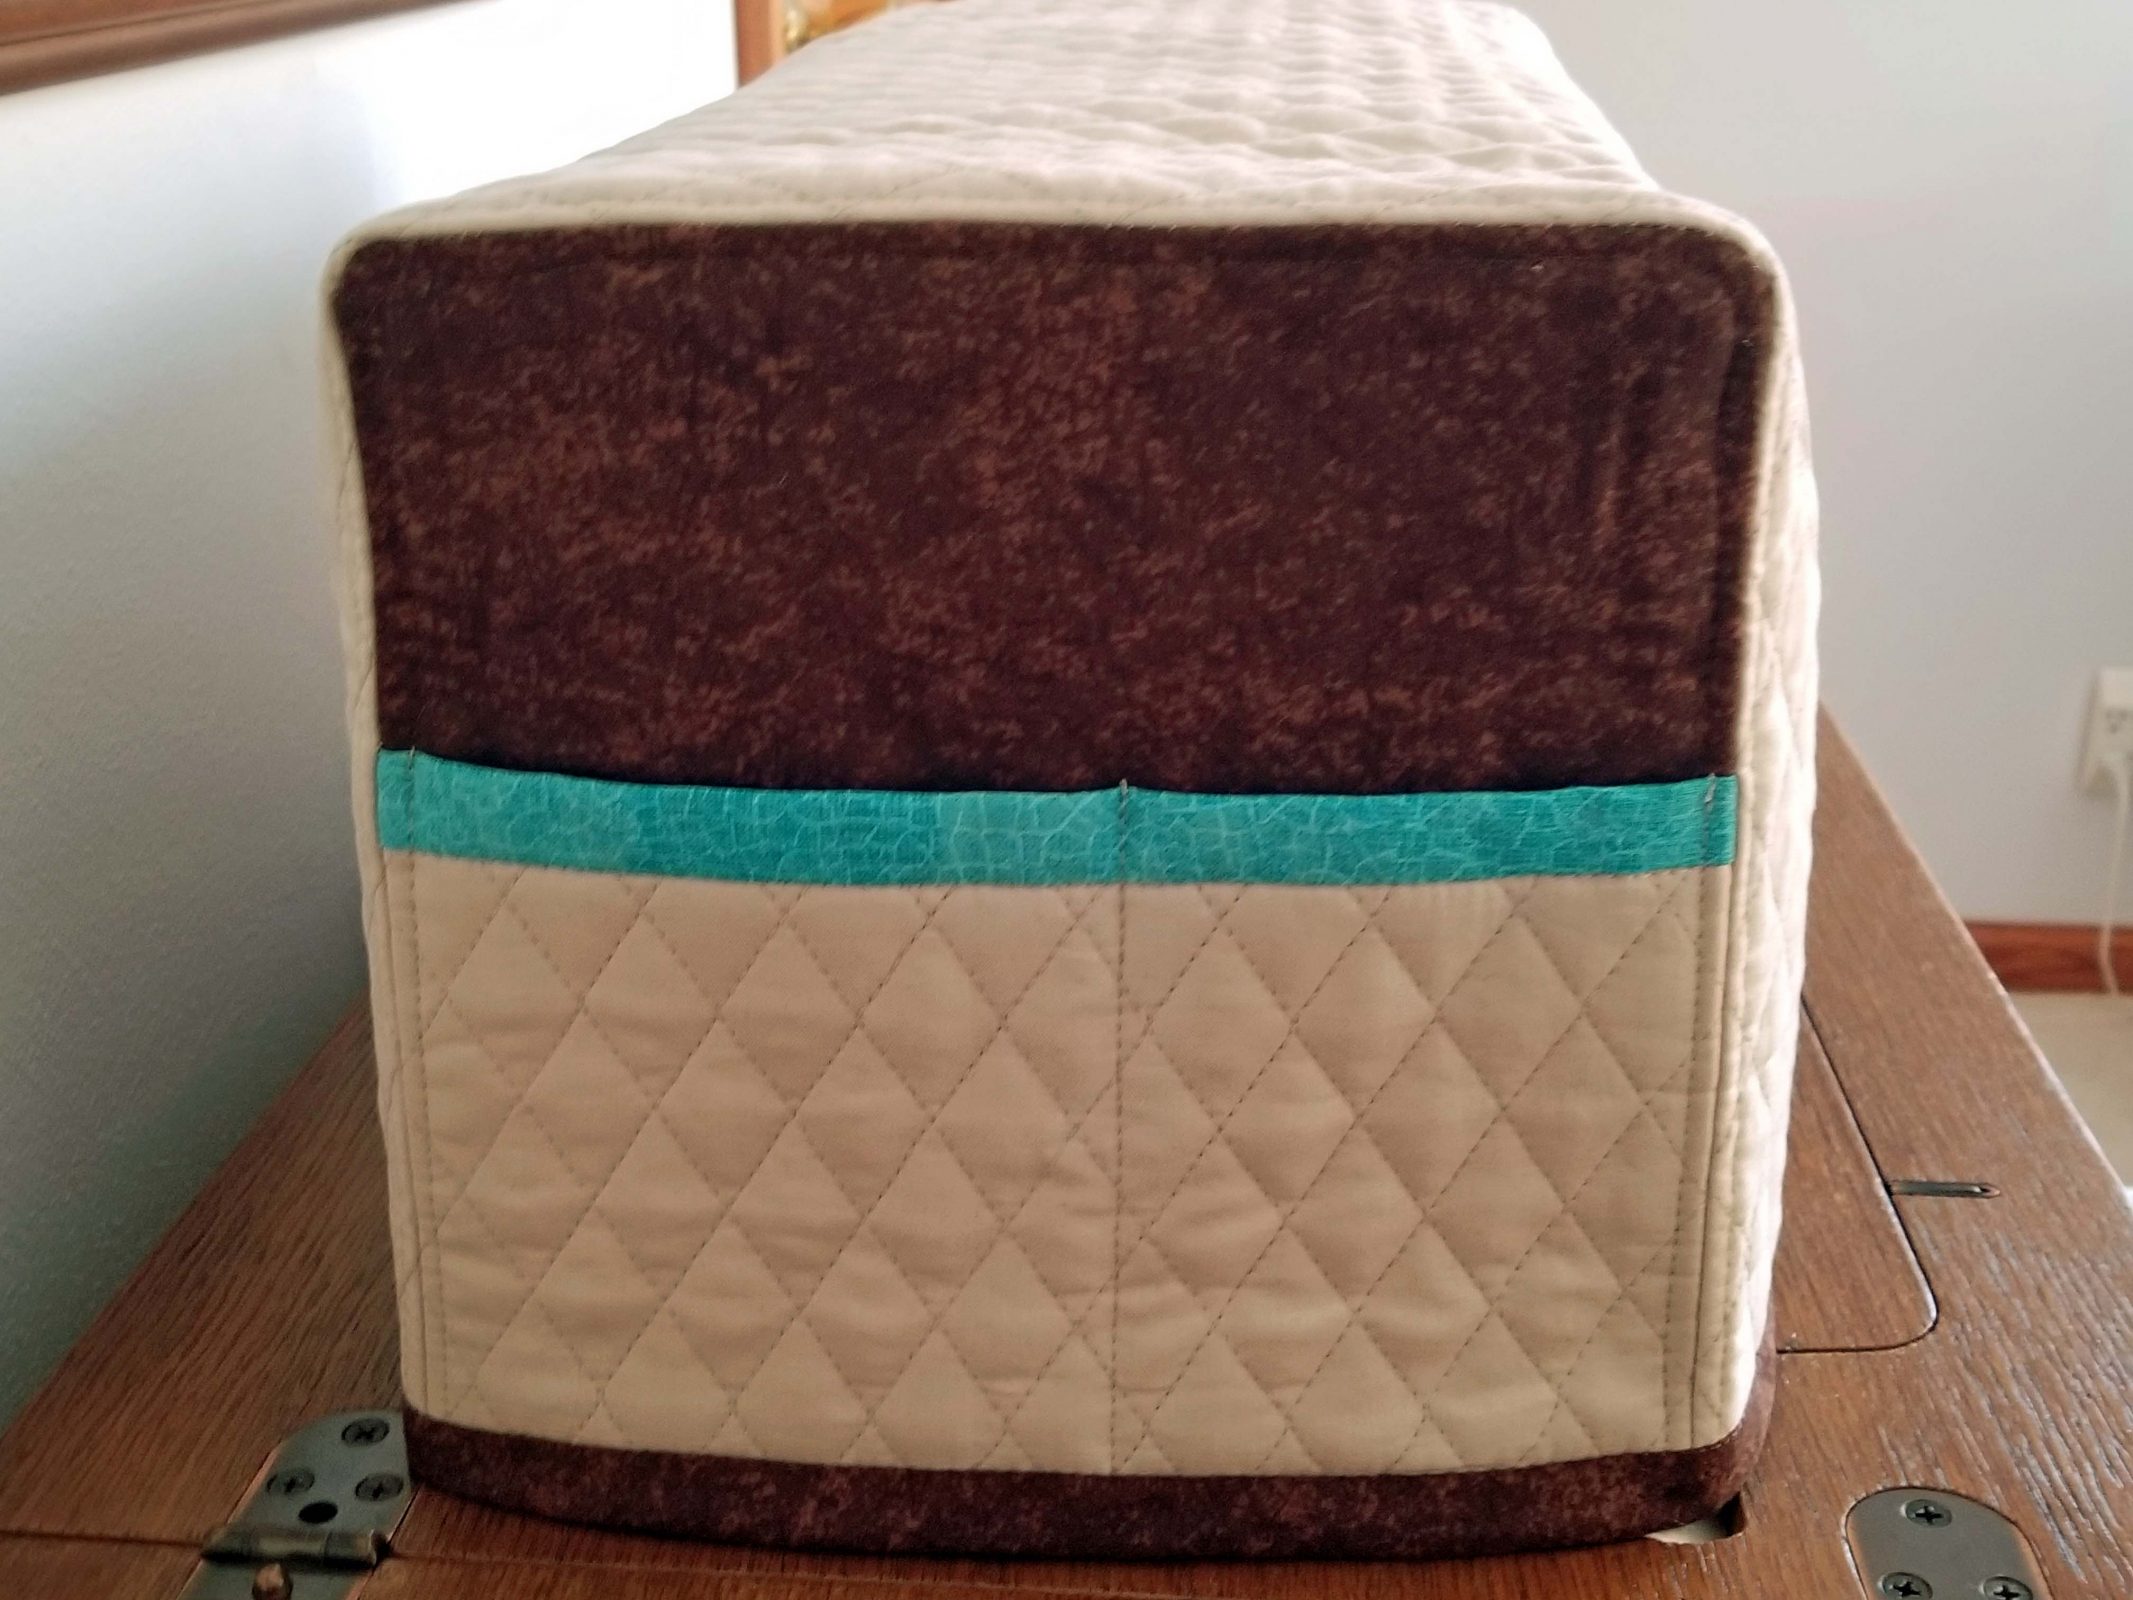
Pockets or not? Because I keep all of my sewing tools in the drawers of my sewing machine cabinet, I doubt if I’ll ever need pockets on my dust cover to keep my tools handy. On the other hand, I can make the pockets decorative and–who knows?–maybe someday I’ll wish I had them. It’s easier to include them now than to add them later. I added contrasting fabric above the pockets and bound the top edges of the pockets with colorful bias tape to give my cover a little pizzaz. I decided to divide one side pocket into two smaller pockets for smaller tools, just in case I ever want to store them above my cabinet.
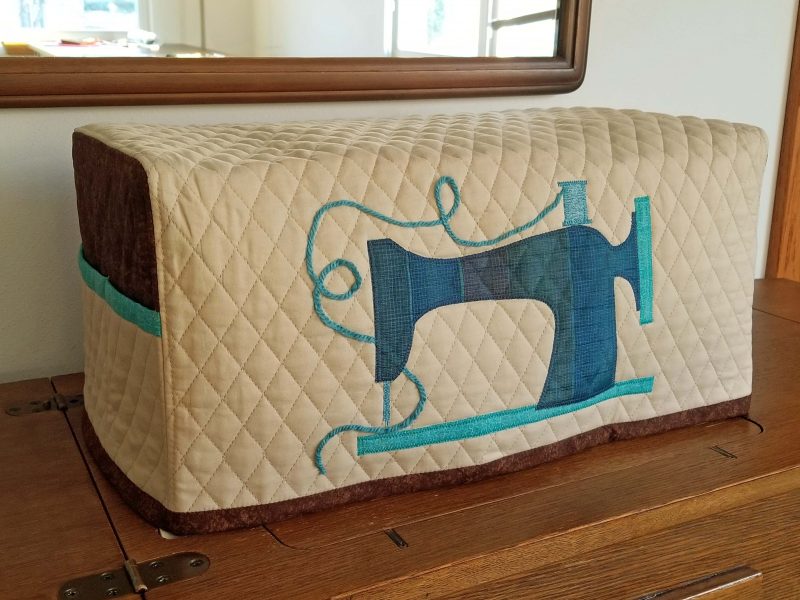
My fabric is plain, so how will I liven up that large rectangle? In what colors? I decided to appliqué the silhouette of an old-fashioned sewing machine to the front of the cover. I had to do another internet search for an old-fashioned sewing machine image that was “straight-on” so I could graph it to the size I needed for my appliqué. Then I pinned the appliqué in place to see if I liked it. I did.
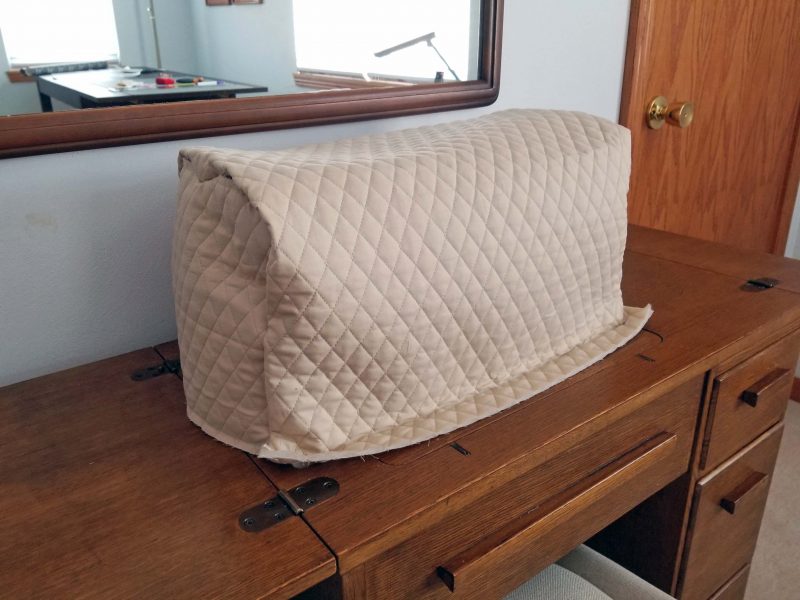
I pinned the three pieces together to make sure they were the right size. There’s that extra inch I added at the bottom. I’ll cut it off after the second fitting session when the pieces are actually sewn together.
That looks good. I had loads of fun (hah!) sewing those tight rounded corners at the tops of the pocket pieces. Clipping and notching was needed big-time.
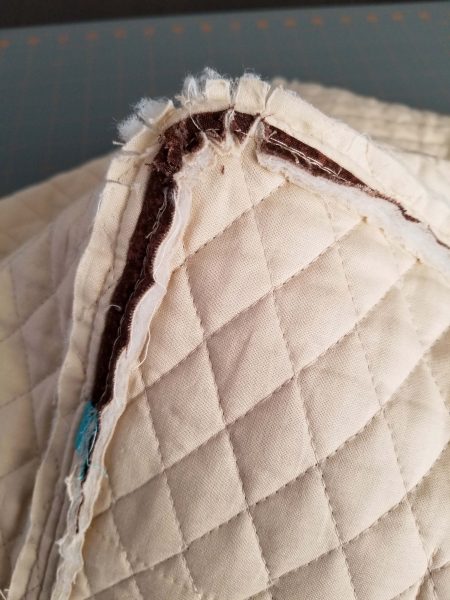
To keep the seams flat on multiple layers of quilted fabric, I edge-stitched on each side of the seams.
Then I cut the cover to the length I needed and decorated the bottom edge with bias tape made from the same fabric as my pocket tops. Last, I ironed the appliqué in place and attached it with a zigzag stitch. HeatnBond can’t be beat for appliqués. (That was hard to type. It should be Heat ‘n’ Bond. Yeah, grammar nerd here.) I added a piece of yarn “thread” for a whimsical effect. Voilà! I like it!
I like to do handwork and I’ll do anything except needlepoint and patchwork quilting. I hated needlepoint so much, I didn’t even finish a small piece I tried and I quit my patchwork quilt project before I finished the first square. I enjoy sewing, knitting, tatting, crocheting, embroidering, and counted cross-stitching. I like to do kits too, like paint-by-number and the Diamond Art kit Kathy and Annette gave me for my birthday last spring. When our kids were little, I made a lot of Christmas tree ornament kits; I sewed quilt kits for Thom and Kari as well as an original DJS design quilt for Teddy; and I made three 15-piece ceramic nativity scenes–one for myself, one for my parents, and one for Ted’s parents. I especially enjoy challenging projects and I have a very challenging project in progress right now. More on that when I finish it–hopefully by my goal of late February.
Thanks to COVID, I had time on my hands this year and decided to give some handmade items as Christmas gifts. I always have at least one handwork project in progress, but I often choose to engage in other activities, so it takes awhile for me to finish a project. With a Christmas deadline and the world in lockdown, I dedicated my spare time to gift-making.
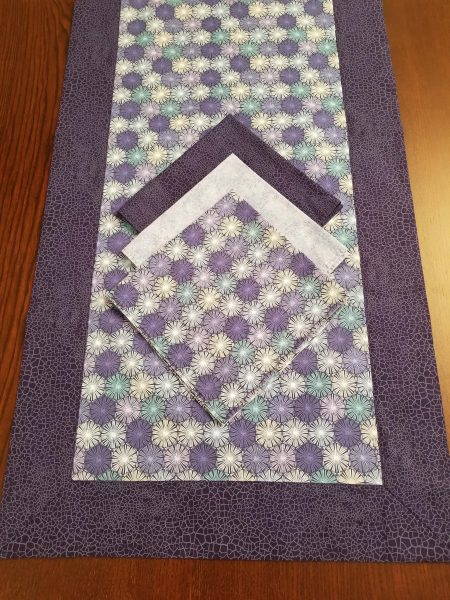
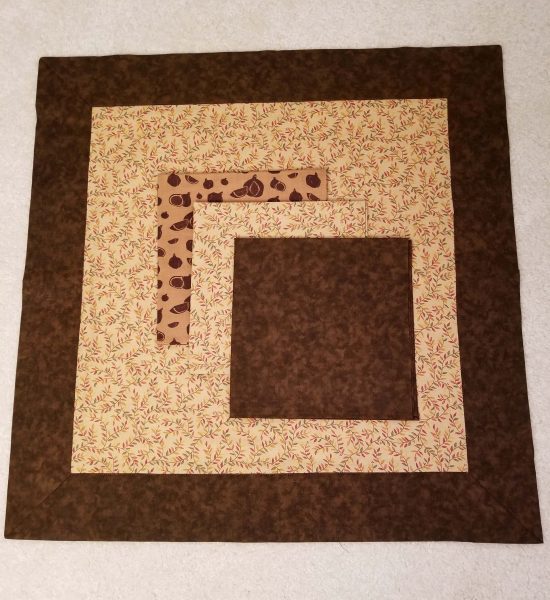
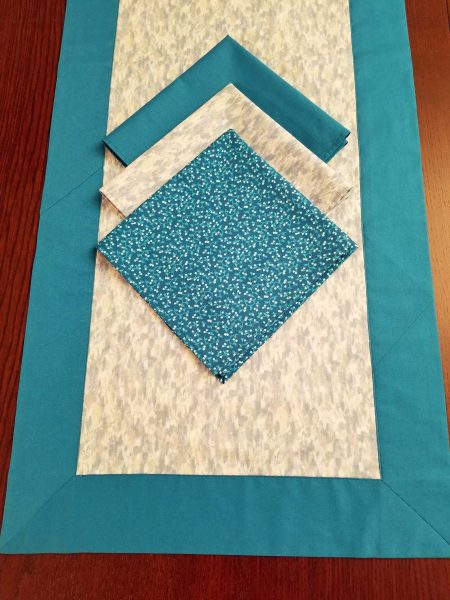
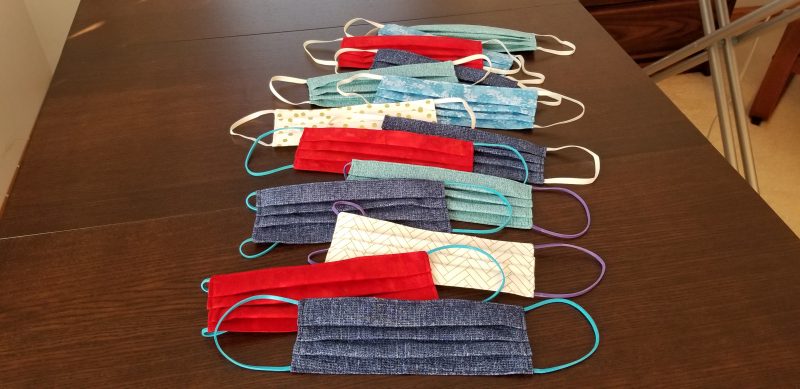
In the spring, I made about 125 face masks for the family. In the summer, I saw an online pattern for table runners and napkins and decided to try another sewing project. I made three sets (in order below): one for Ted and me, another for Kathy and Annette, and a third for Kari’s family.
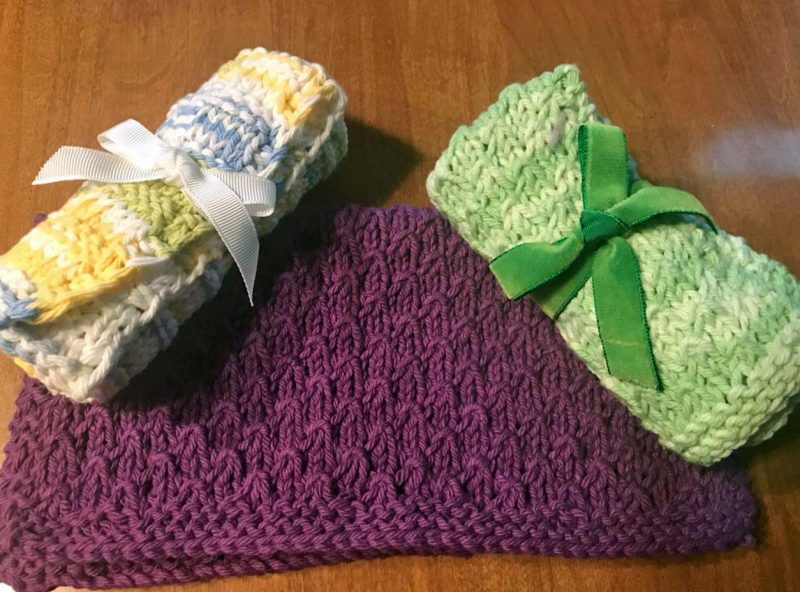
Then I switched to knitting and made dishcloths for Kathy and Annette, Kari, and my friend, Liz. Here are some of the dishcloths.
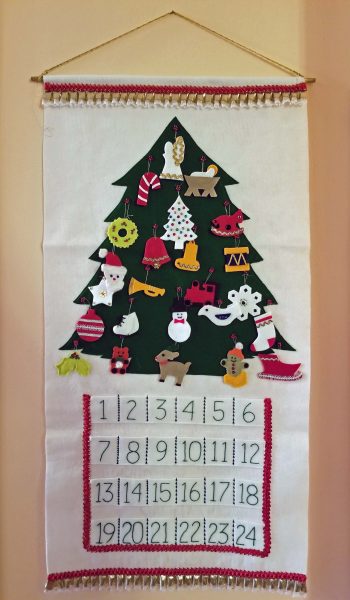
In the early 1980s, I made an advent calendar for our family. We hung it every year and the kids liked to take the ornaments out of the pockets and hang them on the Christmas tree.
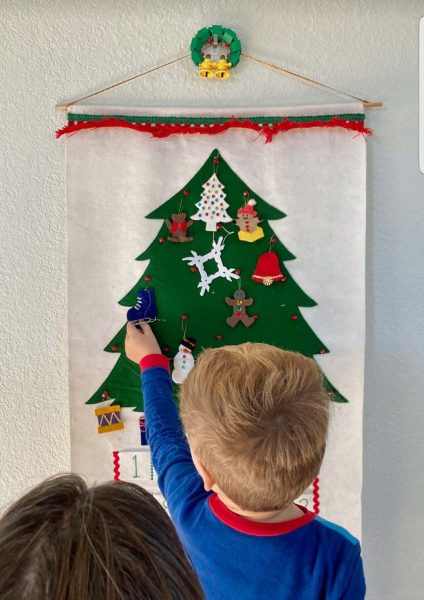
At some point (college, her St. Charles apartment?), Kari wanted an advent calendar of her own and mine was looking worn, so we worked together and made one for each of us. Thom wanted one too, so I made one for him. This Christmas, Katie sent me a picture of Sefton continuing the advent calendar tradition, hanging the ornaments on the calendar I made for Thom. The DIY Christmas tradition lives on.
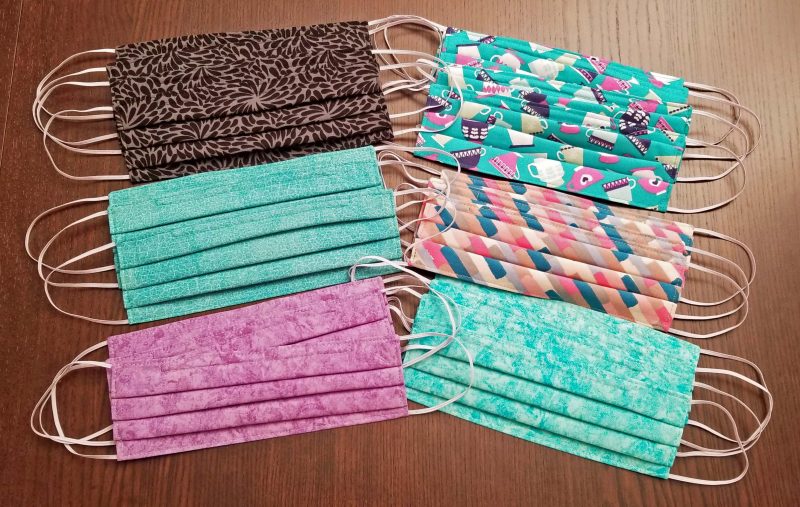
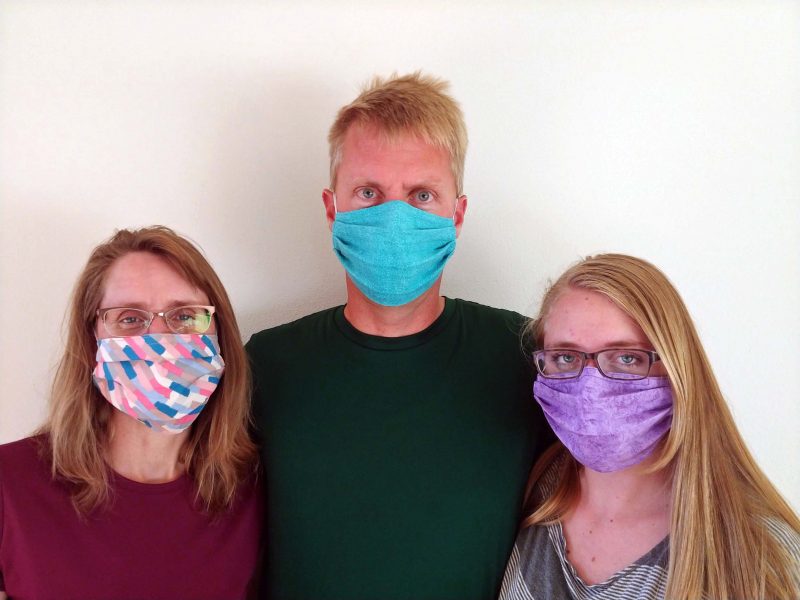
I thought I was finished with my Family Mask Project, but it returned due to popular demand. Jeff saw my blog post about the masks I’ve made and asked if I’d make some for him, La, and Kyra. Well, of course I will!
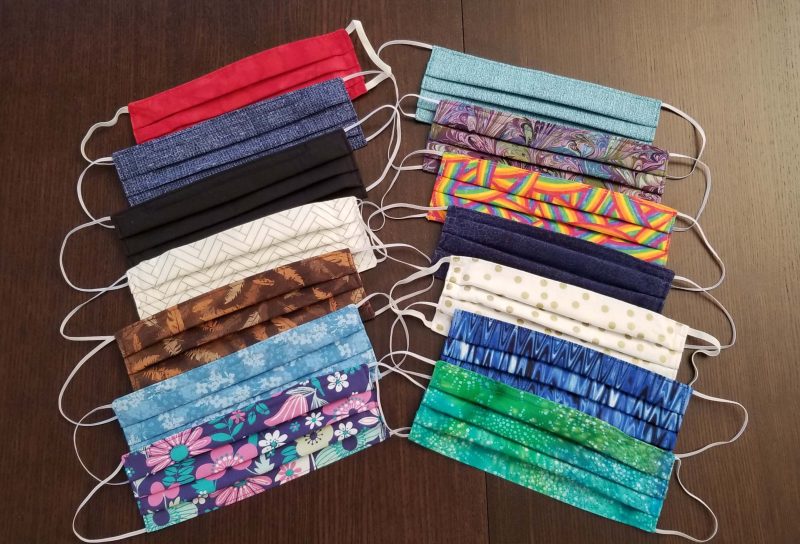
I bought some more fabric, got approval from Jeff’s family for six of the seven fabrics I chose, and went to work.
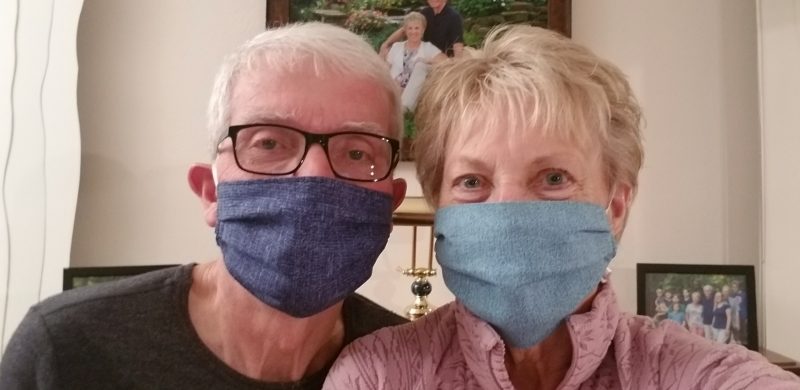
I made a few face masks for Ted and me and for Kathy, Annette, Kari, and Teddy in early April. In mid-June, when COVID-19 case numbers started spiking following the Memorial Day holiday, it became apparent that we’d be needing face masks for more than a few weeks. I decided to embark on a Family Mask Project as my contribution to fighting COVID-19. My previous recipients were happy to have me make more masks for them so they wouldn’t have to wash theirs so frequently.
Finding fabric was never a problem, but I couldn’t find interfacing, thread, or elastic in April and had to use what I had in stock at home. I had a large box of leftover thread from previous sewing projects, two yards of sheerweight interfacing, and a few yards of elastic on hand. When the elastic ran out, I substituted wide rubber bands for ear bands. The number of masks I made was limited to the yardage of interfacing I had. By late June, the supply chain was catching up to demand. I found elastic and interfacing online, bought some more fabric, and returned to my box of leftover thread.
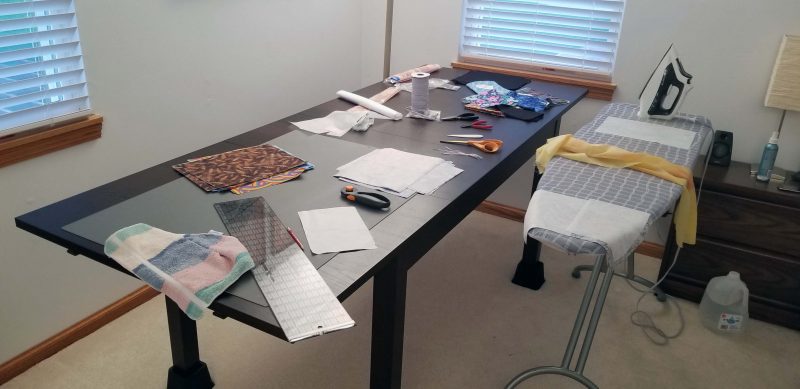
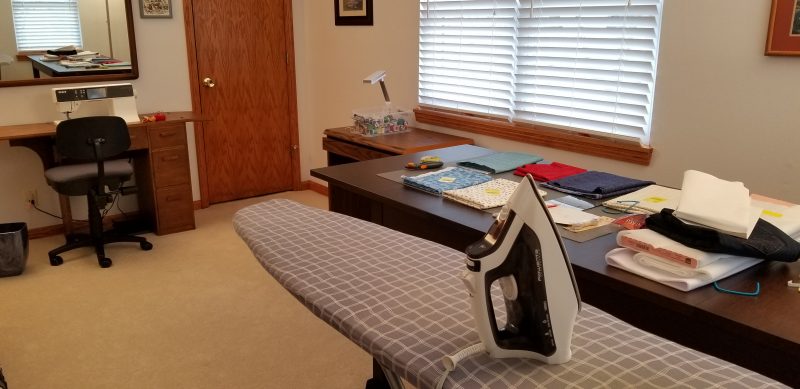
I love my project room. I extended my table to its full length and spread out my supplies and work area. It was handy to leave everything in place between sewing sessions and not have to pick up the mess because I needed the space.
See how handy the ironing board is to the table? One day, I reached across the ironing board to place an ironed mask on the table and bumped my inner left arm on the iron. Ouch! According to the internet, irons reach 400 degrees. It was a bad burn, but is healing well. After that, every time I picked up the iron–even weeks later–the burned spot actually tingled in fear of repeating that experience.
I bought a variety of fabric patterns, sent photos of swatches, and asked everyone to make their choices.
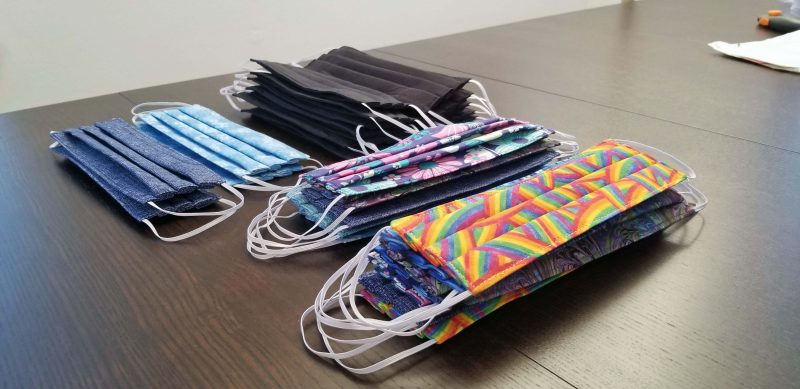
My total mask output from April through today was 92 masks. Ted’s and mine are already put away and some of Kari’s family supply has been delivered. These additional masks are ready for distribution. Sky and Dylan chose black; Kari and Teddy have the blue piles; and the other two piles are for Kathy and Annette. I’ll deliver those when we visit Kirksville August 22.
I enjoyed having a sewing project and I really got to know my new (?) sewing machine. The machine is three years old, but I’ve used it mostly for minor mending. The Family Mask Project taught me that my sewing machine has some very nice features. I’ll have to think of other things to sew so that I can use it more often.
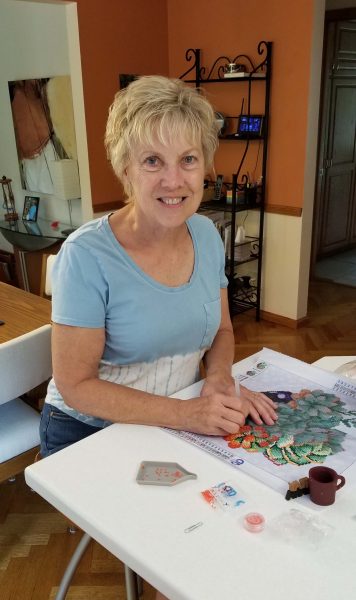
For Mother’s Day, Kathy and Annette sent me a Diamond Art kit. I have already admitted to Kathy that I was skeptical when I saw it, but I decided to give it a try. Kathy admitted that it was Annette’s idea and that she (Kathy) was skeptical about sending it too. The happy ending is that it was a lot of fun to do and I enjoyed the opportunity to spend time on a new activity. Annette, you rock!
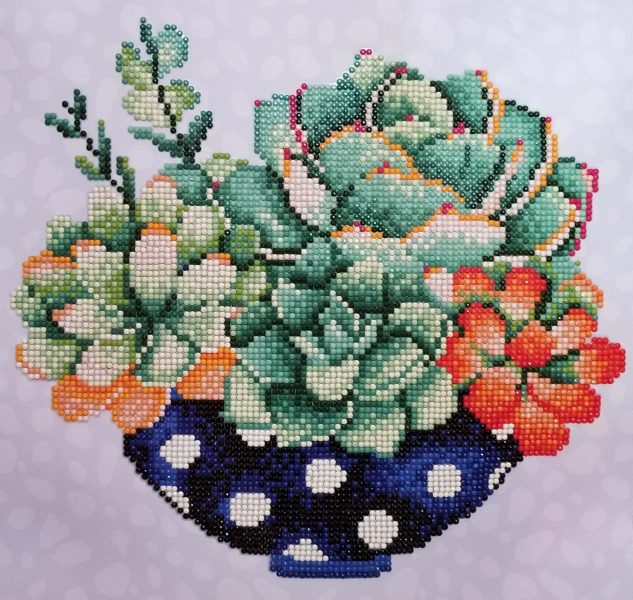
To do Diamond Art, you use a pen-size tool (in my hand) with a hollow tip to pick up tiny little “gems” from a tray (the gray thing on the countertop) and stick them to the adhesive surface of the fabric to create a sparkling picture. The picture is pre-printed with color-coded symbols to designate which gems to use. Think of paint-by-number, only different. It sounds tedious, but it was challenging enough (this was an intermediate level kit) that I enjoyed watching the picture come to sparkling life for an hour or two at a time. (“I’ll just finish this flower before I quit.”)
When I finished, Ted looked at it and sounded kind of surprised when he said, “It looks pretty nice.” I agreed. I don’t think I’ll hang it, and it won’t become my life’s work, but I had a good time and I think I’d like to try an advanced kit next time. Thank you, Kathy and Annette, for introducing me to a new kind of craft project.
The CDC has changed its mind and suggested that we all wear masks to provide some level of protection from COVID-19. A kerchief or homemade mask is fine (a few weeks ago, it was deemed useless), but we should save the truly protective masks for the medical professionals.
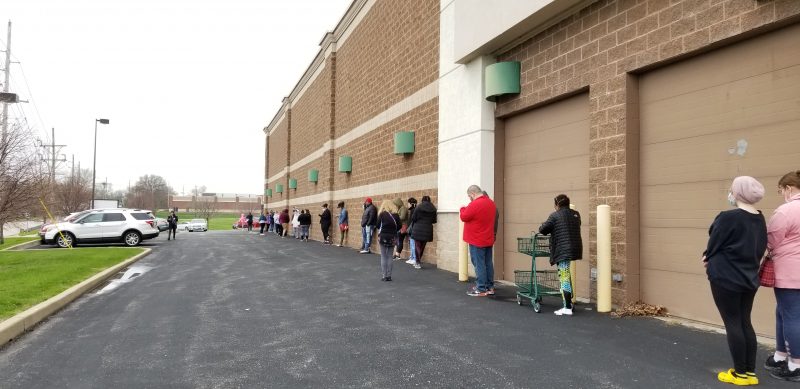
Today I went to Joann Fabrics to buy the makings for some masks. This was the line.
I was at the end of the line when I took the picture, and more people kept coming. After I’d stood in the cold 40-degree weather (wind chill in the low 30s), for about 25 minutes, an employee walked the line to inform us that (1) anyone who arrived after 2:00 p.m. (I arrived at 1:55) was not guaranteed to get into the store before closing at 4:00 p.m.; (2) they were out of fusible interfacing; and (3) there is no elastic in the store or online. At that point, several people (including me) left, so some of those who came after me could probably expect to get inside before closing.
I went to Wal-Mart and, even though they were admitting a limited number of customers, I walked right in. At least 3/4 of the shoppers were wearing face masks. I felt so unprotected!
So many people were buying fabric that the lady working the paint counter had a cutting mat at her station and was cutting fabric over there. I bought fabric and interfacing (there wasn’t much interfacing left), but was told there is no elastic in any store right now. I have several yards of elastic at home, but I bought some wide rubber bands in case I need more.
When I got home, I started making masks. Ted and I are now either protected or not, depending on what the CDC’s latest update is on the efficacy of homemade face masks.
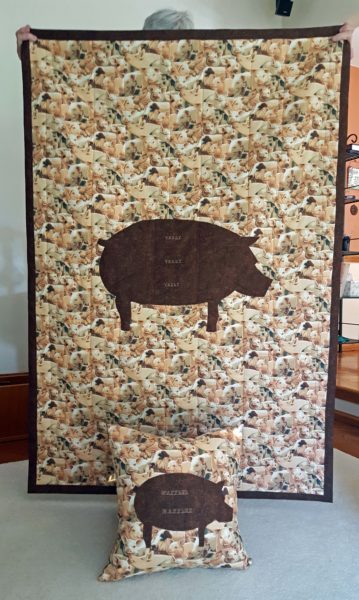
If you’re a grandma and your grandson (Teddy) tells you he and his stuffed pig need a blanket for his birthday, what do you do? Why, you make him and his pig a blanket! I decided to make a simple quilt.
The last time I made a quilt, I bought two kits at a local craft store and made them for Tommy (at that time) and Kari to use for their naps. The quilts turned out nicely, but required no imagination on my part–I just used the materials in the kits and followed the directions.
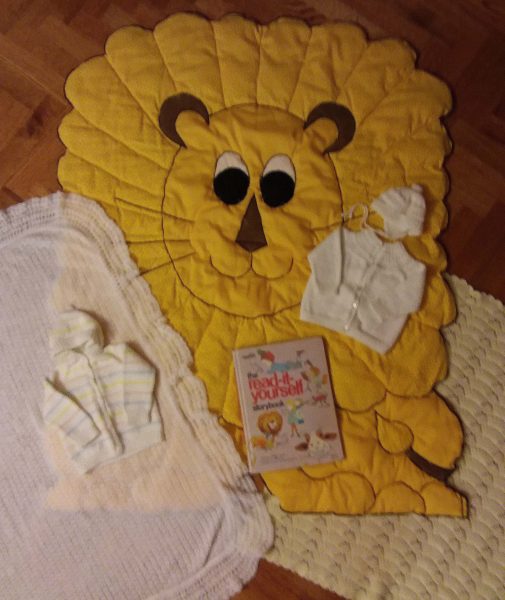
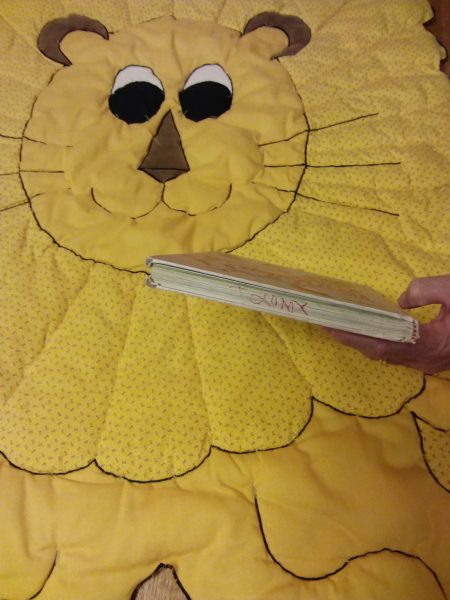
Tommy’s lion quilt. I gave it to Katie as a baby shower gift for Sefton, along with some other baby items of Thom’s.
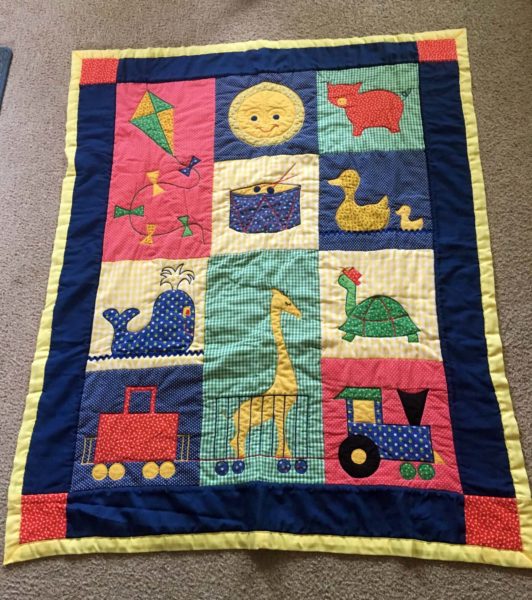
Kari’s quilt. She took this picture and sent it to me as I started working on Teddy’s quilt.This time, I was on my own, but how hard could a kid’s quilt be? I bought some appropriate pig-patterned fabric, some backing, and some batting, then went home to attach two pieces of fabric to the batting and bind the edges. I did not anticipate any enhancements–after all, it was for a nine-year-old and his stuffed pig!
Then I made the mistake of talking to the Quilting Queen, my sister-in-law, Mutzie. She thought it would be nice to include a matching pillow. Well, why not? I had three throw pillows in the Goodwill box, so I rescued one. Mutzie also thought an appliquéd pig cut out of the backing fabric and placed in the center of the top side would be cute. I decided I might as well do the same on the pillow so it would look like a matched set. Even better, I could use my sewing machine to add Teddy’s name to the quilt and Waffles’ name (the stuffed pig) to the pillow.
So far, I’ve altered one pillowcase with the new sewing machine I bought in December, so I still had to follow the instruction book to thread the needle, fill the bobbin and figure out how to use the touch screen to raise/lower the foot, select the stitch, the stitch length, and the tension and all the other stuff you have to do to sew. (Sewing machines have come a long way in the last 50+ years.) That slowed me down a lot in the beginning, but I can do it all without looking at the instruction book now!
When I estimated under ten hours to make this quilt, I obviously misjudged how long it would take to pin, baste, and sew so many things (appliqués, layers, binding). Including the time it took to learn how to use my new sewing machine, I almost reached the forty-hour mark.
The project was fun. The quilt turned out very well and I learned that my sewing machine is awesome. I definitely made a good selection when I bought it. Now I want to work on another project, just to use my sewing machine!
The Quilting Queen told me quilts should always be photographed vertically. Pay no attention to the man behind the quilt.
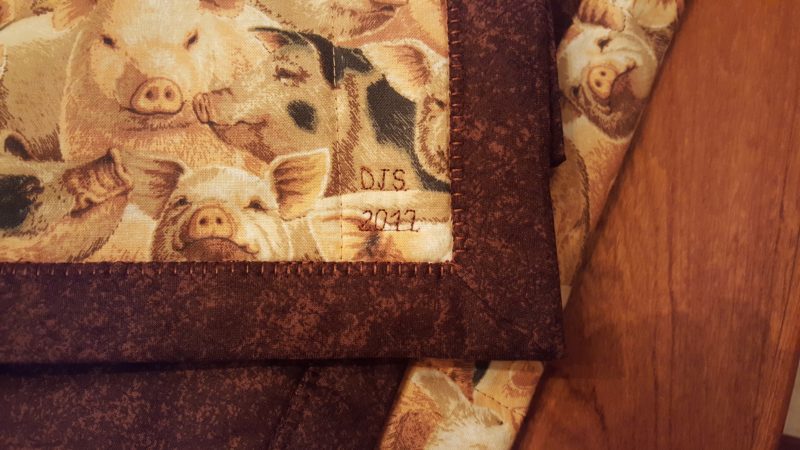
Don’t all artists sign their work? I had to try this feature of my sewing machine for the lettering on the quilt and on the pillow.
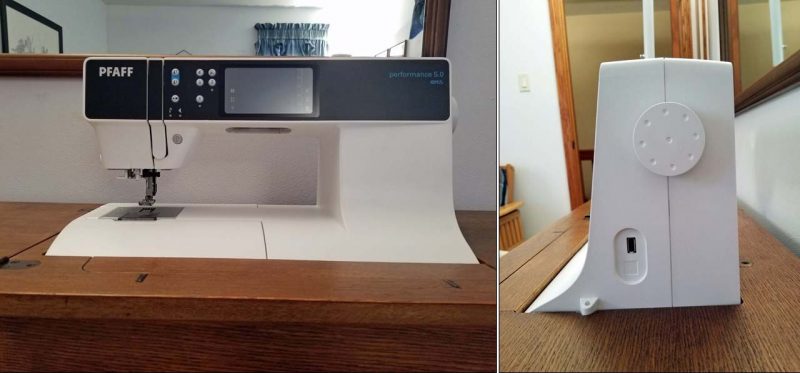
I bought a sewing machine and a serger just before Christmas, and finally had time to play with my new toys today.
The lady at the sewing machine store showed me how to knot the threads and just pull them through the serger to change colors or spools. After that, she made me thread all four spools on the serger from start to finish. She said I’d need to do it sooner or later when a thread breaks. Aaarrrggghhh!!! May my thread never break! Imagine my relief when I saw that my serger came out of the box threaded. Whew!
It took me about 30 minutes to get the sewing machine threaded and a bobbin filled. Basically, the thread pattern through the machine is similar to my old sewing machine, but all the hooks and holes look different and I had to figure out what each little gizmo looked like so I could put the thread through or around the correct gizmo. There have been some changes in the last 50+ years. Last week, I bought some remnants so I could practice sewing and get used to my new machines. I sewed and serged one six-inch seam, then declared myself ready to roll. Confidence, yes!
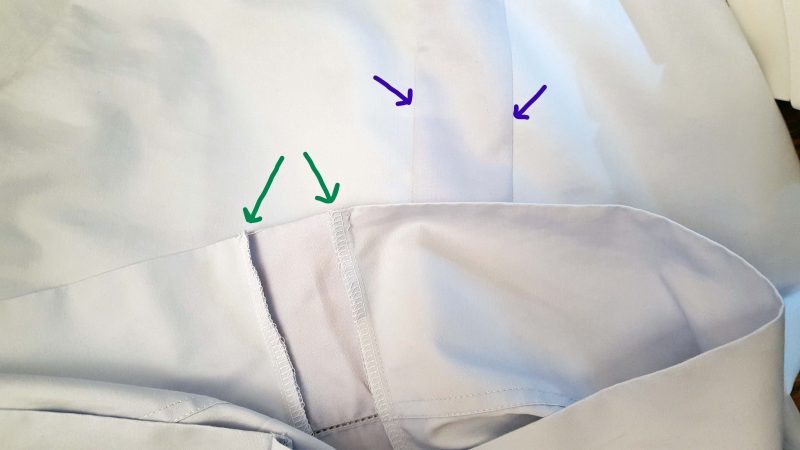
My bed pillow is fat and has to be stuffed tightly to fit a standard pillowcase. That makes the pillow so hard, it’s not comfortable. Being a clever seamstress, I bought an extra matching pillowcase, cut a strip from it, and add the strip to the “real” pillowcase to make the pillowcase a little wider, allowing the pillow to be softer. We had to buy new sheets for our new mattress, and today was the day to ditch my old pillowcase and adjust a new one for my fat pillow. Success and a new pillowcase for me tonight.
Most fun I had: Automatic needle threading and automatic thread cutting. Woo-ee!
Most important thing I learned: It takes a lot more time and space to set up two portable machines than to open one machine that’s installed in a cabinet. I need a better set-up for future sewing.
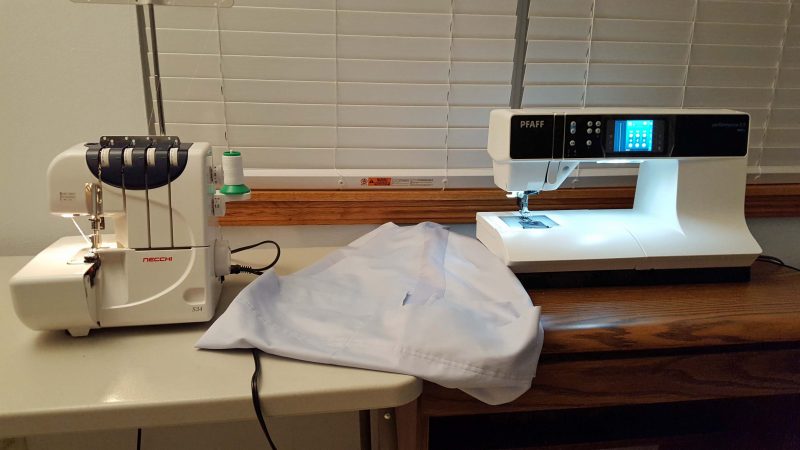
Serger, pillowcase, and sewing machine.
Finished expanded pillowcase. Purple arrows show the outside; green arrows show how I can do serging on the inside now. Mm-mm good!
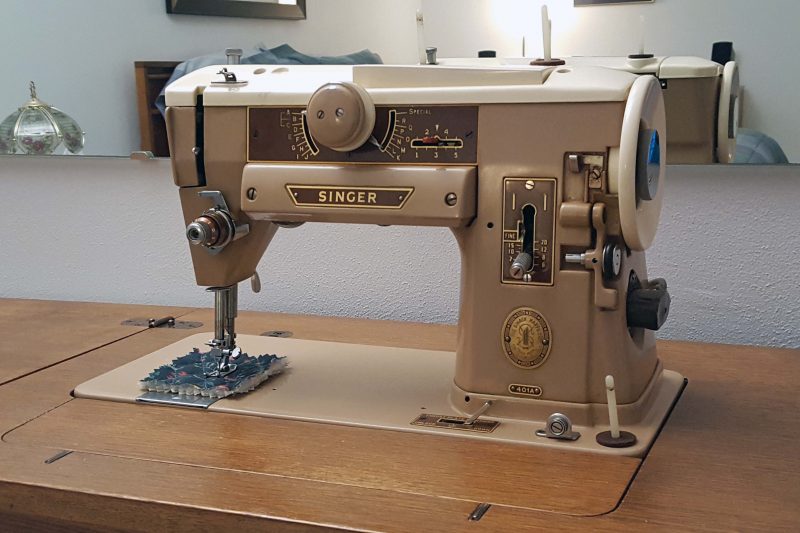
In Spring 1967, when I was in college, I bought a four-year-old sewing machine, including the cabinet, for $100 and have been using it ever since. I’ve often thought of replacing my sewing machine, but I don’t sew nearly as much as I used to, so I couldn’t justify the cost.
Two weeks ago, I was altering a pair of trousers and reached my limit. Fabrics have evolved a great deal since 1967, and my 53-year-old machine left me extremely dissatisfied with my results. I told Ted it felt like asking him to make a weather forecast for this weekend using only the tools he had in the 1970s when a three-day forecast was a new idea–it can be done, but not without challenges and the certainty that you could have done much better using today’s updated models and tools. I decided the time had come for a new sewing machine.
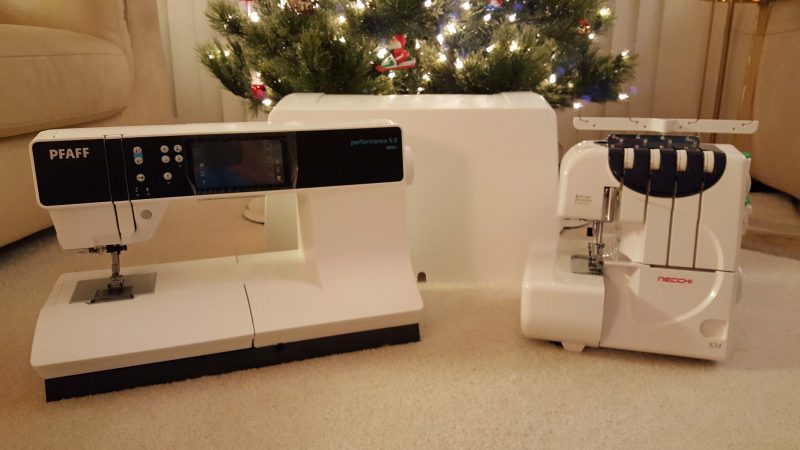
I thought, researched, and shopped, and today I took the plunge and bought a new sewing machine and a serger, with the option to buy a cover stitch machine at a later date if I decide I need one. I’m betting the new machines will make the remainder of my trouser alteration project easier and will produce better results.
My trusty 53-year-old sewing machine. It never needed a repair.
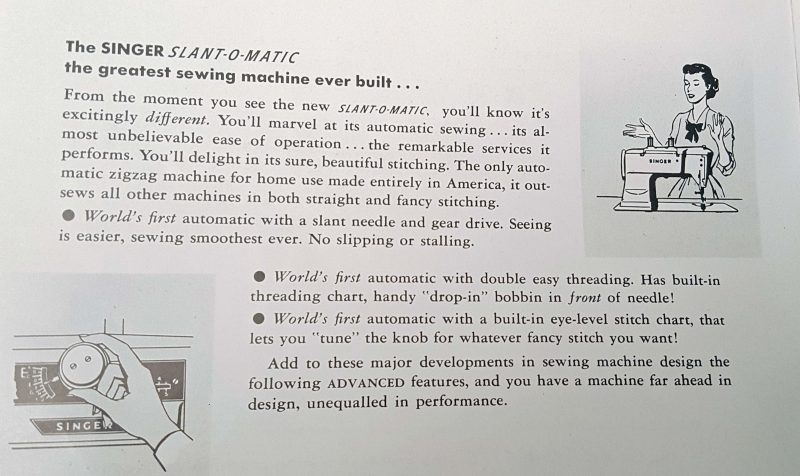
From my old machine’s instruction manual. Notice that it is billed as “the greatest sewing machine ever built.” I can’t disagree.
My new sewing machine on the left; its case in the back; the serger on the right.
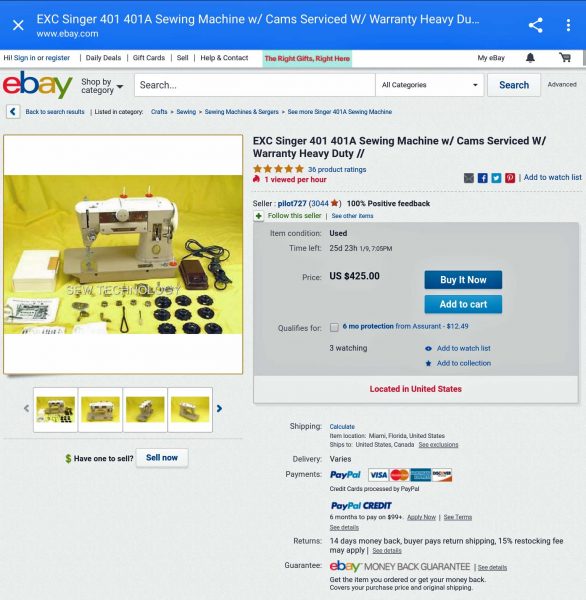
It looks like my old $100 sewing machine could bring $425 on eBay. Yes, I have all those original pieces.
When I received an invitation to Katie’s baby shower, I thought it would be fun to use some frequent flier miles to attend the event. I called Katie’s mom and Thom to make arrangements for airport shuttling and sleeping, and they both thought I should surprise Katie, because she wouldn’t be expecting me.
I flew to Seattle on Saturday. Katie’s parents, Scott and Carmen, picked me up at the airport and I stayed at their house overnight. As shower time approached Sunday afternoon, Carmen suggested that when we saw Katie’s car coming up the driveway, I should go to the bedroom and wait a few minutes, then “mosey” out and see how long it would take Katie to notice me. It took her less than five seconds, even though I was trying to be inconspicuous.
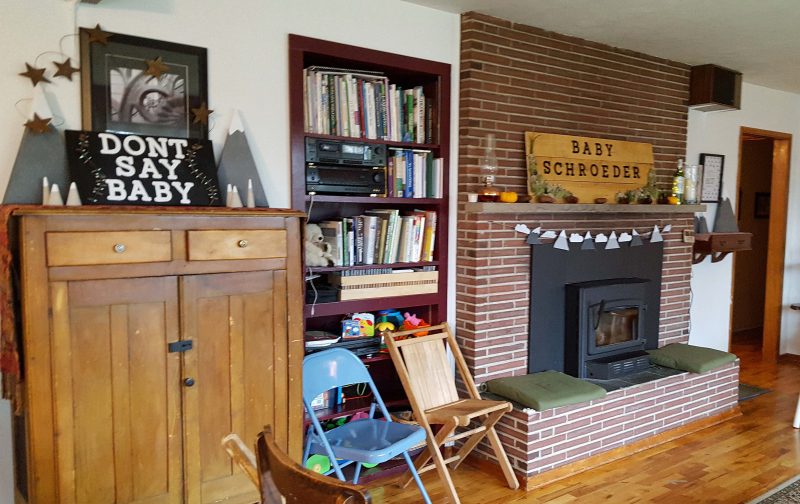
This was the most elaborate baby shower I’ve ever attended. I admit that it’s been many years since I was at a baby shower, but they used to be much simpler: chairs in a circle, women friends and family members, gifts for the mom-to-be, and dessert. This shower included a plethora of decorations, including signs, banners, decorated clipboards for the obligatory shower games, and decorated gift bags for the guests. In addition to what’s in the picture below, there were also banners hung on the windows, decorative strings of pine cones, table decorations, and a photo wall. Whew!
A few of the decorations: “Mountains” on the cabinet top, a hand-made sign for the “Don’t Say Baby” game, a handmade sign on the fireplace with a chain of mountains and clouds below it, and another handmade sign between the fireplace and the door that said “You are our greatest adventure.”
The menu included chili, chicken salad croissants, a veggie tray, a cheese and cracker tray, cake and cupcakes, and a variety of beverages. This is a lot more than dessert and coffee! Carmen was the head chef and did an awesome job. Everything was delicious.
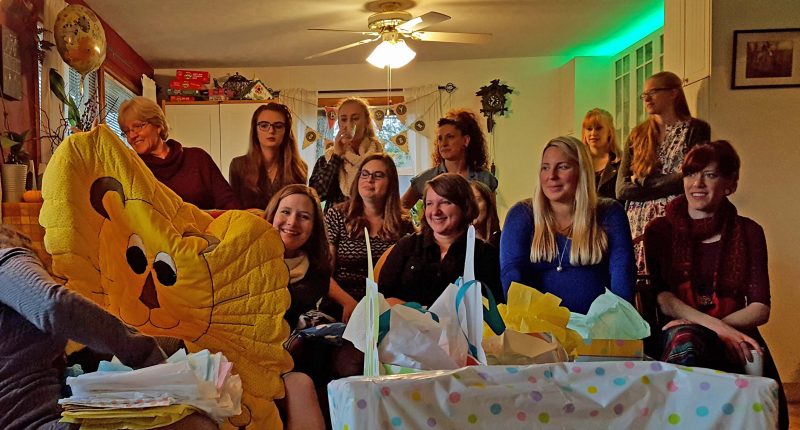
We played the bare minimum of shower games at Katie’s request. She did not want to guess the baby food, etc. (Thank you, Katie. You’re a woman after my own heart.) I counted thirty-one women present, but they kept moving around, so I could be off by one or two. It followed that there was a huge pile of baby gifts and all of them were very nice.
Ted and I bought a few baby toys for the shower, but I decided to go mainly with heirloom gifts. I opened the boxes of baby things I’ve saved, and I pulled out the lion quilt and the yellow knitted blanket I made for Thom. I also selected a white blanket my mom made on her knitting machine and two sweaters she knit for my babies. She knit the hooded striped sweater for Thom, and the white one with the matching cap for Kathy. Katie asked for baby books instead of cards, so I brought one of Tom’s favorites: TheRead It Yourself Storybook. Thom wrote his name on the pages (he was Tommy at that time) and, inside the book, I had noted that he received it from his Uncle Tom and Aunt Jo for his fourth birthday.
Gifts from the baby’s great-grandma, its grandma, and its father
Yes, I remember when he was Tommy, not Thom.
Katie just unbagged the lion quilt. Thom loved this quilt. Several of the women at the shower told me later that it was really thoughtful of me to give away my baby things, because we often find them hard to part with. (If this weren’t true, I wouldn’t still have them in boxes when my baby is in his late thirties.) They also commented on the good condition of everything. When she saw the tiny knitted baby cap, Katie became a little bit tearful at the thought that she will soon be holding someone who is that small. It was a very touching moment at the shower.
. . . and then it was time to eat cake and cupcakes and to take pictures at the photo wall. There was a designated official photographer who took pictures and printed them on the spot.
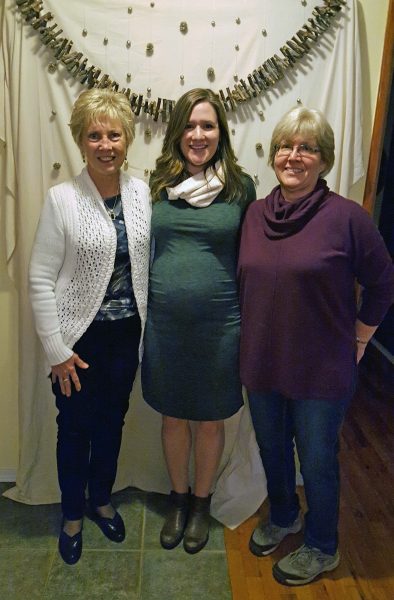
Katie with the grandmas-to-be
After the shower, we loaded the gifts into Katie’s car and went to her house. Thom and Julian helped unload the car and then Thom started making dinner. (What a good thing I taught him to cook.) After dinner, while Katie showed Thom all the gifts, I had some one-on-one time with Julian.
All too soon, it was Monday morning. I hugged Julian good-bye when he left for school, and Thom and Katie took me to the airport before going to work. My flight home was uneventful, and I was glad to see Ted again. It was fun to be a part of Katie’s baby shower and I’m glad I could go, even if I was there for a only little while. Ted and I will stay longer when we go to Seattle to meet our eighth grandchild, who is due to be born January 2–or whenever it chooses.
P.S. There were rain showers outside throughout my short visit. It’s Seattle.
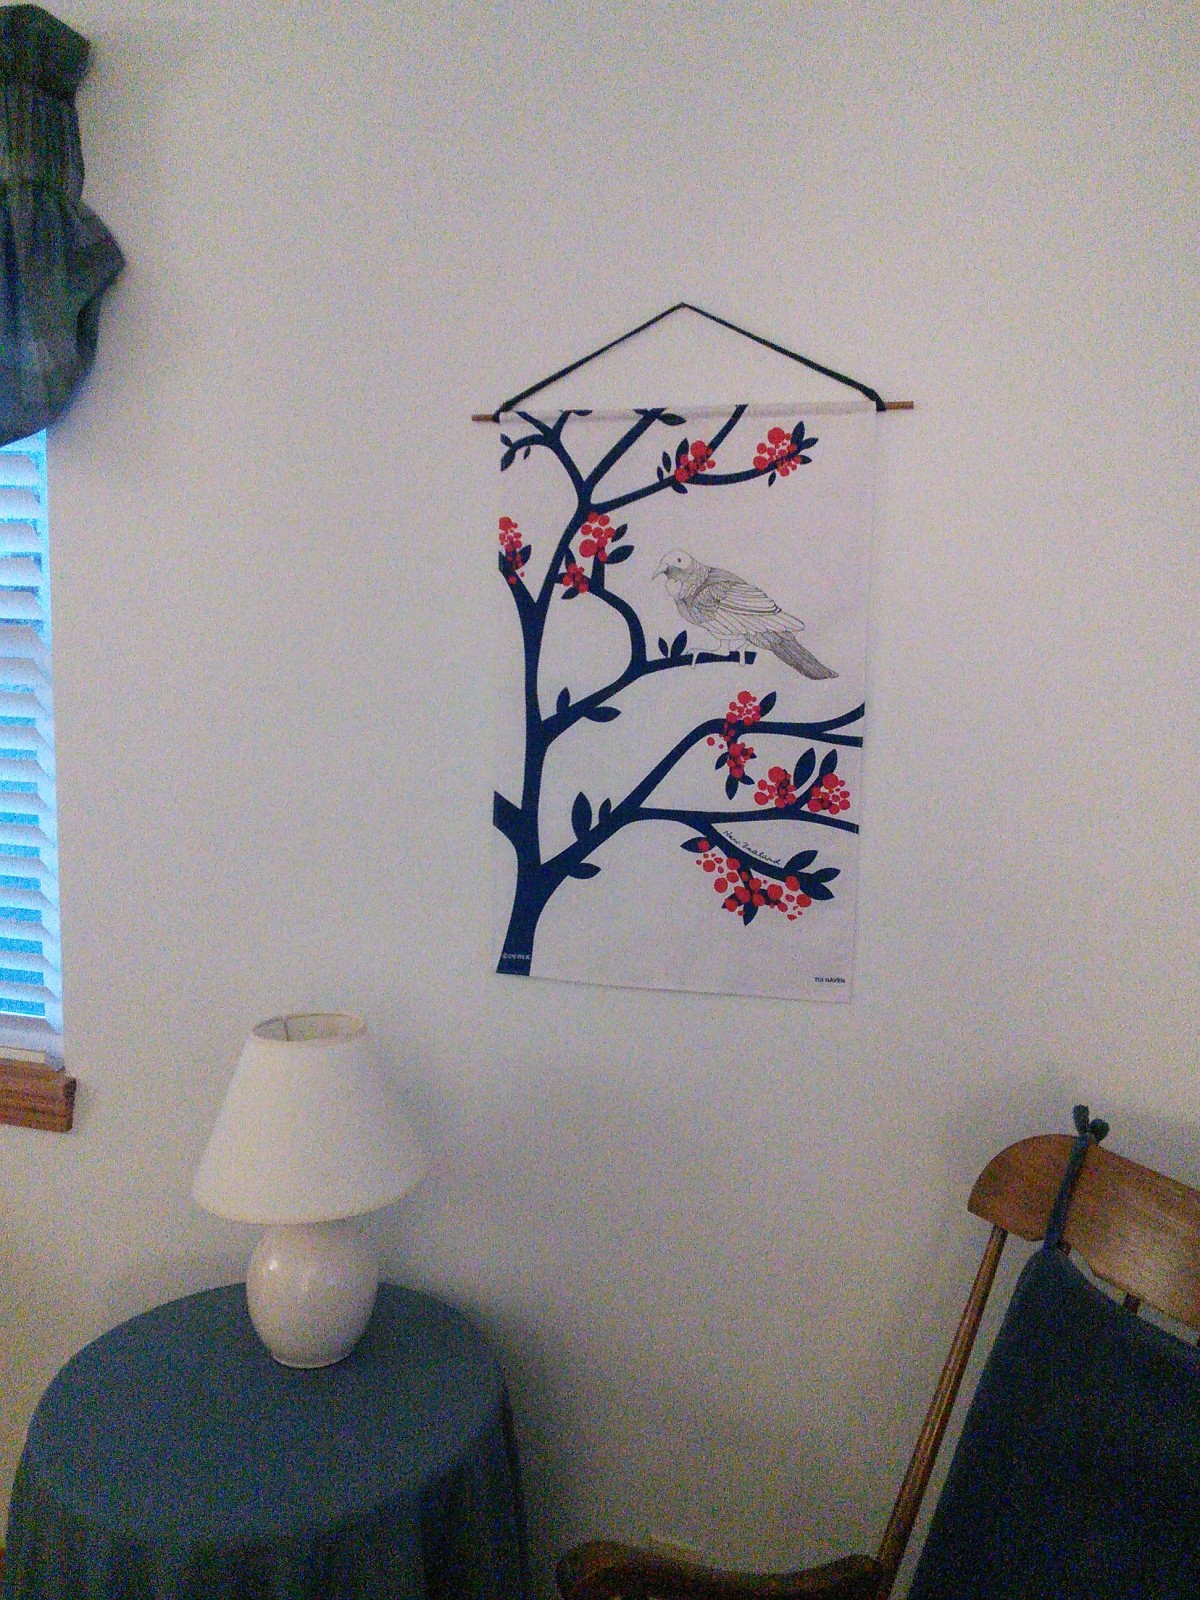
For Christmas, Thom and Katie gave each of us (Ted and me and the other three kids) tea towels they bought in New Zealand on their honeymoon. I decided to hang mine on a wall where I can enjoy it, rather than putting it out of sight in the dishtowel drawer. A dowel, a coat of stain, two coats of varnish, and a seam across the top edge of the towel, then voilà!–a wall hanging from New Zealand! Thanks, Thom and Katie!