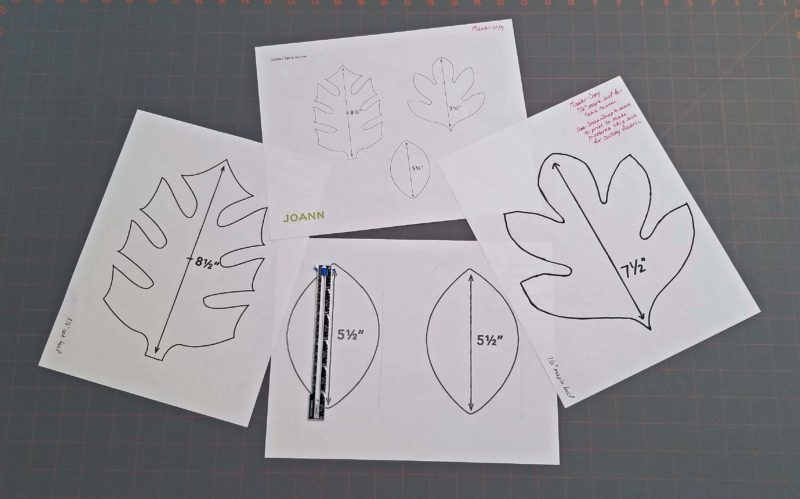
Last year, I saw a pattern for a fall table runner and I liked it. This year, I had time to make it. It was a Joann Fabrics project, so I downloaded it. The patterns were included, but not in the size needed (the top sheet of paper in the photo below). I thought about graphing the patterns to a larger size, but that was difficult so I came up with an easier idea. I scanned each individual leaf pattern and saved it as an image, then inserted it into a Word document. I set the screen display to 100 percent and enlarged the image until my ruler showed it to be the right size. When I printed the pages, I had properly-sized patterns.
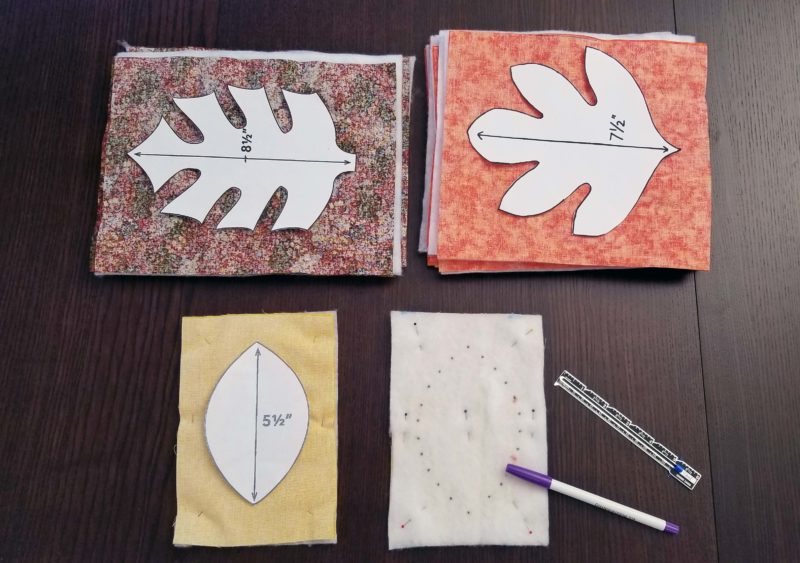
I bought brown fabric for the oak leaves, orange for the maple leaves, and yellow for the oval leaves. There were three layers to cut for each leaf–two layers of fabric and an inner layer of craft-weight quilt batting. After cutting out the patterns, I marked them on the white batting and pinned the batting to two pieces of leaf fabric.
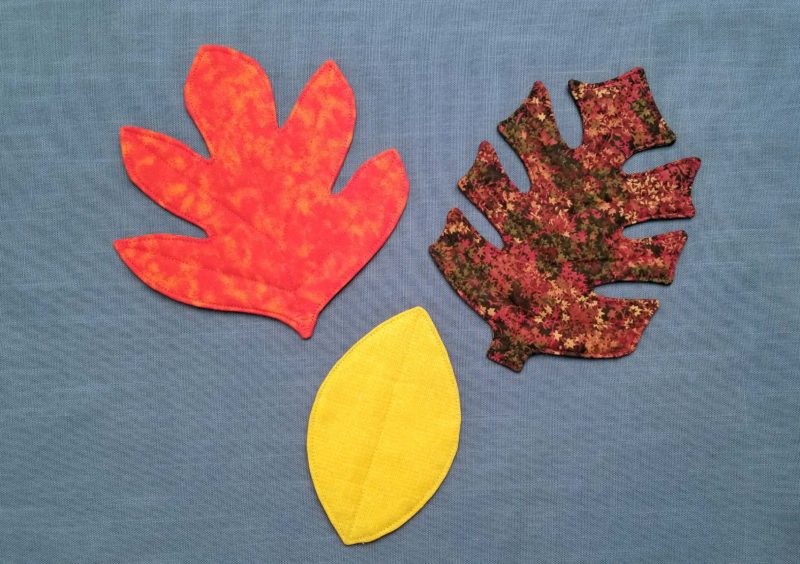
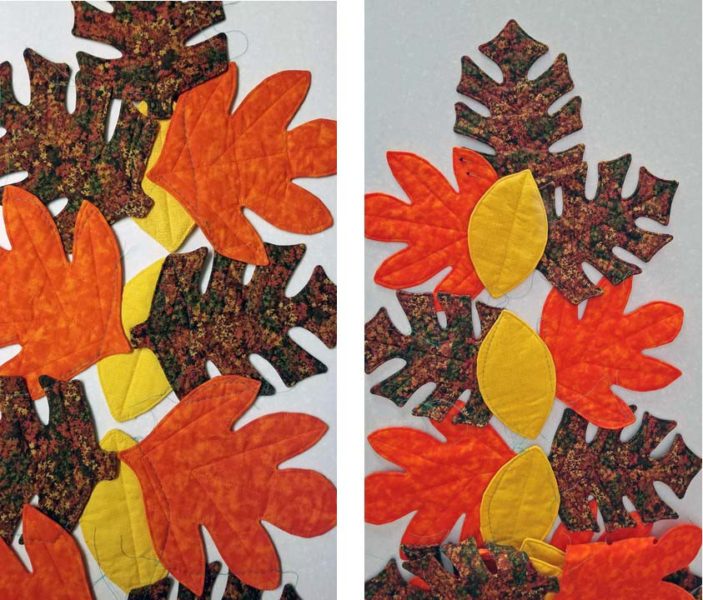
I sewed around the edges and turned the leaves through. The oval leaves were easy to turn; the maple leaves weren’t bad; the oak leaves were a real pain! After turning, clipping, and pressing the leaves, I topstitched around each one and then sewed “veins” on them to give depth to the quilted look. Only the center vein of the oval leaf shows well in the photo, but there is a stitched line down the center of each maple and oak leaf lobe.
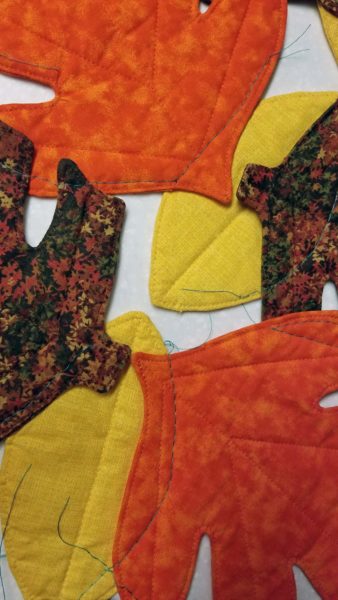
After sewing all the leaves, the directions told me to “arrange them in a pleasing pattern.” I used the project picture to get started and then did my best to fake creativity. Then I was instructed to sew the pieces together in a “free style.” Hah! That was far beyond my creative ability. I didn’t see any way I could sew the pieces together in a continuous and attractive manner, so I went with the alternate idea: join them by hand. The directions warned that joining the pieces by hand would increase the time needed to complete the project. No kidding! You can’t fool those project designers! I pinned the pieces together in my “pleasing pattern” and then machine basted them in a very free style (wherever two leaves overlapped) with a contrasting (blue) thread to hold them in place for my hand stitching.
Then I moved to a comfortable chair with an end table at my side and spent hours hand-stitching the leaves together. My mother, an expert and professional seamstress, taught me that the back/inside of a garment or project needs to look as nice as the front/outside or the front/outside won’t look as nice as it should, so I stitched every joined edge on both sides of my runner. Patience is indeed a virtue. Thank you, Mom? Yes, thank you. I’m proud of my work and I probably wouldn’t feel as good about it if I hadn’t followed your advice. Ignoring the basting stitches that I haven’t yet removed, can you tell that the left photo is the underside and the right photo is the top side of my runner?
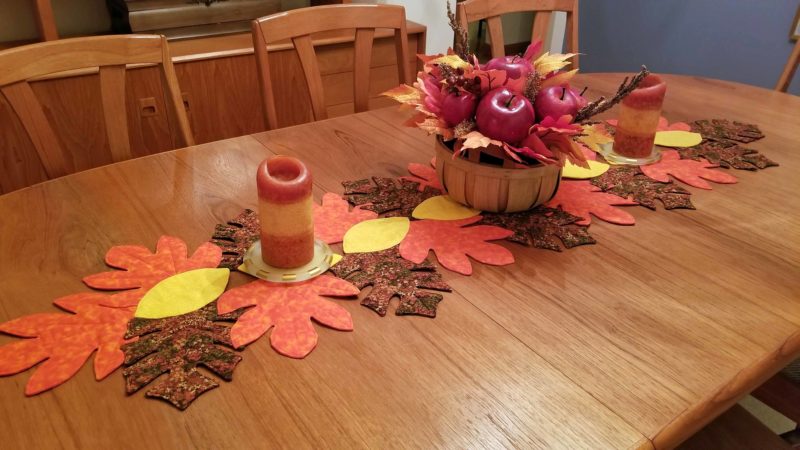
I think the finished runner looks very nice and very fall-like on our dining room table.
The project directions told me to cut and sew 16 leaves of each type, but when I put the leaves together, I decided I didn’t want a runner that long, so I stopped with ten each of the maple and oak leaves and eight of the oval leaves. I already have the additional leaves marked and ready to sew. Instead of throwing them away, I’m going to make a centerpiece that will be about half the size of my runner. I might keep the centerpiece for myself or I might give it to someone as a gift. I’ve never made anything like this before, so it was fun to try something new. Happy fall!