I saw this truck when I stopped for a red light.

I couldn’t tell what kind of rescues Super Dave performs, so I looked him up online. He’s a handyman. The attitude displayed on his truck makes me want to call him when I need something handy done.
I saw this truck when I stopped for a red light.
I couldn’t tell what kind of rescues Super Dave performs, so I looked him up online. He’s a handyman. The attitude displayed on his truck makes me want to call him when I need something handy done.
I saw this playful sculpture in front of an orthodontist’s office.

When Ted and I ordered a replacement bay window for our kitchen last August, I decided new windows deserved new valances. Those currently on the windows might be twenty years old. (Time flies. Who’s counting?) At the time, I didn’t realize it would take six months to get the windows.
When Ted and I excitedly (?) re-hung the blinds–which are only three years old, not twenty–on the new windows in February, we discovered that they didn’t look very nice. To allow for the window-opening cranks on the old windows, the two outer blinds were made shorter than the center one. The new windows have recessed cranks, so the two shorter blinds looked like mistakes on the new windows.
I talked to the decorator about this and she suggested sending the blinds to the manufacturer to have the cords made two inches longer. (Because of the style of my blinds and the mechanism that operates them, re-stringing the cords is not a simple thing.) There was enough fabric in the length of the blinds to accommodate the extra two inches, so the adjustment was covered by my lifetime warranty. Great!
I stalled again on making the valances, deciding to wait until I had blinds on all three windows. In today’s market, however, instant gratification is becoming harder to find. It took eight weeks to get my adjusted blinds back. On the bright side, we now have three equally long blinds on these windows.
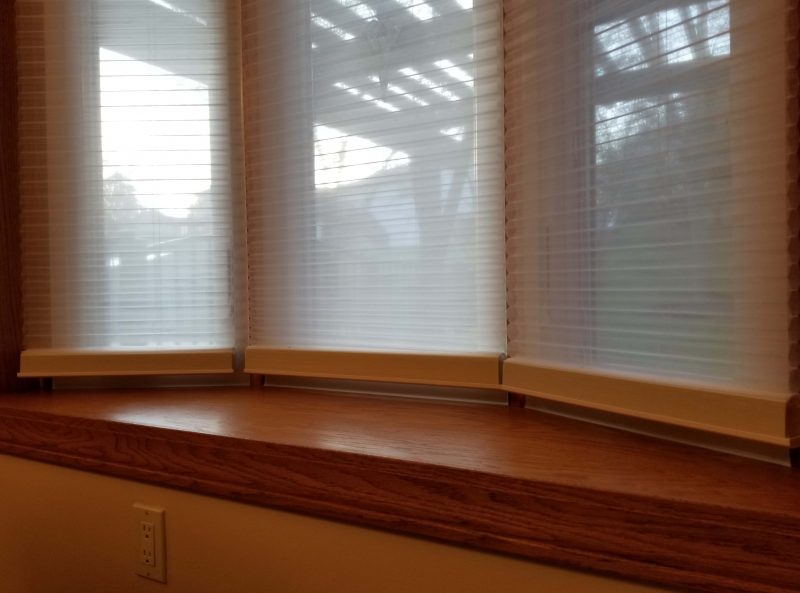
Eight months after deciding to replace the kitchen valances, with the windows replaced and the blinds adjusted, I headed for my sewing machine. It was a quick project. These are the old valances . . .

. . . and these are the new ones. There’s not a striking difference, but the lighter color is a nice change.

We had a new pool liner installed a few weeks ago and we thought we were ready to swim. Then, one day while Ted and I were working in the pool area, we noticed that the pool surface had a lot of leaves on it. They should have been sent to the skimmer, but we discovered that hadn’t happened because the pump wasn’t running. I couldn’t get it started, so I called the pool company. The service manager (Jim) told me “That doesn’t make sense. I’ll come out and look at it.” He tried everything in his bag of tricks, but nothing started the pump. He told us he’d be back the next day with a new pump.
Jim and his daughter came back the following day and replaced the old pump in about 30 minutes. Now that we have a new liner and a new pump, we should be good for at least ten years.
The arrow points to the old pump. The new one is in the box on the right.

For several years, Kari has has been telling me she wants to learn to sew. A few years ago, I gave her a Christmas gift coupon for free sewing lessons, and she finally cashed it in. She decided to make draperies for Teddy’s bedroom. Her theory for choosing that project was that draperies would be pretty easy because they’re all straight seams.
Kari and I shopped together for fabric. We talked about different styles of draperies she could make and then we did some browsing. She took pictures of fabrics she thought Teddy would like, then went back to the store a few days later to purchase her final selections.
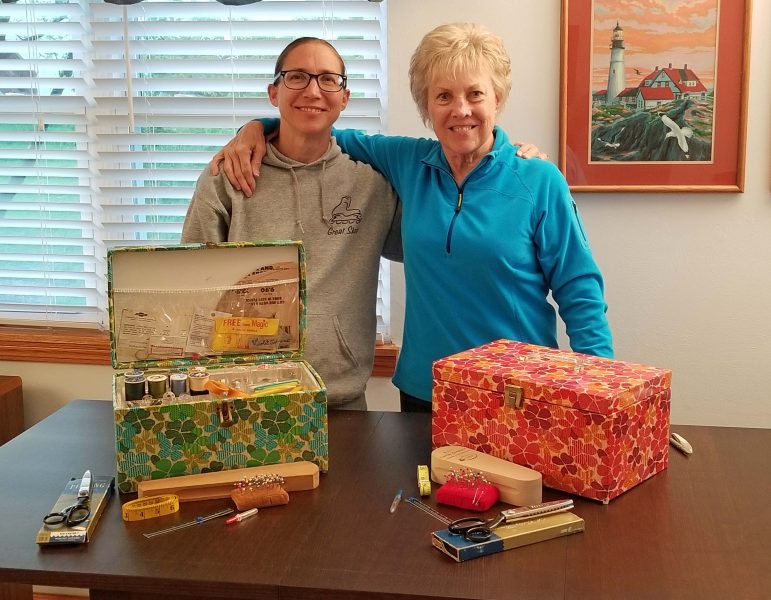
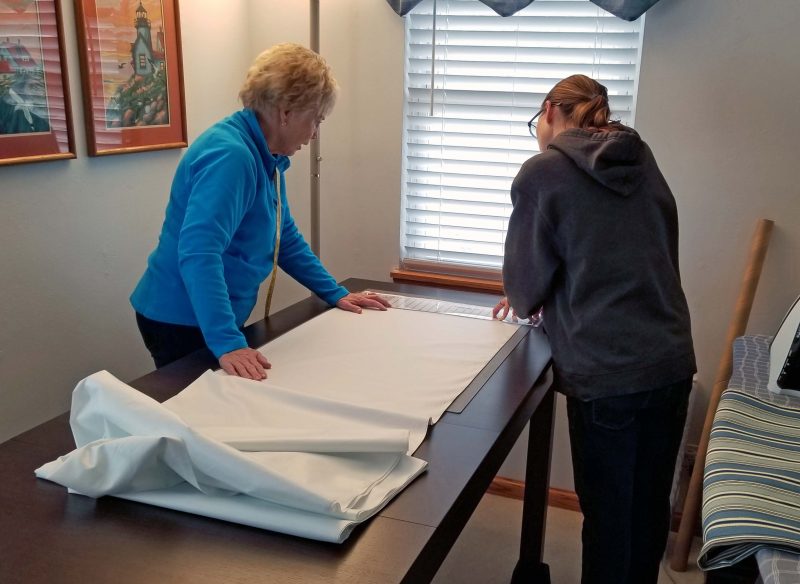
We decided to work at my house because I have a project room where we could simply leave things in progress. Kari measured Teddy’s window, then brought her fabric and her sewing box to my house. Before we went to work, we took some time to compare our sewing boxes. We have matching boxes because my mother bought one for herself and one for me when I was in college, and Kari has my mother’s box, including its contents. We shared memories of my mom / Kari’s grandma while we looked through the sewing boxes. Some of the items in our boxes match because my mom provided me with the same items she had.
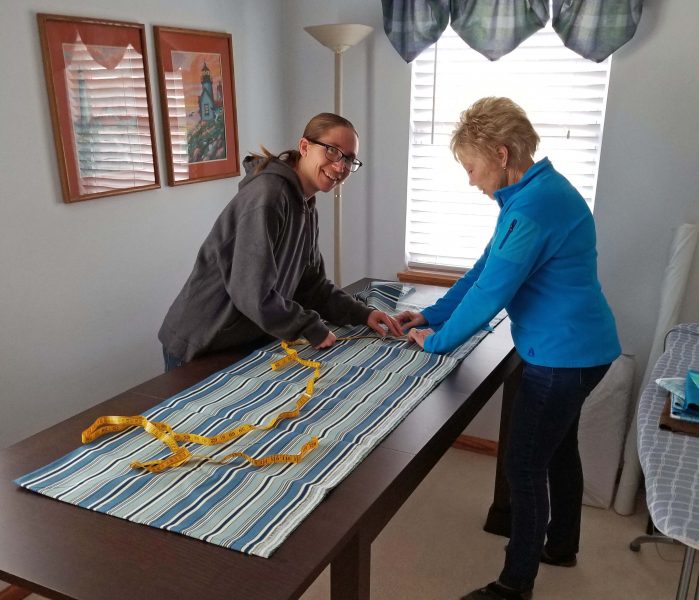
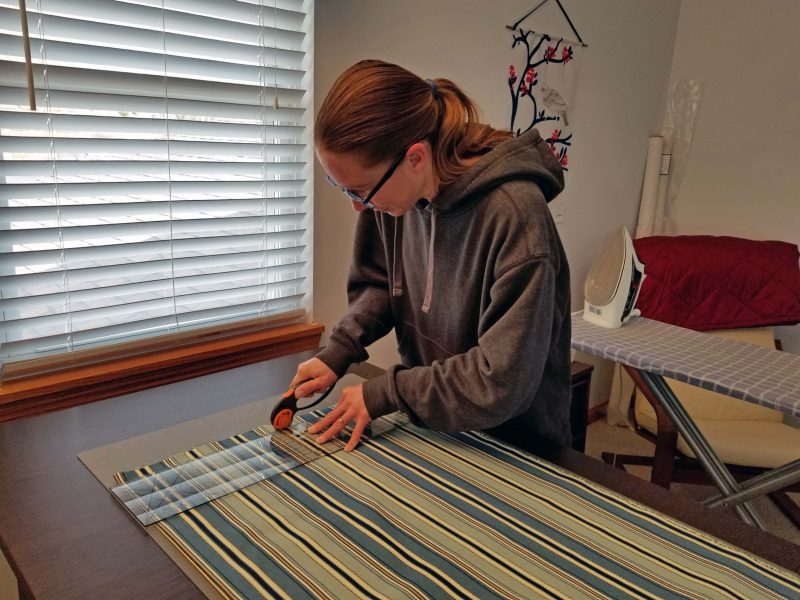
The first day of a sewing project is kind of dull because it’s all prep work: figuring, measuring, squaring the fabric, marking, cutting, etc. At the end of the session, you have nothing to show for those hours except a pile of cut fabric. We started by measuring and cutting the fabric. I had some leftover lining that I convinced Kari to use for Teddy’s drapes, so we measured and cut the lining too.
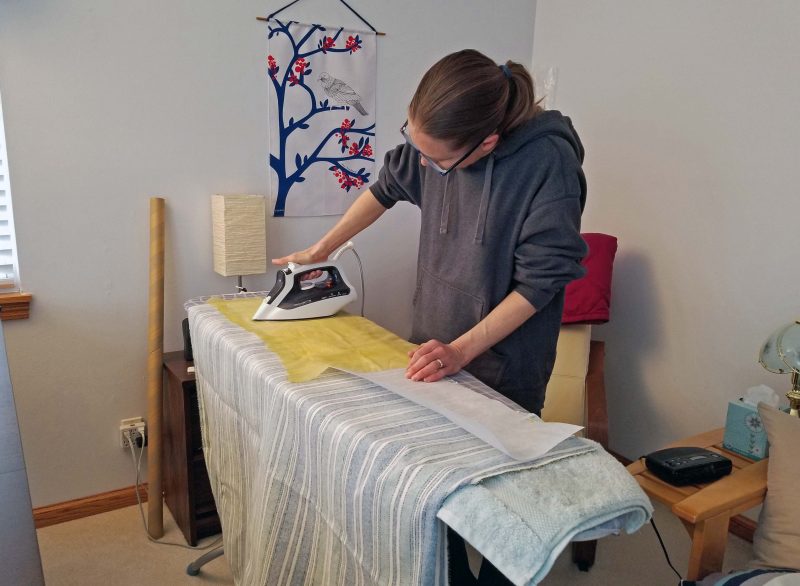
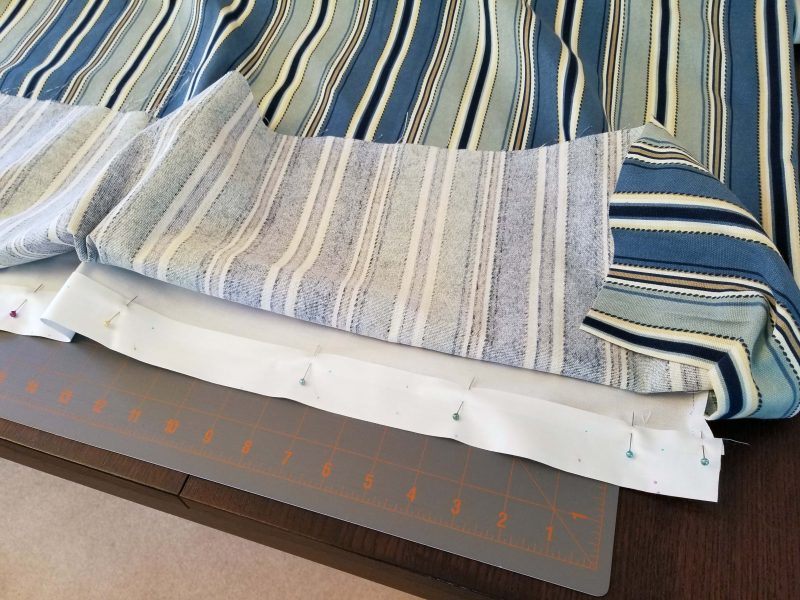
Because Kari decided to hang the panels from grommets, I suggested a heavyweight interfacing at the top to keep the fabric in the header from becoming floppy. Kari got a lesson on how to use a pressing cloth to apply iron-on interfacing.
The spool pin on Kari’s sewing machine is broken and the replacement she ordered hasn’t arrived, so we used my sewing machine. Here’s a picture of Kari attaching the lining to the fabric. After sewing the fabric and the lining together, Kari told me I was right about the lining. (I knew she’d like it.)

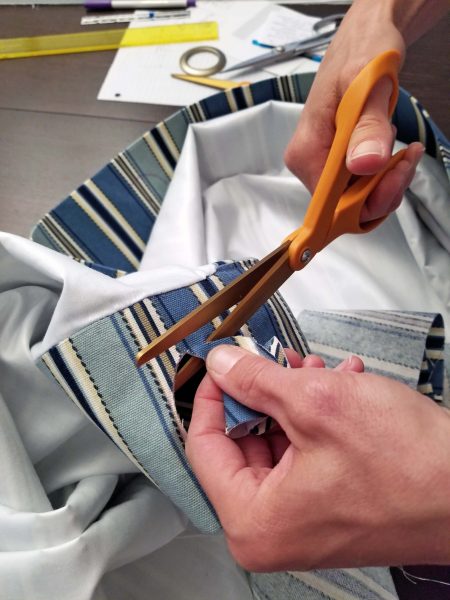
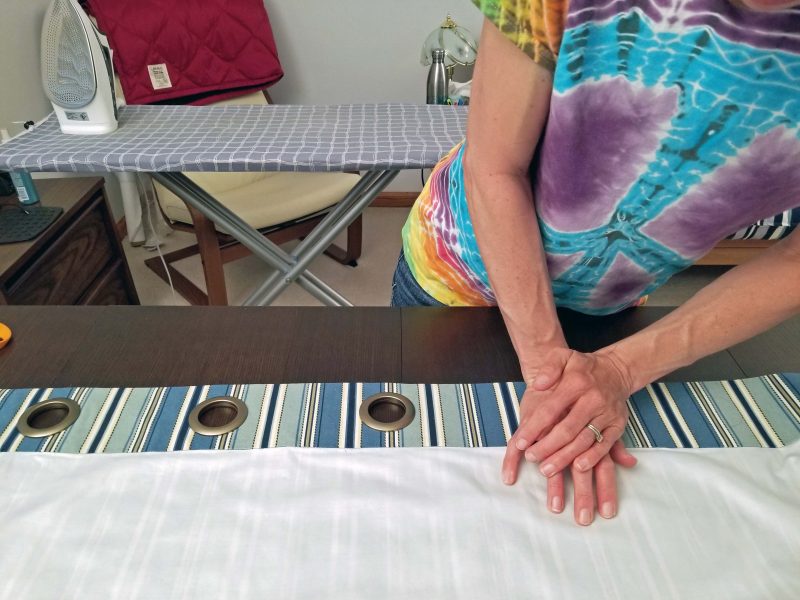
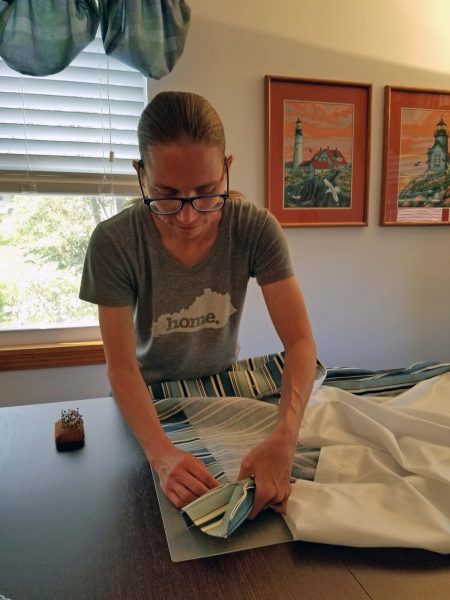
Neither of us had ever used grommets, but we discovered that they’re pretty easy to install: mark, cut, and snap together. Kari did a perfect job of grommet installation.
Then it was time to hem the first panel. Using Kari’s window measurements, we pinned the hem in place and she took the panel home and hung it from her new rod to check the length. All that time we spent measuring paid off: it was perfect. When she brought the panel back to my house, we marked and sewed the lining and the drapery hems.
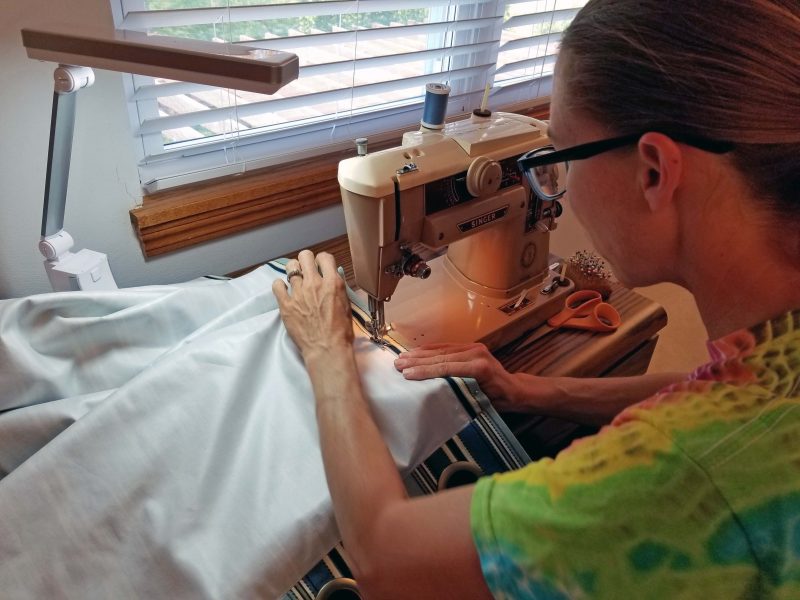
It took four sewing sessions to finish both panels. After the first session, Kari said she would enjoy using my “heritage” sewing machine. (That would be my now-58-year-old sewing machine, which I haven’t had the heart to get rid of. I bought it in college and it has sentimental value to me.) I set up my vintage machine for Kari and she used it for the remaining sewing sessions. In the photo below, she’s finishing the topstitching on the side hems of the second panel.
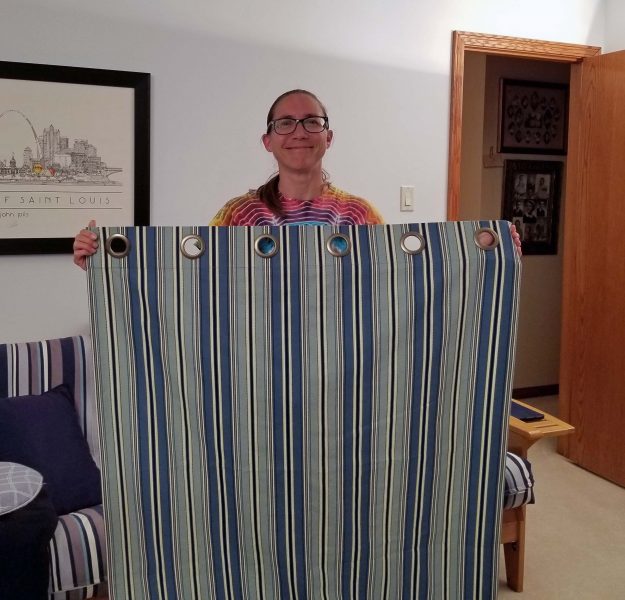
Kari said she wanted a picture of both of us with her finished draperies, so we called Ted to play cameraman. Here we are showing off Kari’s successful first sewing project.
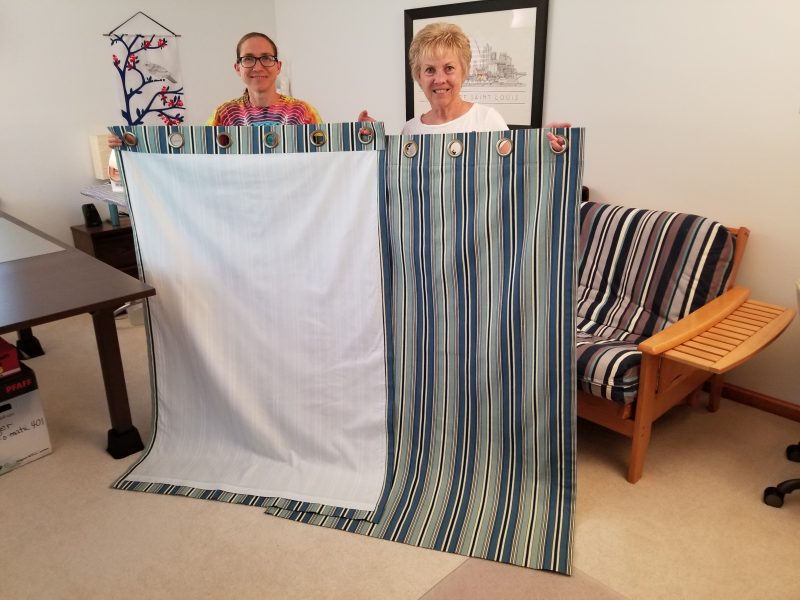
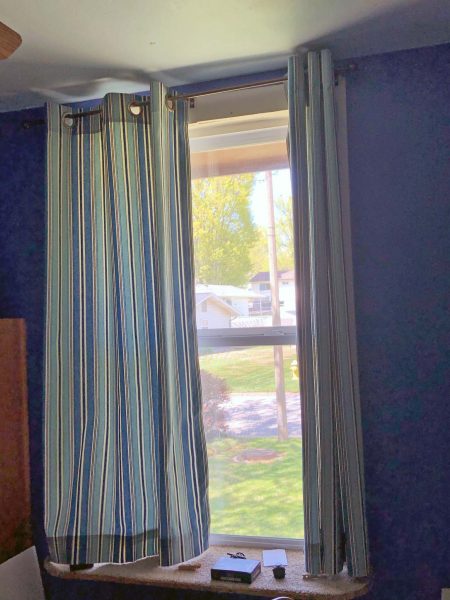
And voilá! Teddy has new draperies in his bedroom. Don’t they look nice?
Kari told me this project has inspired her. Now she wants to make a cover for her sewing machine, draperies for other windows in her house, and Christmas gift bags. She was disappointed when I told her we’ll have to wait for late summer or early fall for the Christmas fabrics to be available in the stores. I’m looking forward to sewing together again. It reminds me of my mom teaching me to sew. Pass it on, right?
Three years ago, we planted an arborvitae hedge. The trees on each end are doing very well, but the trees in the middle don’t want to grow. One tree died in the first year and was replaced under the warranty, but now we have four trees in the center area that are failing. The difference in size between the trees on the ends and those in the middle is obvious. You can’t see between the end trees, but there’s lots of space between the stubby center ones–just where we want the privacy. The trees were all planted at the same time except for the totally brown one, which was replaced after the first year. The replacement lasted about 18 months. That spot in the ground has now killed two trees in three years. When we ordered this round of replacements, the landscaper suggested having the crew overdig the holes and put in new soil.

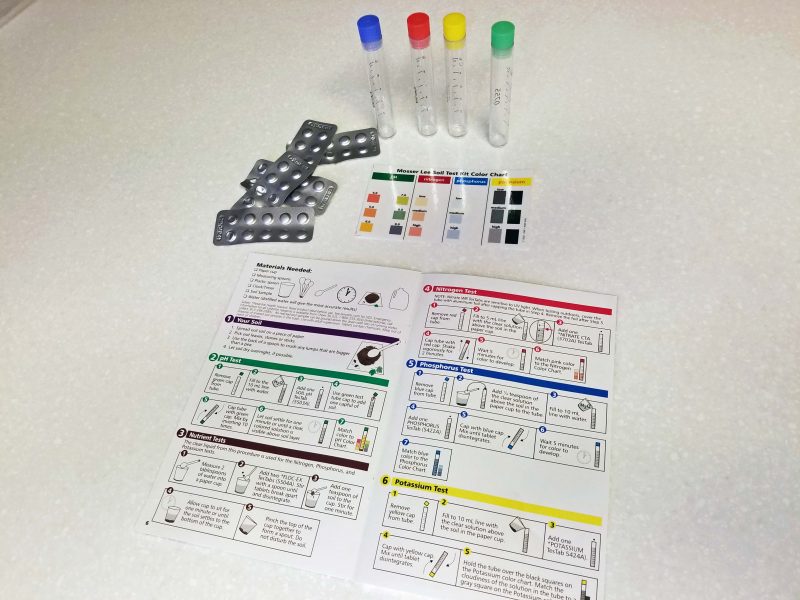
The landscaper’s suggestion made us think a soil test might be a good idea. I thought we’d have to go through the county extension service, or at least a nursery, to get an expert to perform a soil test. I shouldn’t have been surprised, but when I searched online for someone to do a soil test, I discovered that soil test kits are available at–where else?–Wal-Mart.
This is the stuff included in the testing kit. As I set out the instructions, the soil samples, the test tubes, the chemistry tablets, the distilled water, and the color chart, I felt like Bill Nye the Science Guy. All I needed was safety goggles. It brought back memories of high school chemistry class when we did experiments on Fridays.
Soil testing isn’t hard, but it’s definitely time-consuming. It took me about four hours to test six soil samples. The results showed that our troubled center section of arborvitae trees could use some pH and a lot of nitrogen, and our magnolia trees could also benefit from some nitrogen. Ted bought some nitrogen and treated the magnolia trees. The landscaper’s plan to add new soil might solve the arborvitae problem, but I guess we’ll have to test the new soil to find out.
I saw this picture of Dr. Anthony Fauci (Tony to those who know him) and noticed that he has an appropriately clever face mask, covered with test tubes, beakers, Bunsen burners, etc.

Check out today’s seven-day forecast for our area.

The record low for tonight (Tuesday) is 32 degrees, set in 1904. We’re probably going to break that record with a low in the mid- to upper 20s. We spent today in the 30s and, just for fun, we had a late season snowfall.

The ground is above freezing, so the snow will disappear quickly. The temperatures will stay cold for another day and night, probably dropping below freezing again tomorrow night. The normal high and low temperatures for today are 68 and 48, so this cold weather is definitely unusual.
Did you notice that the high for next Tuesday is expected to be around 80 degrees? It’s quite a ride, going from a record low in the 20s to a warm 80 degrees six days later.
Spring: the least predictable season.
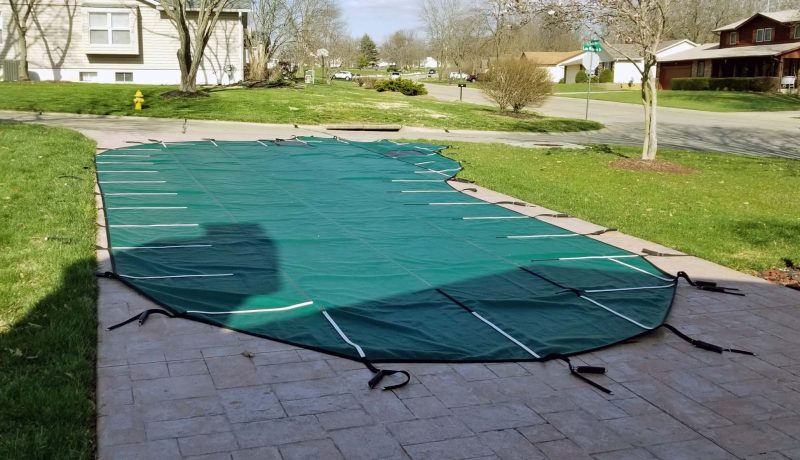
Last week, we needed to get our pool ready for the scheduled installation of a new liner. The first step was to remove the winter pool cover. Ted estimates the cover weighs about 80 pounds, not counting the water it picks up as we drag it over the pool to remove it. I think his estimate might be low. I had already washed the driveway so we could spread the cover out to hose it off before we pack it away until late fall. Our neighbor, Will, saw us washing the pool cover and said, “Oh, no! If you guys are opening your pool, it’s going to snow next week!” Hahaha.
While the cover lay drying in the sun, we started draining the pool. With the pump pulling the water out through a two-inch hose, that took about 5 hours. While waiting for the pool to drain, I power washed the winter dirt from the pool deck and the patio, and hosed off the sidewalks and the front porch. Ted brought out a few more pieces of lawn furniture for the nicer weather, then mowed the lawn.
With a new liner coming, we wanted the pool steps and the upper edge around the pool to be sparkling white. It’s much easier to clean the edge by standing in the pool than to kneel on the pool deck, leaning over the water to scrub it. Since the pool was empty, Ted got to work.
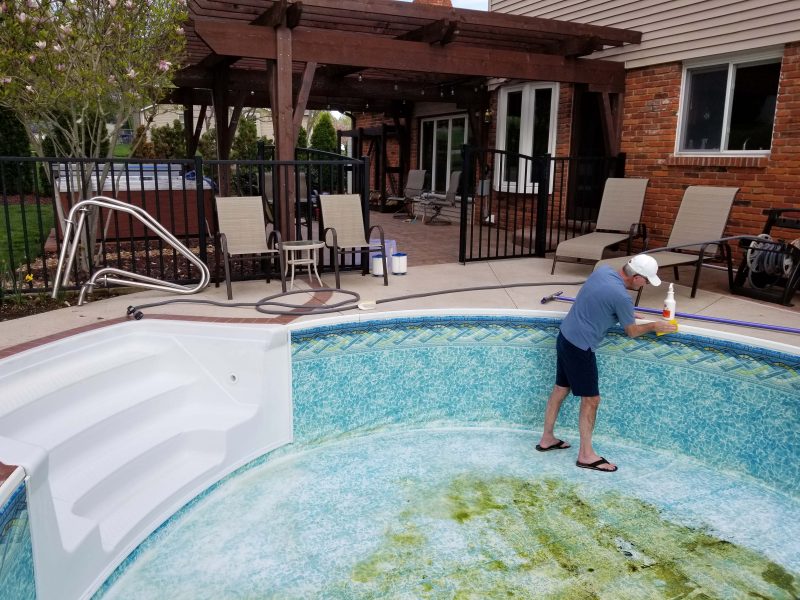
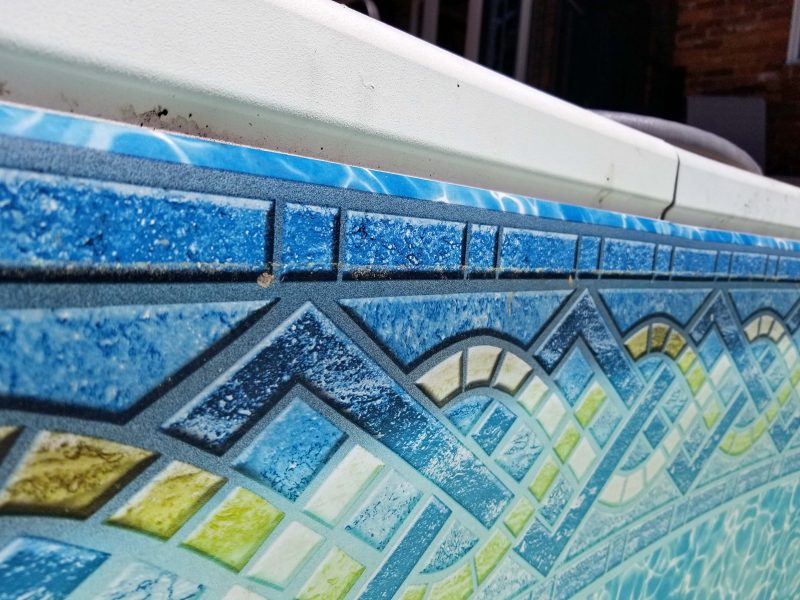
If you’re a long-term reader, you might be thinking, “Didn’t they just put in a new liner a few years ago?” You’re right; liners should last at least 10 years. Look at the top edge of the liner in the photo above. It looks like there’s a dark border, but that’s not a border; that’s how much the liner faded in 3 years. When the pool guy saw that, he said it should have lasted much longer (say, 10 years), so he activated the warranty to save us a chunk of money on the new liner and on the installation labor. A closer look at the liner in the photo below clearly shows the fading. It also shows why Ted is scrubbing dirt off the top white edge.
The pool crew arrived bright and early the next morning. They cut around the bottom edge of the liner and removed the bottom piece, then released the sides, and carted it all away. There was some clean-up to be done before dropping the new liner. Hard objects and / or deep depressions under the vinyl liner can result in puncture holes, so a complete and detailed vacuuming and some touch-up fill work were needed.
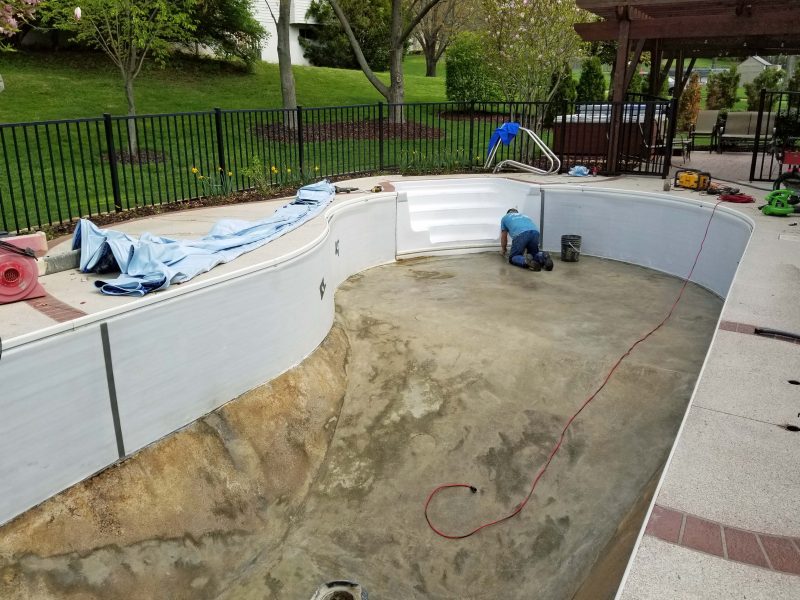
Two hours after the crew arrived, they had the new liner dropped and they were making some final adjustments before working out all the wrinkles and installing the jets, the light, and the drain covers.
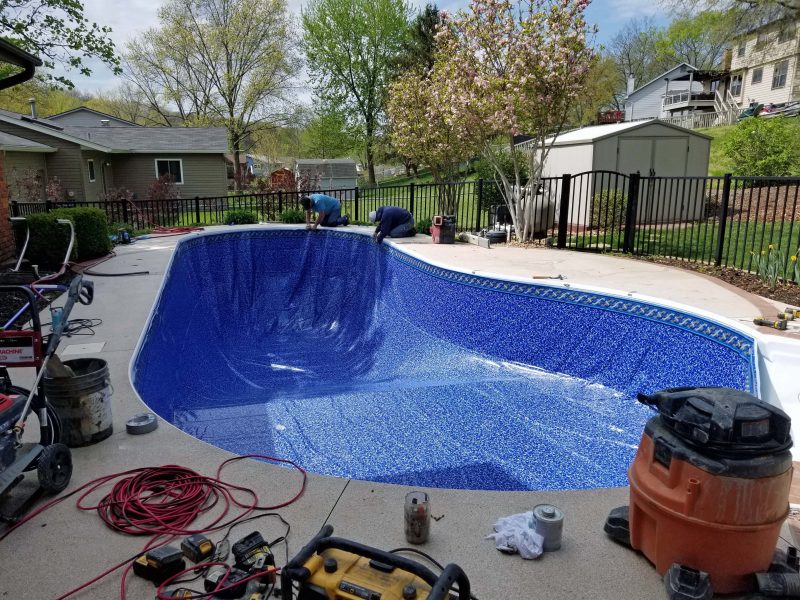
The guys started filling the pool before they left and told us to turn off the water when it reached the bottom step. The next morning, they came back to adjust any remaining stubborn wrinkles that had been pushed ahead of the water. After that, we were “go” to fill it all the way. With two hoses running, it took 16 hours to fill the pool to the top. One of the pool crew guys came back the next day to install the ladder and the railings, to turn on the pump, and to check the equipment to make sure everything was running well. We are now ready for the 2021 swim season.

Having a new hot tub means having one more thing to clean up in the spring and in the fall. We’ve been enjoying the hot tub for almost six months, so it’s time to freshen it up. That job turned out to be a lot more time-consuming than we’d expected.
The obvious first step was to drain the hot tub. It sounds easy and there really isn’t anything to do except connect a garden hose to the hot tub drain. BUT, first you have to bring the water temperature down from that lovely, relaxing 104 degrees. The owner’s manual suggested 24 hours, but the overnight temperature dropped to the low 40s, so cooling the water wasn’t a problem–we just took the cover off and let the night air do its thing. The water was more than cool enough by morning, so while the pool was draining, we connected a garden hose to drain the hot tub. Draining it took a surprising 5 hours–the same amount of time it took to empty the pool, which has about 34 times more water than the hot tub. We did not see that coming! Talk about a setback in your schedule! The pool’s two big drains, its pump, and its two-inch drainage hose work a lot faster than a 5/8″ garden hose counting on gravity to do the work.
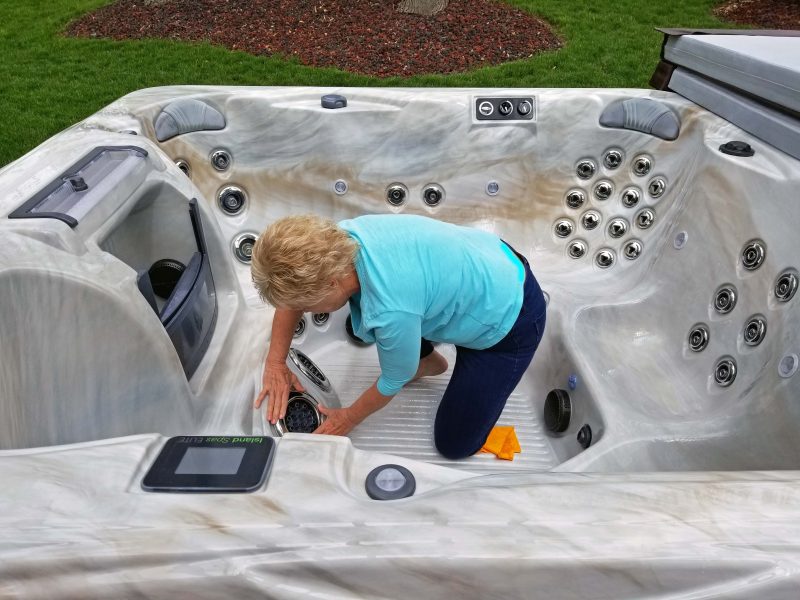
When the hot tub was (finally) drained, I started cleaning it while Ted cleaned up the pool. It sounds amazing when the literature and the salesman tell you that your hot tub has 6 gazillion jets. “Ooh, aah,” you say. “Is that the most we can get?” It’s a different story when you have to remove every jet to clean it. My sore fingertips felt like I unscrewed and pulled out about 6 gazillion jets, but I reasoned there probably weren’t more than 120. Hah! When I finished, I counted them and came up with only 62 jets–half of what my fingers “reasonably” felt like I had removed.
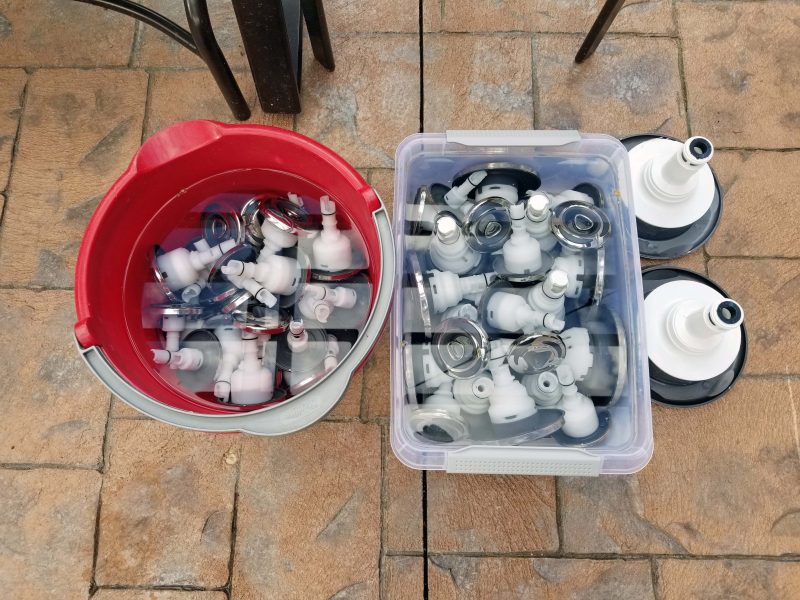
The jets had to be soaked in a vinegar/water mixture for 3 hours to remove any built-up residue in them. The two extra large jets that provide an awesome foot massage didn’t fit well in our pail and dishpan with the other jets, so we put them in the pail after the first load of jets was finished soaking. As a result, the total soak time was 6 hours. We opted for the extended time because we’d already used 1.5 gallons of vinegar and we didn’t feel like making another trip to the grocery store for more vinegar to do only two more jets.
While the jets soaked, I scrubbed. The pool store sold us some awesome non-sudsing cleaner for the tub surface. I just sprayed it on and wiped it off, and it left the surface as smooth and clean as if it had never been used. No hard scrubbing needed. I bet it would work great for cleaning the bathroom.

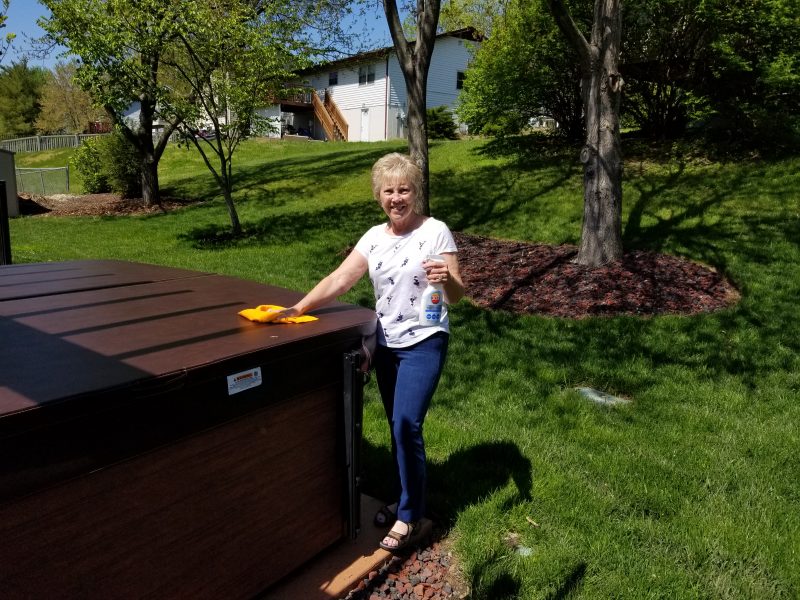
After removing and washing the headrests, I moved on to the exterior of the hot tub and wiped down the sides to get rid of the winter grit. The final cleaning task was to wash the cover and apply a coat of protectant to help prevent premature fading and weathering. That was pretty simple too–just time-consuming. Aren’t you impressed that Ted’s pictures show me smiling while I work? I feel like a TV ad. The truth is, the job wasn’t awful, but I’m good with only needing to do all of this twice a year, and we both feel that way about the pool too.
At last, I could put the garden hose inside the hot tub to fill it. It filled in about 45 minutes, but it wasn’t warm enough by evening to relax our sore muscles from all the work of cleaning the pool and the hot tub.
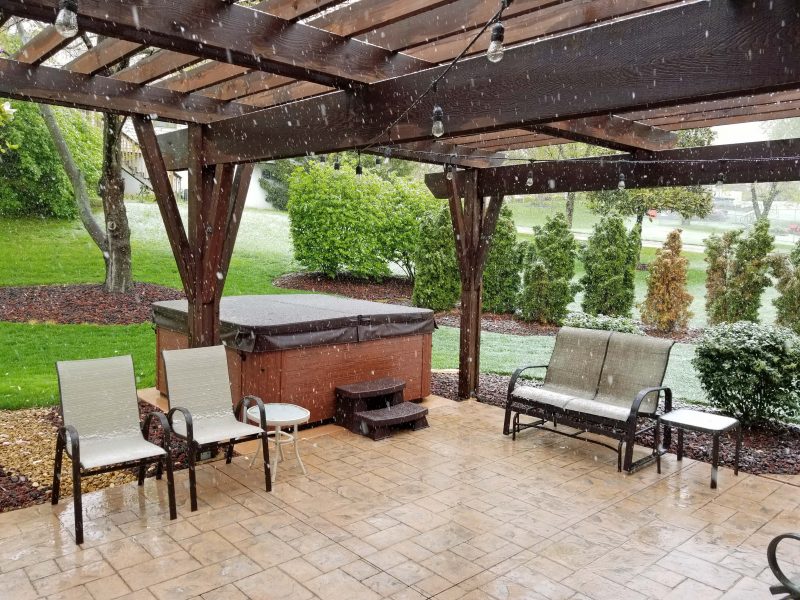
After spending two days getting our waterworks cleaned up for the summer season, there’s a change in the weather forecast. After a high temperature of 75 degrees today, tomorrow’s forecast includes falling temperatures, rain possibly mixed with up to one inch of snow, and an overnight low in the mid-20s. More of the same is predicted for the following day and night, except the temperatures might be a few degrees warmer. Will was right. It’s been a week since we opened the pool and we’ll probably see some snow tomorrow.
It’s time for the Dr. D Spring Award. One of the reasons I love spring in Missouri is because we have so many blooming trees. There’s beauty wherever you drive in the spring. This year, I had more than the usual number of contestants because not many trees were affected by the late frost.
I don’t know what kind of tree this is, but there are a lot of them in the area and they have very thick white flowers. You can see a redbud peeking over the white tree.

Here’s a flowering crabapple tree.

The white dogwoods are always pretty, especially when they are sprinkled throughout a wooded area.

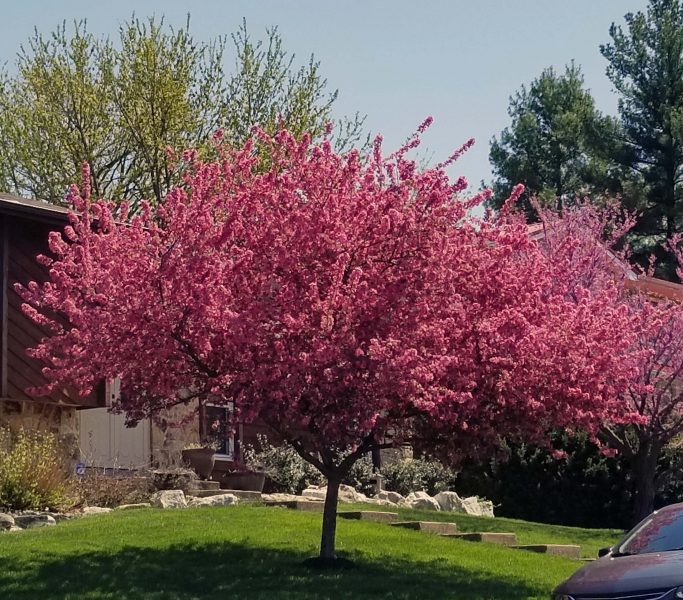
Pink dogwoods are gorgeous. I’m not crazy about the setting, but this is a beautiful pink dogwood.

This is another flowering crabapple tree. The color is so vivid!
The judge’s (my) decision was really tough this year. I finally decided to include a new category and named this stunning star magnolia the first runner-up in this year’s spring show.

For the first time, the winner is a group of trees. It was a tough decision, but the color and scope these redbuds display to passers-by (and my love of redbuds) gave this group the edge to be named this year’s best display. Presenting . . . the Dr. D Spring Award.

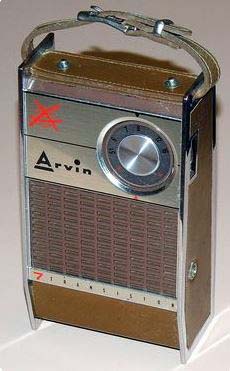
I was searching for something on the internet and, to my surprise, I came across an image of an Arvin 7 transistor radio. That brought back so many memories!
Transistor radios were first mass produced in the late 1950s and were the most popular electronic communication devices of the 1960s and 1970s. (What else was there at that time? I’m drawing a blank.) Transistor radios were popular because they were pocket- or purse-size and portable (battery operated), allowing us to listen to music wherever we went.
I was a pre-teen at that time and, of course, my friends and I all wanted transistor radios. I saved my allowance money and, in October 1958, I went shopping. My mom came along because I needed a driver. My choice was the Arvin 7. This was an upscale transistor radio. It was named the Arvin 7 to indicate that it had seven transistors. Wow! I think it cost about $30 when the cheaper models cost around $10-$15. It was so cool! It looked like this and was about 4″ x 6″.
It came with a leather cover for the front. You can see the earphone jack on the side. That was a nice feature.
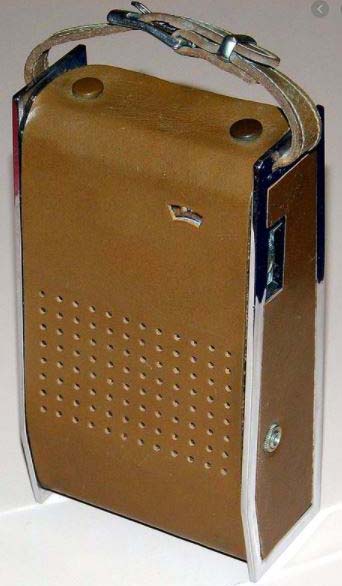
The cover had one snap on the bottom and two on the top and could be attached over the back as well. Really cool!

These radios offered only AM frequencies, but that was fine because my friends and I all listened to the same AM station that every teenager in the Milwaukee frequency area listened to: current pop music on “WOKY in Milwaukee–920 on your radio dial.” My parents (and my friends’ parents) hated WOKY (pronounced “walk-y”). In fact, my mom once told me that the same song sounded better on any other station. Yeah, right. If Bing Crosby sang it instead of Elvis!
One of the really neat things you used to be able to do with AM radio was pick up far-away clear-channel stations on especially clear nights. With my awesome little transistor radio, I occasionally heard Wolfman Jack in New York and I remember picking up New Orleans and Chicago too. Those were the days.
March: In like a lion, out like a lamb, right? Well, early March was cold. (Lion?) Then the weather started warming up in mid-March, and late March was beautiful. (Lamb.) In fact, we had so many warm days in the 60s, 70s, and even a few 80s, that spring flowers, shrubs, and trees burst into bloom. Our magnolia tree is as eager for spring each year as I am. As a result, it usually loses its blooms to a late frost. This year, it reached full bloom and held it for several days. I dared to hope that spring was really, truly here.
Here’s my favorite tree–the magnolia that loves to bloom ASAP every spring.

When we had our maple tree cut down, we also had the tree-cutting crew shape a smaller magnolia to grow more evenly out of the shadow of the maple tree. The tree-cutter said the little magnolia wouldn’t bloom this spring, but it will by next year. No, sir! These trees can’t wait to bloom! Here’s the little tree, blooming like crazy in spite of last summer’s pruning.

Our cherry tree in the back yard gets noticeably taller and blooms more fully each year.

The daffodils around the pool are in full bloom. I love them!

And then, . . . And then, . . . And then, . . . Hah! April Fool! In the early morning hours of April 1, our temperature dropped to 26 degrees. As if that wasn’t bad enough, in the early morning hours of April 2, it dropped to 25 degrees! And that was the end of the beautiful magnolia blossoms.


The cherry tree blossoms, the daffodils, and the not-yet blooming different variety of magnolia trees in the back yard all look fine. I think it might be that our back yard is more protected with houses and a hill behind us and didn’t get hit as hard by the frost. The two magnolia trees in the front yard are more exposed because of the wide street and the open space between houses across the street.
The temperature got back into the mid-70s today and is forecast to stay in the 70s and maybe even low 80s the rest of this week. We had spring, then a hard hit of frost, and we’re right back to spring. The Midwest is a great place for variety in the weather in March and April. I could do without the mid-spring frost, but I love all the things that bloom, making spring my favorite season every year.
Author’s note: Ted and I are optimists. We’re scheduled to open our pool in nine days.