Ted’s sister, Mutzie, (aka the Quilting Queen) gave Kari a small quilt when Kari was a toddler, and she also gave Kari a baby quilt for each of Kari’s three boys. Kari loves those quilts (she wore hers down to rags) and thought making a quilt for a baby gift would be a good idea for our next sewing project. Since Ollie’s birthday was coming up and since I’d be working with Kari on her quilt project, it seemed like a good idea for me to make a gift quilt for Ollie.
The last time I worked with a sewing partner was during the years my mom taught me how to sew. Now that Kari has decided it’s time for her to learn to sew, I have a sewing partner again and I’m really enjoying it. We start our mutual sewing projects by shopping for fabric and supplies together, a subset of sewing that’s also more fun to do with a partner. Kari chose fabrics in blues and yellows. She wanted to make a simple quilt for her first effort, so she planned to sew the edges together (wrong sides out) and turn the quilt through, then topstitch a “binding” edge and quilt it. She bought calico for the top fabric and fleece for the bottom because some of the quilts Mutzie made for the boys have a fleece backing and Kari loves the softness of it.
My choice of fabrics was calico in light and dark blues. Kaitlyn told me that Ollie looks good in blue and he loves his Mickey Mouse toy, so I decided to put some Mickey Mouse appliqués on his quilt. I planned to use a bias-cut binding around the edges. Kari’s quilt gift will stay in Missouri; mine is going to Utah. We chose a medium-weight batting for hers because more than that would be too much with the fleece backing; I went with a heavy-weight batting for Utah’s cold winters.
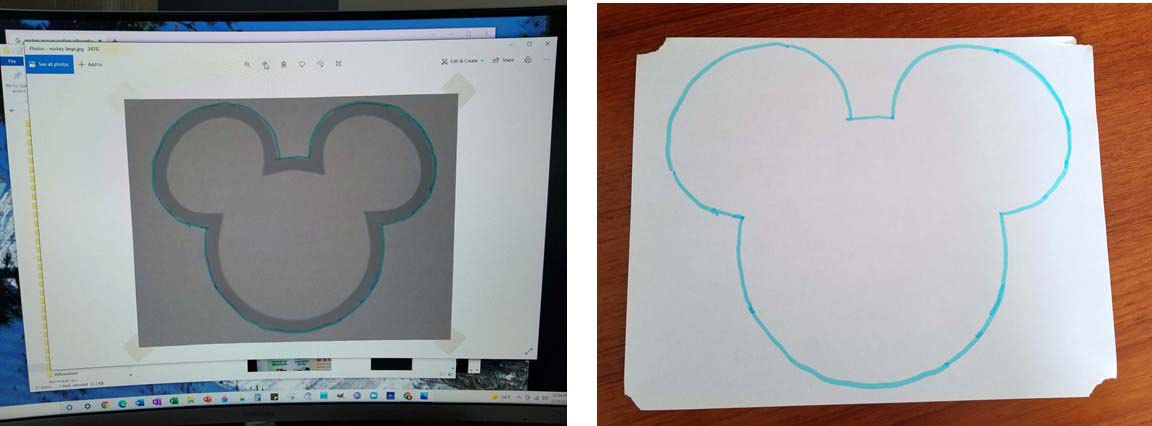
Things were looking good. We worked together on Kari’s quilt when she had time to come over for an afternoon and I worked on mine between our mother-daughter sessions. I’m not an artist, but I found a clipart Mickey Mouse-like outline online, zoomed the PC screen to my appliqué size, and traced a pattern.
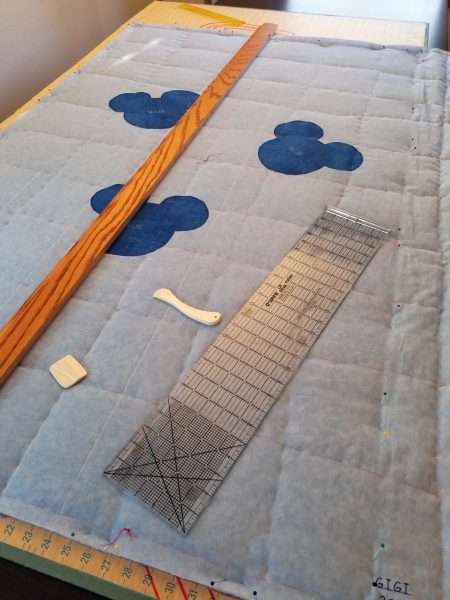
I cut out the appliqués, fused them to the quilt top with HeatnBond, stitched around the edges, and admired my work. It looked good.
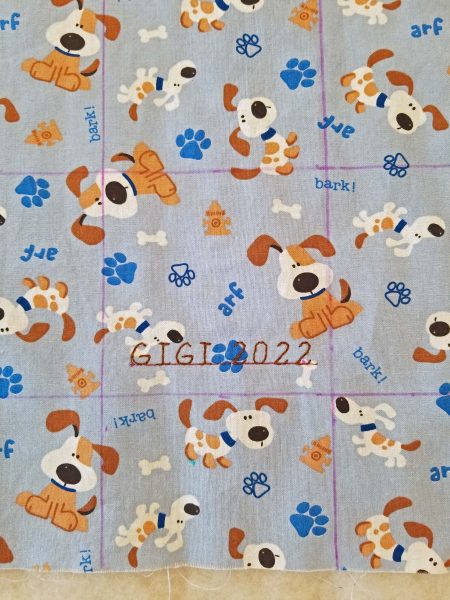
If this quilt ever becomes valuable (hah!), “Antiques Road Show” will raise its value with the provenance of a signature, so I decided to put my signature in a corner of the quilt. I estimated where the signature would fit without being covered by the binding and I stitched it. So far, so good.
Then I pinned the top fabric, the batting, and the bottom fabric together, basted them, and marked my quilting lines. I was pondering how to draw long straight lines when I remembered that we have a spare 7-foot piece of finished oak baseboard in the basement. I checked to make sure it wasn’t warped, then washed it off and used it as a long straightedge. It worked great for marking the quilting lines.
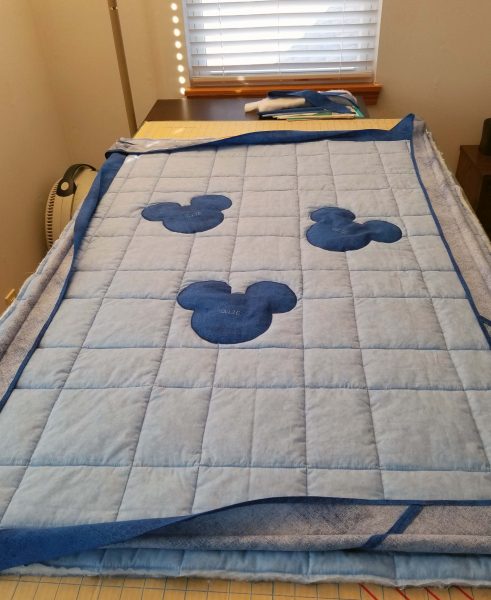
As I was marking the lines, I discovered a problem or, in Bob Ross terms, a happy accident. One of the lines went right through the signature. With my seam ripper in hand, I ripped out the signature and repositioned it. After that, it was exciting to start sewing quilting lines to make my project look more like a quilt than like two pieces of fabric with a filling. I laid the quilted quilt on the table, examined the lines for straightness, and saw some more happy accidents. There were so many crooked places in the lines that I wasn’t pleased at all. I got out my seam ripper (again) and sewed the lines (again), then checked how everything looked (again). There were still some areas that needed adjusting, so I ripped (again) and re-sewed (again). 😢 Bob R’s happy accident thing is wearing thin.
After the third round of stitching lines, the quilt looked ok–not great, but passable–so I moved on to the binding. I started pinning the binding near the signature and guess what . . . the binding covered the bottom edge of the signature. Dang it! How many happy accidents can one project have??? I ripped out the signature (again) and stitched it (again). Then I sewed the binding to the top of the quilt, mitered all the corners, folded it over and pinned it to the bottom, making sure I caught the bottom edge with my top pins. I was ready to “stitch in the ditch” to attach the back of the binding and finish the quilt.
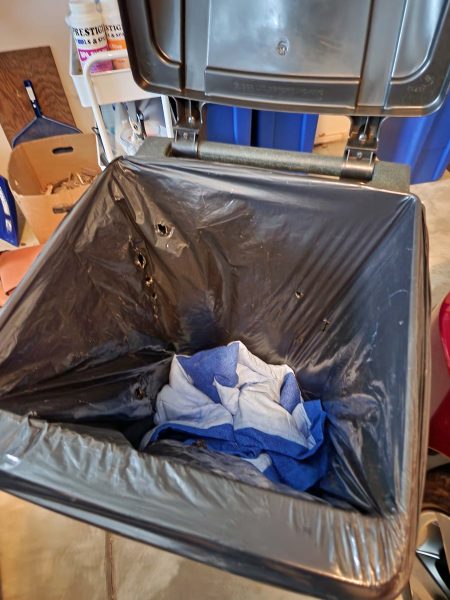
But, . . . when I finished that job and turned the quilt over, almost half of my stitches in the ditches had failed to catch the edge of the binding, in spite of how carefully I’d pinned it. I’d been pretty patient about all the do-overs so far, but this was the last straw. I’d already clocked 43+ hours on this quilt because I’d ripped out so much of what I’d done and re-sewed it at least twice and sometimes three times. I’d had it! Good-bye, Bob Ross, and take your happy accidents with you!
I was tired of the way this quilt was behaving and I told Ted I sincerely believed it was cursed and the universe was giving me a message. I was not happy with how my (almost) finished quilt looked and I felt like I’d have to make excuses for all the things that were not up to my standards. I definitely didn’t want another seamstress to see it up close and I did not want to give work of this quality to Ollie. “Despondent” perfectly described my mindset at that moment. I think the heavy-weight batting was the problem. It was too thick for my sewing machine to do its best work and it definitely made the quilt heavy. Not warm and cozy heavy, but “take this thing off of me” heavy. I decided (with Ted’s full support) to start over, and this is what I did with the Mickey Mouse quilt.
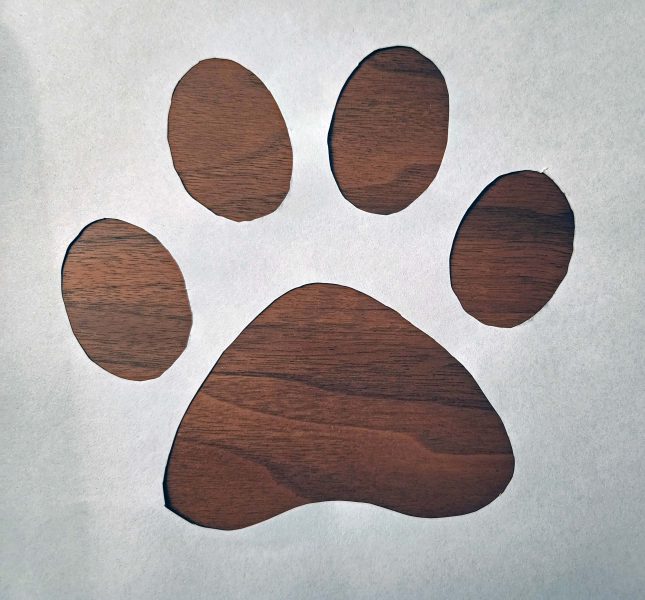
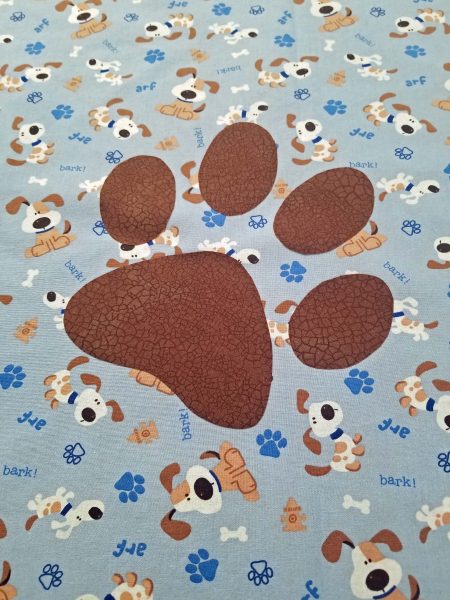
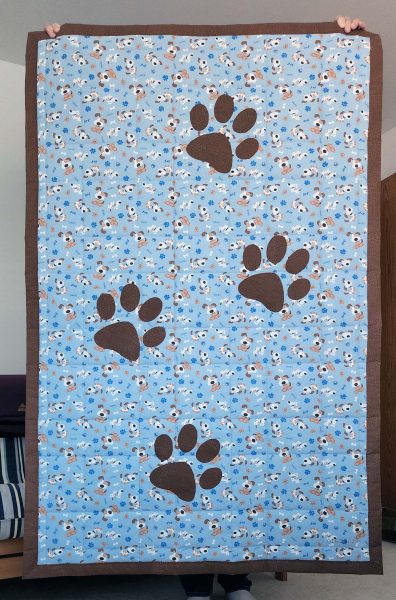
I bought some lighter batting, chose a blue fabric with a puppy print (remember, Ollie looks good in blue), and a brown fabric for the backing. The print I chose won’t remind Ollie of his Mickey Mouse toy, but what little kid doesn’t like puppies? I decided to stay with my original basic idea–appliqués and a binding–but instead of messing with a bias binding, I chose to do a self-binding.
To complement the puppy-patterned fabric, I chose puppy paw prints for my appliqués. The Mickey Mouse appliqués were a single piece of fabric; the paw prints had five pattern pieces each. I printed copies of my pattern and cut the pattern pieces out of one of the sheets to create a template. It was so easy to place the template on the quilt fabric, fit the adhesive-bonded pieces into it, and iron them in place.
Never let it be said that I don’t learn from my mistakes. This time, I drew my quilting lines before sewing the signature in the corner. I knew exactly where to place it and it was in the right place the first time.
I put the three layers together, basted them, and sewed the quilting lines. Every single line was straight the first time! The heavy batting was definitely the problem. Folding over the edge for the self-binding was easy. I attached it with a decorative stitch, and that turned out very nicely. A feather stitch closed the open miters at the corners.

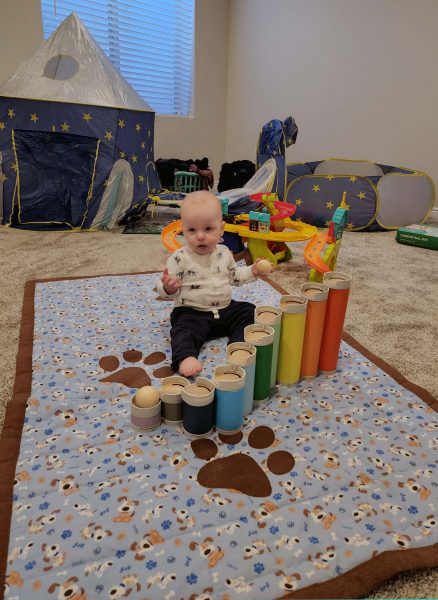
Voilà! In less than half the time I spent on the Mickey Mouse quilt, I had a quilt that I think is even cuter and that I was excited to give to Ollie. Anyone who wants to examine it–seamstress or not–is welcome to do so, because I’m proud of this work, not embarrassed by it. The trash can was the right place for the Mickey Mouse quilt and this one is for you, Ollie.
The trials and tribulations I experienced with the Mickey Mouse quilt were happy accidents after all. The puppy quilt turned out beautifully and, when Ollie saw it, he pointed at the puppies and said one of the three words in his current vocabulary–“dog.” Happy first birthday, Ollie.