Thanks to the kitchen update, the basement workshop got an update too. The last time we updated our kitchen, we selected some of the old, to-be-removed cabinets from the kitchen and had them moved to the workshop for neater storage down there.
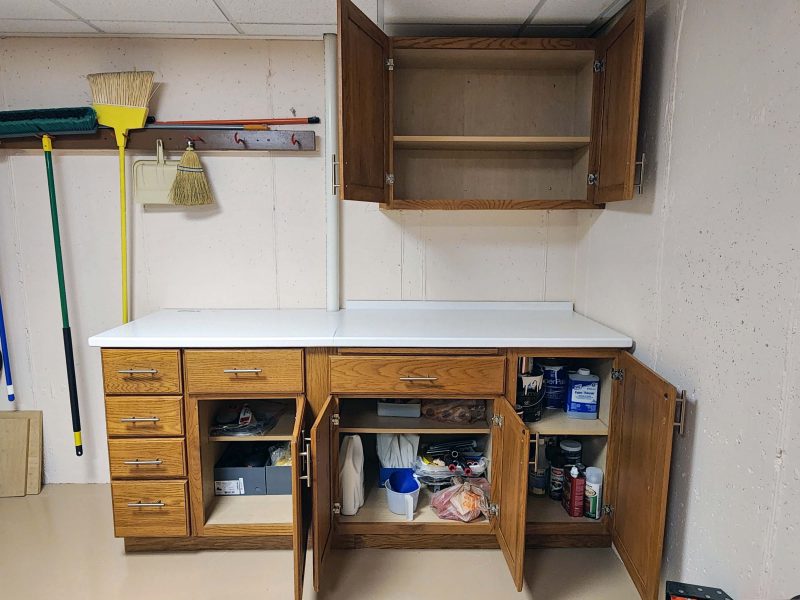
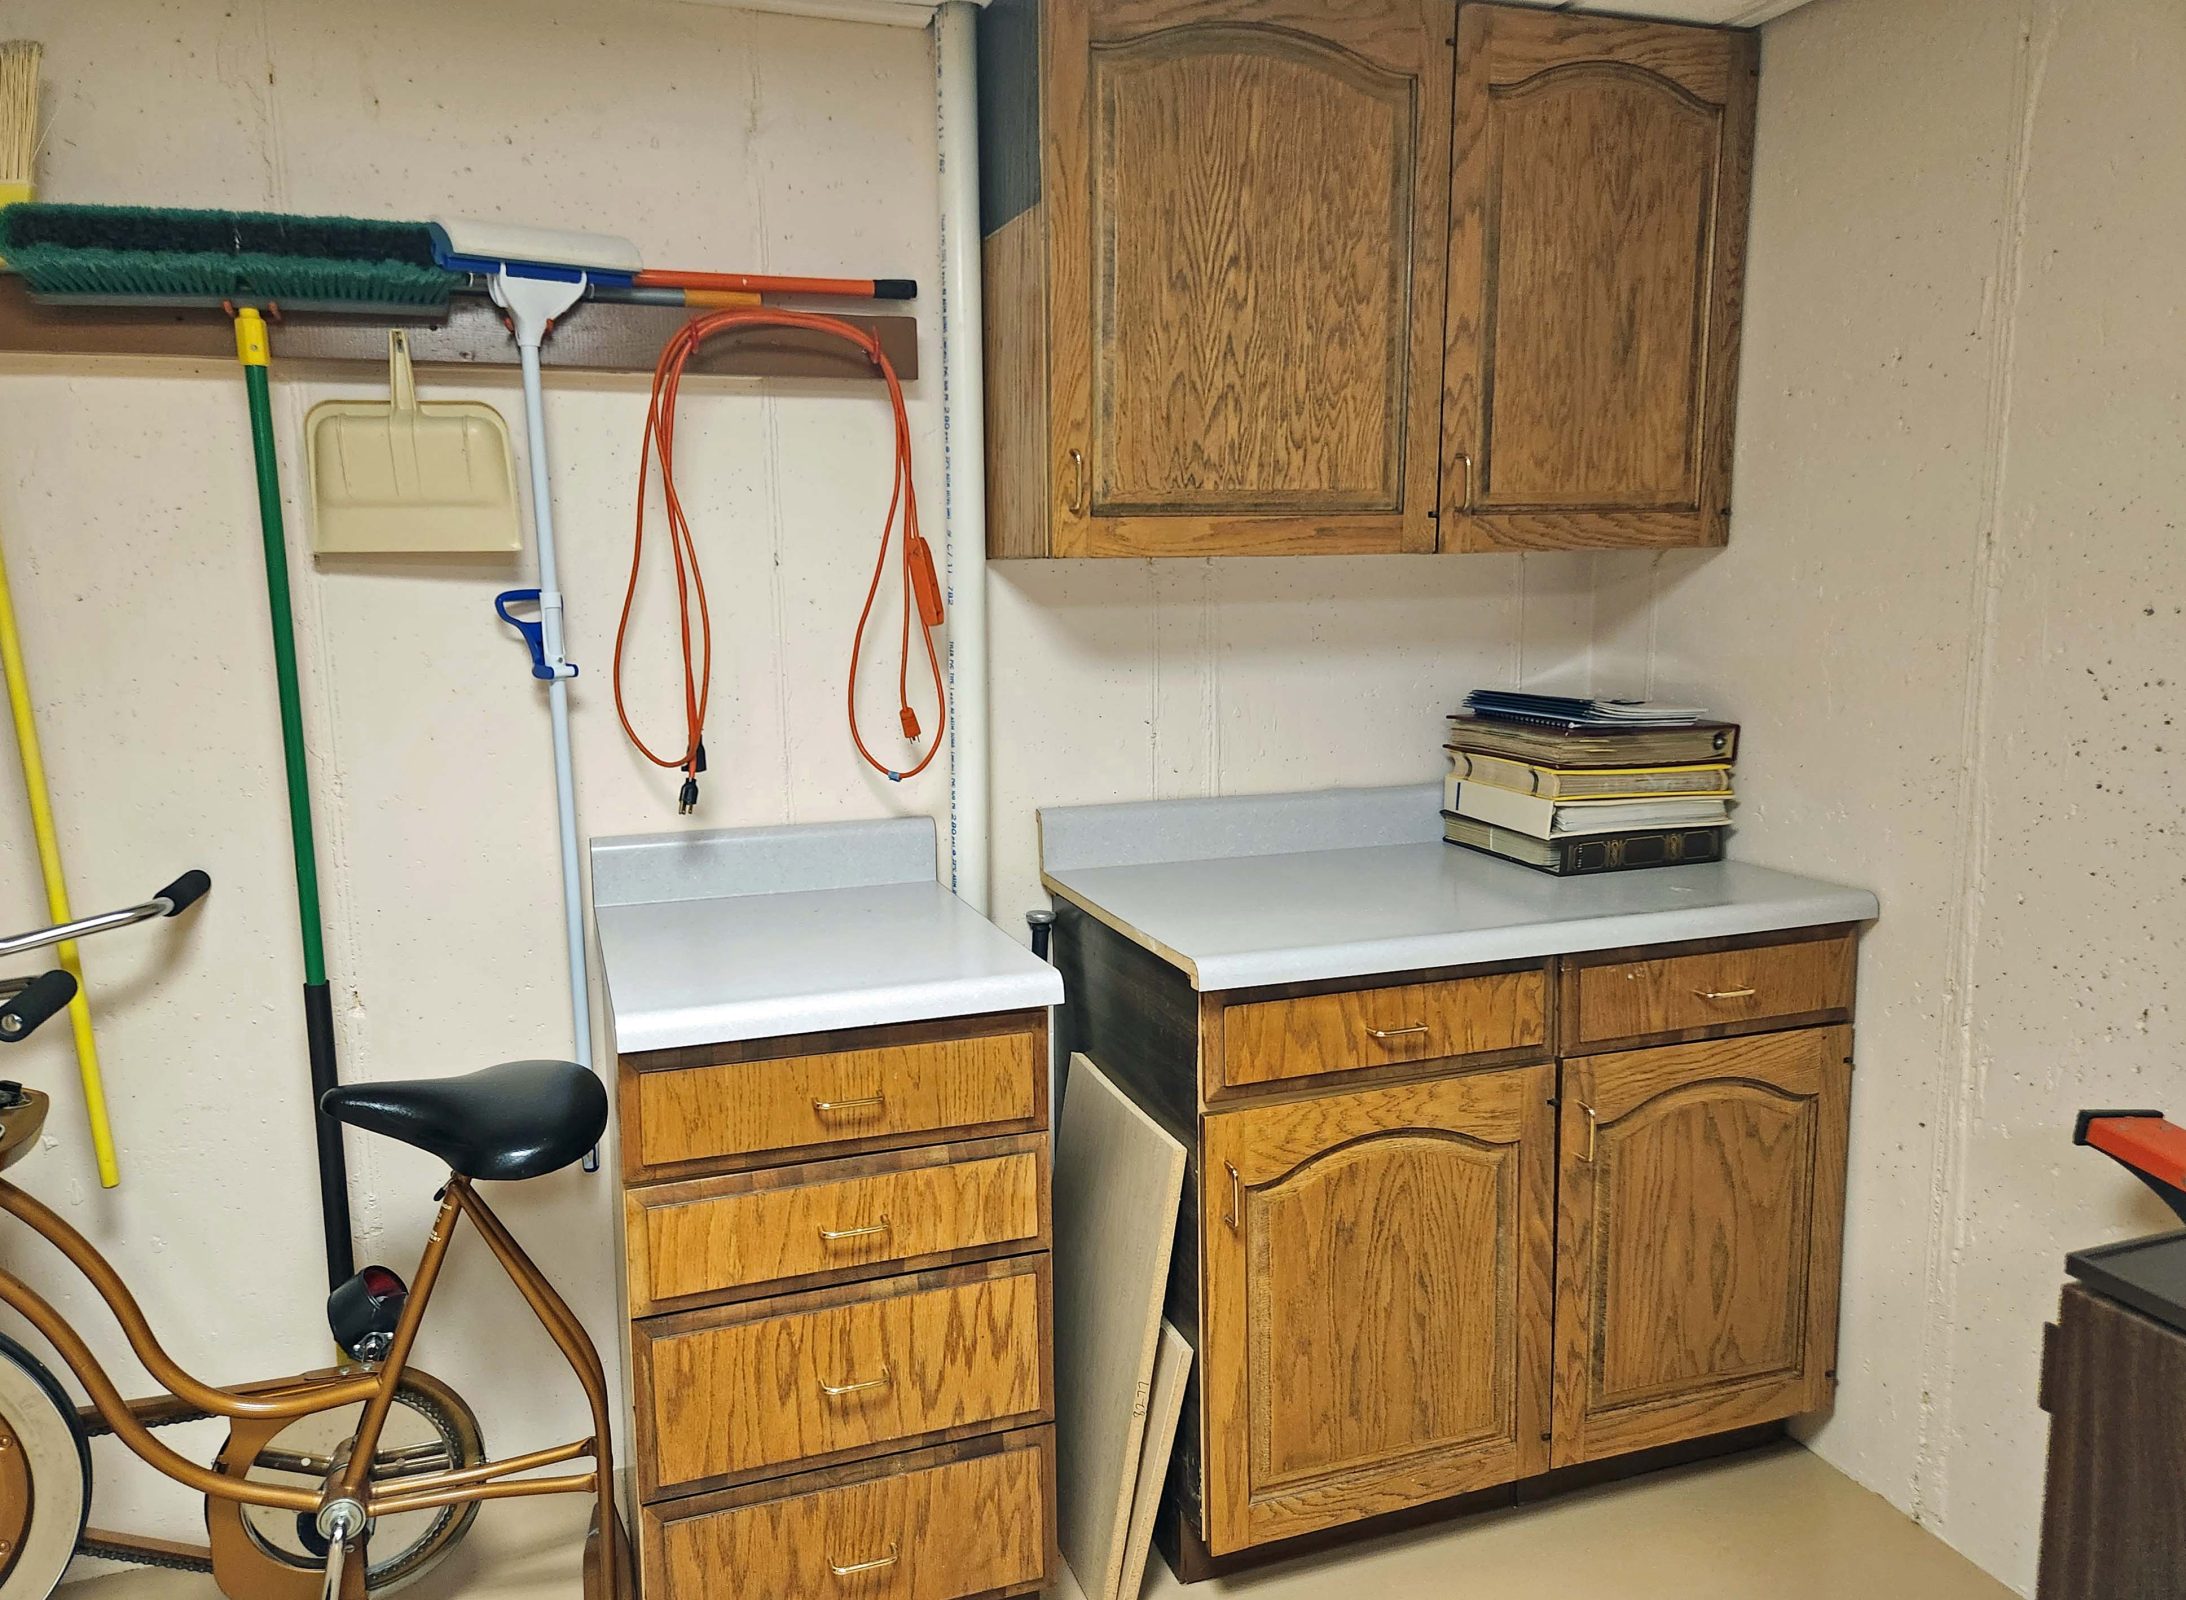
The cabinets pictured below were original to the house, and are now 44 years old. They show their age and the drawers no longer work very well. Naturally, the upper cabinet is installed (i.e., fastened to the wall). The lower three pieces, however, are just set in place against the wall with the countertop pieces simply resting on the cabinet tops, making those pieces easy to move. Not surprisingly, we never moved them. The PVC pipe drains the washing machine above, so the cabinets were placed separately on each side of it. The dark portions of the cabinet sides are the original color of the cabinets. I hated that dark color when we bought the house, so I stripped the cabinets and stained them lighter. The dark areas were against adjacent cabinets, so those portions didn’t get stripped. You can see the raw edge of the Formica countertop in the center. That countertop wasn’t originally on that cabinet; the workers at the time cut it to fit.
This was the workshop in the basement, so we didn’t need or expect beautiful cabinetry. We were satisfied for many years, but with new cabinets coming to the kitchen, it was the perfect time to replace these worn-out cabinets with something only half their age.
When our kitchen crew, Christian and Craig, removed the upper cabinets in the workshop, they noticed mold and some ceiling tile damage. That must have developed years ago when the washer hose broke and sent a full load of water to the basement floor–gallons of wash water and more gallons of rinse water. I left the washer running while I was away from home, so I wasn’t there to immediately turn off the water. Oops! What a mess that was to clean up! Since the cabinets were installed before the washer hose ruptured, we couldn’t dry the water or remove the ceiling tiles above them, and we couldn’t see the resulting damage. As a result, the water absorbed by the ceiling tiles in that area dried slowly enough to develop mold. It’s a good thing Christian and Craig could repair it now.
I expected the same kind of installation from Christian and Craig as we had last time: attach the upper cabinet to the wall, put the lower ones in place, and cut the countertop(s) to fit. Wow! Was I surprised!
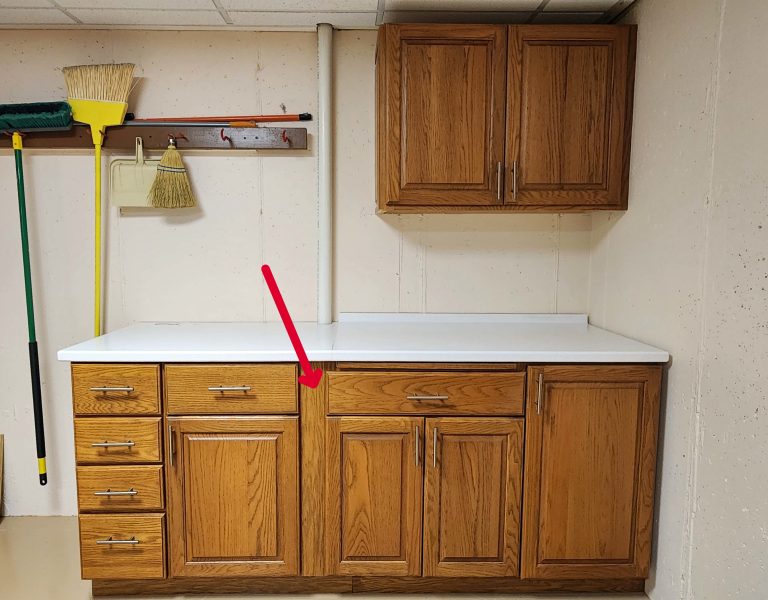
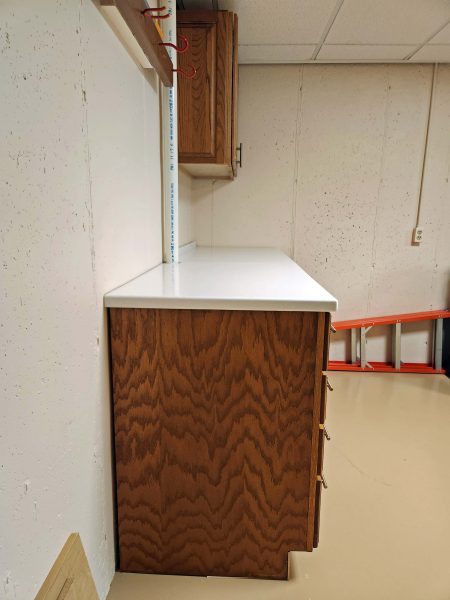
These guys didn’t put the cabinets in the basement; they installed them. They leveled everything and fastened every cabinet to its adjacent wall and to its adjacent cabinet. To hide the drainpipe space needed between the cabinets, the guys cut a spacer from a flat wood panel taken from a to-be-trashed cabinet from the kitchen, and inserted the spacer between the cabinet sections (arrow). None of the removed countertop pieces was long enough for the entire lower surface, so the right portion has a backsplash and the left portion doesn’t. To make a continuous countertop around the drainpipe, Christian cut a half-circle into the back edge of the countertop and joined the two pieces with a nearly invisible seam sealed with clear caulk. The back edge is also caulked along the wall. All of those details make the four lower cabinet pieces look like a single unit. Compare the photo below with the top photo above. Attention to detail makes a big difference!
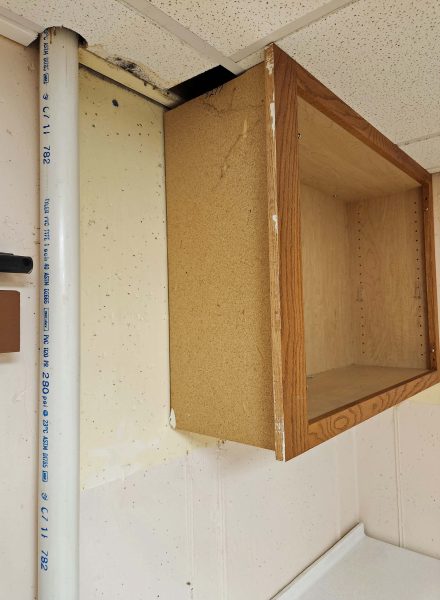
Speaking of details, . . . The over-the-top thing the guys did in the basement was to cover the exposed end of the upper cabinet with a trim piece (below). It’s not a perfect fit, but, like the spacer and the continuous countertop, I didn’t expect that level of detail in the workshop. Craig cut the piece from one of the old, matching cabinet doors and attached it to make the upper cabinet look nice from the side. Uh, that would be the side that faces the storage room. Doesn’t everyone want to see a beautifully finished workshop cabinet edge from the storage room?! Christian and Craig certainly do!
I expected these repurposed cabinets to look a lot like the previous ones, but in better condition. Instead, I feel like we ought to do something special in this room to justify such nice cabinetry. When I repeatedly complimented Christian and Craig on how beautiful the cabinets looked, they kind of shrugged as if to say, “How else would we have done it?” and Craig said, “Well, I like my workshop nice.” Obviously, it could have been done as simply as the previous crew did with the previous cabinets, but that’s not how these guys roll.
When we emptied all of our living area rooms for painting and carpeting in Fall 2022, we got rid of so many things, that we removed shelving and still have extra shelf space. The same was true when we refilled the “new” basement cabinets–we have extra space in our updated workshop. I wonder how long it will take us to fill all the empty shelf space we now have throughout the house. There’s a saying that the more countertop you have, the more things you set on it. I’ll bet the same is true for closets and shelves.