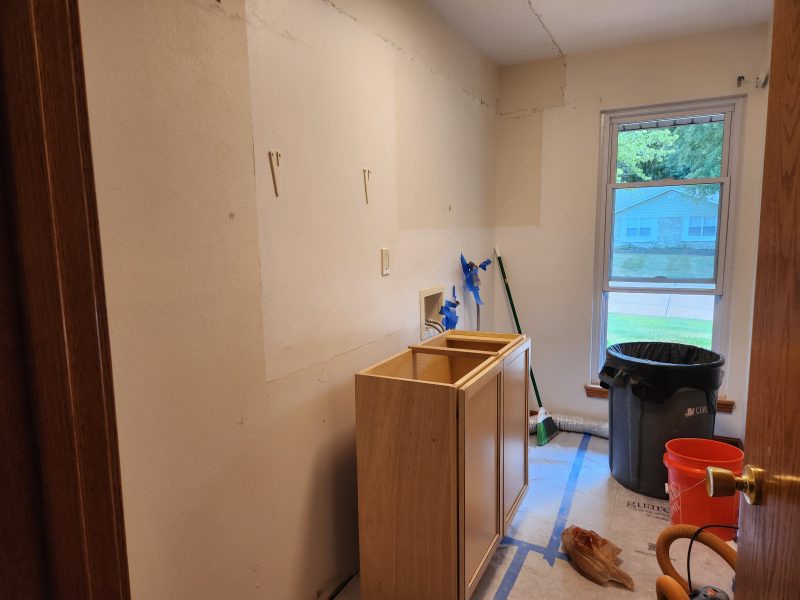
The laundry room was the last room to update in our house. We started in the usual way: empty the room and put everything in the dining room. When carpenters are working at our house, we always park our cars on the street so they can put their tool-filled trucks and their saws in the driveway. They store the supplies–and, this time, our washer and dryer–in the garage.
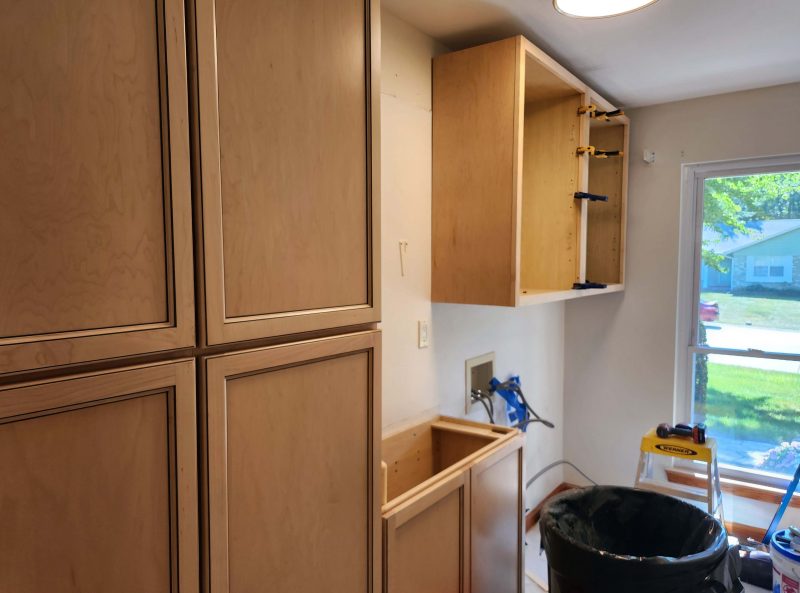
We wanted to extend our cabinets to the ceiling, so after removing the old cabinets, the first job was to remove the soffit. We were all surprised to see that the walls and the ceiling behind and above the soffit were already covered with drywall. That meant a discount on our cost. Yay! At the end of the first day, the carpenters, Christopher and Mike, brought one of the new cabinets indoors.
The next day, they brought in the remaining units and started installing them.
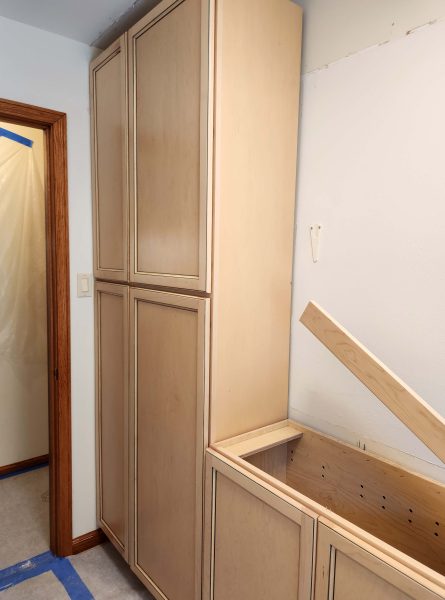
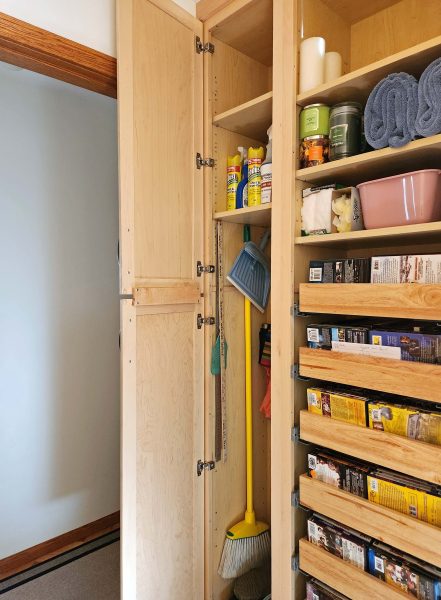
This is what our old utility cabinets looked like. One side provided storage for brooms, mops, etc.; the other side had eight drawers, most of which were filled with DVDs. We made it clear during the design process that we wanted the same design in the new cabinets, but . . .

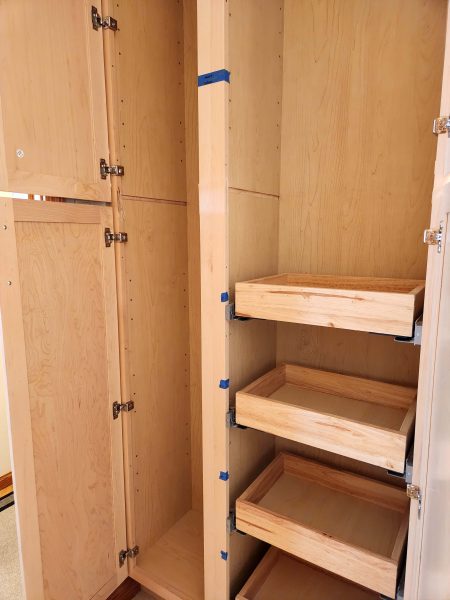
. . . this is what we discovered when we opened the new cabinet doors. We expected two tall cabinets topped by two short cabinets. Instead, we saw four identical cabinets stacked and fastened together with an installed shelf (the wide horizontal bar) between the two units. The installed shelf made it impossible to simply remove shelves to make mop and broom space or to add additional drawers. Even if we could have done that, the doors wouldn’t align with the taller spaces in the lower units.
The left cabinet was 6-8 inches too short for brooms. (The broom is standing on the floor, not inside the cabinet.) Then we were told that manufacturers are moving away from customized cabinets. Really? It wasn’t a problem ordering our 1999 kitchen and laundry cabinets to size, nor was it a problem to order our 2023 kitchen cabinets to size within a 3-inch range (30, 33, 36 inches, etc.). Could it be that this particular manufacturer did not build custom-sized cabinets?
What to do? Jimmy, the owner/contractor sells high-quality merchandise, and we’ve always been pleased with what we’ve had him install–until now. We told Christopher and Mike that these cabinets were not what we made clear we wanted and thought we had ordered. They were useless to us because the mops and brooms wouldn’t fit, and there weren’t enough drawers for our DVDs. Without that storage space, we didn’t need these cabinets.
Christopher and Mike didn’t want to start installing cabinets if they’d just have to take them out later, so they called Jimmy. He came to the house soon after that with his master carpenter (34 years of experience), Tommy, to see what could be done to customize the unsatisfactory cabinets. The two of them talked for about 20 minutes and decided they could make us happy. We didn’t understand all the technical jargon, but the idea seemed feasible, so we gave them the go-ahead and the other carpenters went to work.
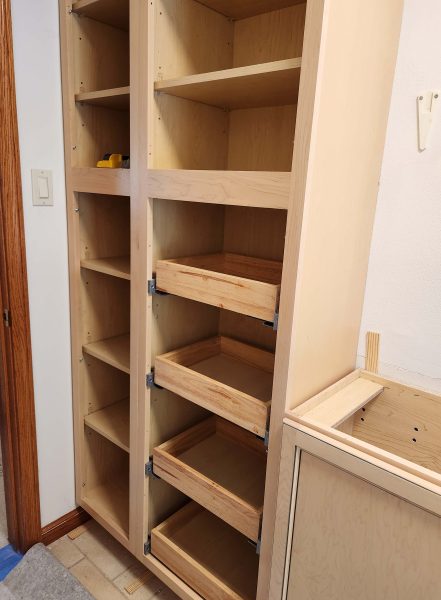
The next problem appeared when I started thinking about how I’d arrange our stuff in the cabinets with the extra room at the soffit-free ceiling. I noticed then that the cabinets only had one set of holes for shelf adjustments in the lower cabinet and only three sets of holes in the taller cabinets. Each set consisted of three holes drilled three inches apart (six-inch total distance). That meant I couldn’t store my laundry basket in the lower cabinet, where it’s always been, because the shelf adjustment holes were only in the centers of the side panels.
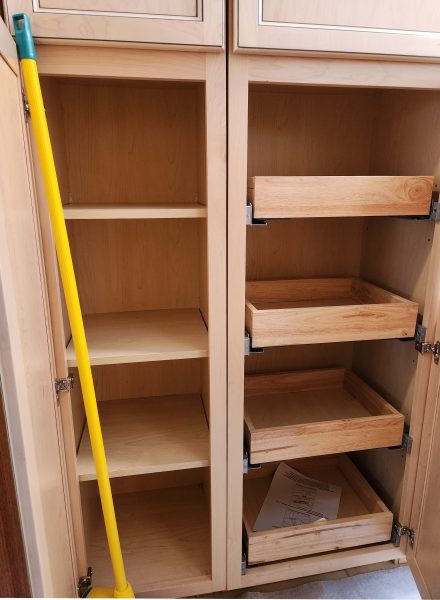
Ted and I don’t place our shelves evenly in our cabinets; we adjust the shelves according to what we store on each one. One or three sets of holes per cabinet was not good. Fortunately, the guys had a template they could use to drill holes any size and any distance apart, as desired, for shelf brackets. Go for it, guys! Now my laundry basket fits in the cabinet. Problem solved. If you zoom in, you can see the set of three holes inside at the right front of the cabinet and the strip of closer holes behind them. Note: the second plastic box from the left on the upper shelf is my “essential” toolbox.

The upper cabinets are installed. Note: This was the day of the ICE raid. Christopher, working on the upper cabinets, looked out the window and saw the law enforcement vehicles parking across the street.
Next step: install the trim at the tops of the cabinets.

Door handles and trim: installed.

And now, the challenge. First, wait for the three additional drawers that needed to be ordered. When the drawers arrived, Tommy, the master carpenter worked to customize these so-called “utility” cabinets. The process sounds simple, but doing the job well to make it as attractive as possible took time.
Tommy started by cutting out the horizontal shelving between the upper and lower cabinets. You can see the grooves in the side panels where the installed shelves used to be and the now-flush vertical scar in front of the left groove between the installed door hinges. That’s where he cut out the wide board that anchored the shelf in place and stabilized the joints between the upper and lower cabinets. Then he had to do some work to re-stabilize the cabinets. I wasn’t “snooper-vising” him, but I heard pounding.
Next, he had to uninstall the top three drawers and remove the drawer slides. The bottom drawer was already as low as it could be to operate smoothly. Ted and I had previously figured out how far apart the drawers had to be placed so that our DVDs would fit in them without wasting space between drawers (see the blue tapes). To accommodate our measurements, Tommy re-installed those three drawer slides lower and then the three additional slides above them.
When that was finished, he used matching wood–from a shelf that was removed from the lower left cabinet that we knew we’d never use–to fasten the upper and lower doors together and to cover the empty space between them. The down side of this solution is that the upper and lower doors now open and close as a single unit.

Result: We have utility cabinets with room for brooms and mops, and drawers for DVD storage. The door arrangement is unusual, but it works.
Jimmy is a good guy. We’ve never had problems with his products or service before, so we had a private talk with him about how disappointed we felt. He apologized and told us it’s hard to find skilled carpenters, so he made the decision to hire younger carpenters and pair them with his more experienced carpenters, hoping the younger ones will continue working for him. He didn’t charge us for any of the extra customizing labor.
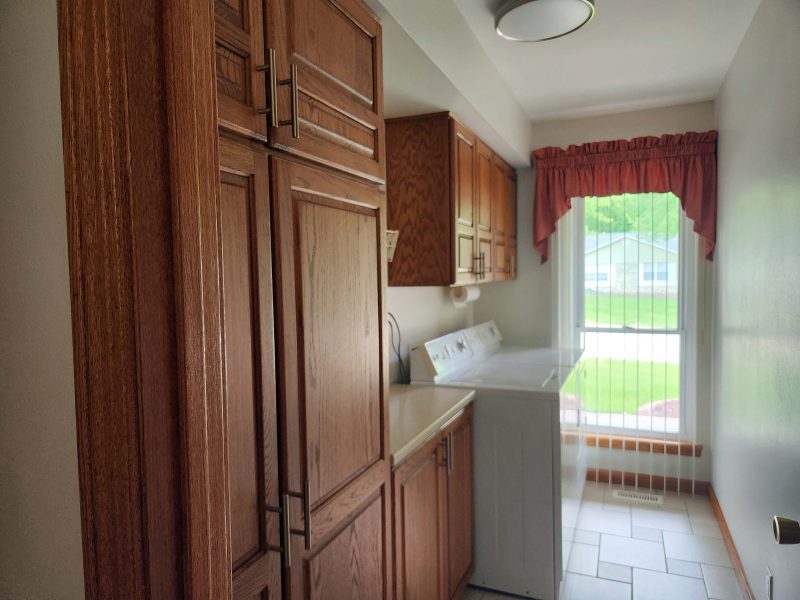
Here are photos of the c. 2000 laundry room and the 2025 laundry room. We definitely like the lighter, brighter new look.
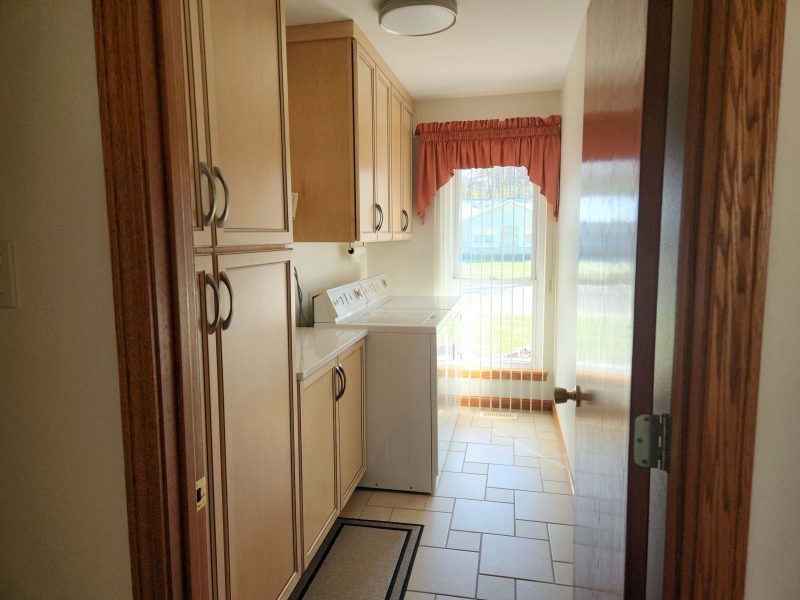
The cabinets are new, but we still have our 30-yer-old Maytag washer and dryer. They just won’t quit working!